Illustrator 绘制矢量性感美女
发布时间:2009-05-15 01:17:12 作者:佚名  我要评论
我要评论
This time there is nothing much to explain. Well, it’s actually hard to explain how you draw bezier curves in Illustrator. I had the urge to do some sketches and I believe I owe it to myself, it’s been too long since I had this kind of fu
Some of you remember part 1 and part 2 and have been eager to view part 3. It took me a while to find some free time to work on part 3. Today I have been able to finish my drawing. This part covers the final touch of the illustration. We’ll be adding highlights and shadows and use the Gradient Tool a lot…

The final touch of an illustration improves the illustration a lot. It'll make the illustration more appealing if you spend some attention to details without overdoing it. An illustration style like this is clean but a little depth, light and shadow will make the difference. A bit of face lifting The eyes
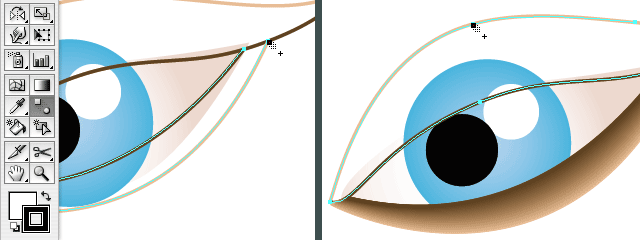
The part of the illustration that needs some extra attention and improving is the face, especially the eyes. First we'll add some smooth shadow effect which gives the impression as if she wears a bit of make up. This effect also adds a bit of depth to the face. First of all I removed the filling and used a stroke. I cut both into 2 parts and gave the outer lines the same color as the face. I made sure there is the same amount of points on both lines, otherwise this could result in some weird effect when using the Blend Tool. Choose the Blend Tool, click a point on the light line then click the equivalent point on the dark line. The neck and mouth
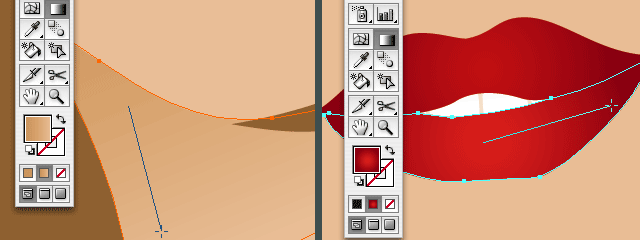
Adding some shadow on the neck will give the illustration extra depth. Make sure you always add shadows in a subtle way, too dark shadows will spoil it and make the illustration too hard. I use a gradient that has the same color of the skin and a bit of darker skin color. First I drew a shape that fits exactly on the neck. I copied the shape of the face and place it in front (command/control + f), then I used the Scissors Tool to cut off the part I don't need and drew the other parts of the path using the Pen Tool. For the lips a subtle red radial gradient is been used (instead of flat red). The hair
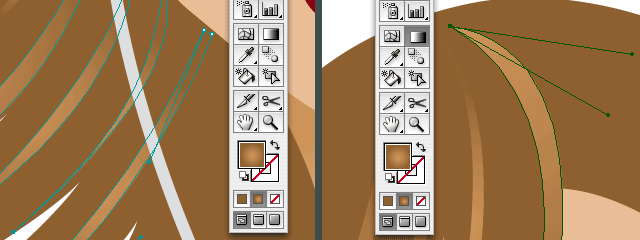
For the hair I added extra paths to give it more color. The color variation in the hair adds extra dimension, detail and it gives the girl also a more 'modern' look. Adding the right eye, adding shadow on her forehead
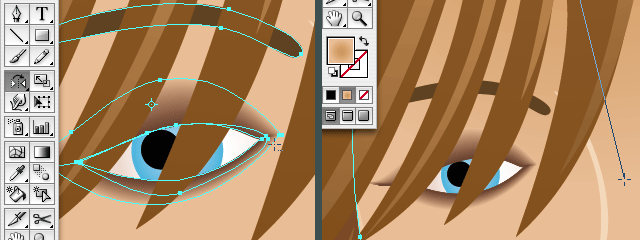
The left eye wasn't drawn yet in part 2, the hair covers her eye, so you could decide to leave it out. However it feels unfinished and a bit odd to me not to draw the left eye. It's also better to finish the right eye first since we will copy it to create the left one. You simply mirror (and if needed, rotate) the eye, except the eyeball of course. To finish her face I've added some shadow and highlights: an extra shape to highlight her nose, same for her left cheek and chin and a radial gradient on the shape of her face to add a bit of shadow on her forehead. Adding extra shadows and highlights
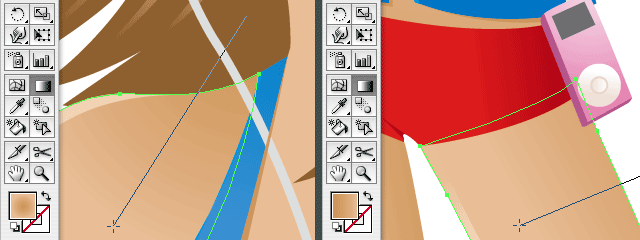
I've added subtle shadows and highlights on her skin and clothes by using subtle gradients or adding a highlight shape, a small line that follows the border. Adding a background
Last but not least I've added a background. Since she's wears a swimsuit (or kind of), I thought of adding the beach in the background. So I added sky, water, sand (with a tiny bit of structure), a beach chair and some boats to finish it off.
 The before and after effect
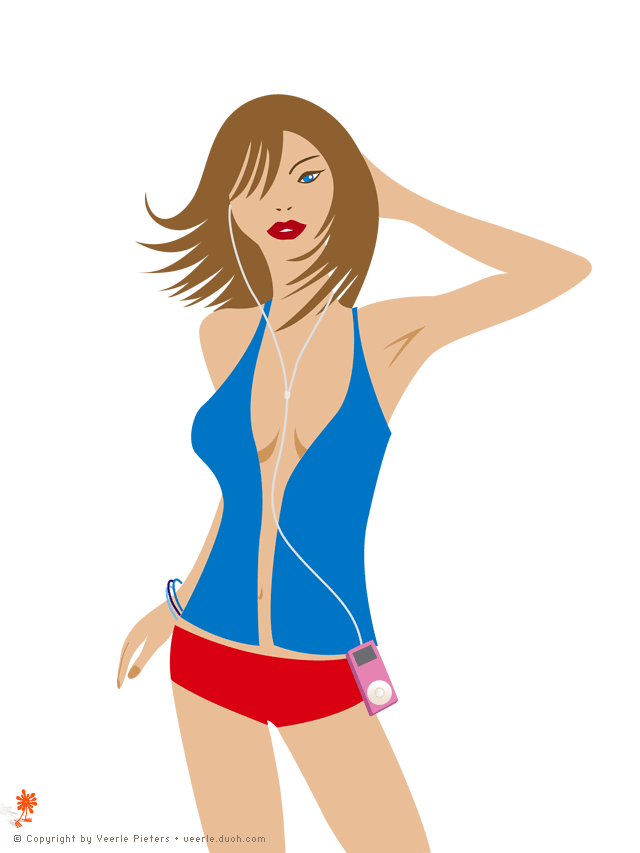
 In case you need me to refresh your memory, this is how the illustration looks without any finishing touch. Not bad but far from complete, just basic. Never forget the extra touch. Go the extra mile, but just remember to keep it well balanced.
相关文章
ai怎么混合两种颜色? illustrator混合两个色块的颜色的方法
ai填充不同颜色的图形重叠以后,想要将两种颜色混合,该怎么混合颜色呢?下面我们就来看看详细的教程2024-07-18 ai网格线间距默认的不是很喜欢,想要自己调整一下,该怎么调整呢?今天我们就来看看参考线调整技巧2024-05-28
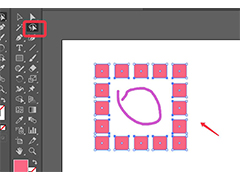
ai路径平均效果怎么用? illustrator使用平均路径的教程
Adobe Illustrator中有一个路径平均功能,如何使用呢?下面小编为大家演示路径平均功能的一种使用方法2024-05-21
ai保存pdf格式出现多余内容怎么解决? 去掉pdf文件多余内容的技巧
ai保存pdf格式出现多余内容怎么解决?ai中的文档保存为pdf文件的时候,发现有多余内容,该怎么操作呢?下面我们就来看看去掉pdf文件多余内容的技巧2023-12-19 ai描边在哪里?ai中想要设置描边,该怎么操作呢?下面我们就来看看ai设置描边的多种方法2023-12-19
 ai原位复制怎么用?复制图形的时候,想要原位复制粘贴,该怎么操作呢?下面我们就来看看ai原位复制快捷键介绍2023-12-19
ai怎么让文字随着路径变形? illustrator区域文字不跟着变换方向问题的
ai怎么让文字随着路径变形?选中文字后,发现文字不跟随变换区域旋转该怎么办呢?下面我们就来看看illustrator区域文字不跟着变换问题的解决办法2023-11-30
ai渐变色怎么调方向? illustrator将渐变颜色反向的技巧
ai渐变色怎么调方向?ai中给图形填渐变色,想要进行反向,该怎么操作呢?下面我们就来看看illustrator将渐变颜色反向的技巧2023-11-30
Ai彩色logo怎么做反白反黑效果? ai彩色logo转化为黑白稿的技巧
Ai彩色logo怎么做反白反黑效果?设计的彩色logo想要做黑白稿,就是反黑反白效果,下面我们就来看看ai彩色logo转化为黑白稿的技巧2023-11-12 ai怎么设计迷宫字体效果?我们需要使用分割网格结合形状生成器工具,制作迷宫字体,下面我们就来看看详细的设计过程2023-11-02


最新评论