Android使用Matrix旋转图片模拟碟片加载过程
今天实现了一个模拟碟片加载过程的小demo,在此展示一下。由于在公司,不好截取动态图片,因此就在这截取两张静态图片看看效果先。
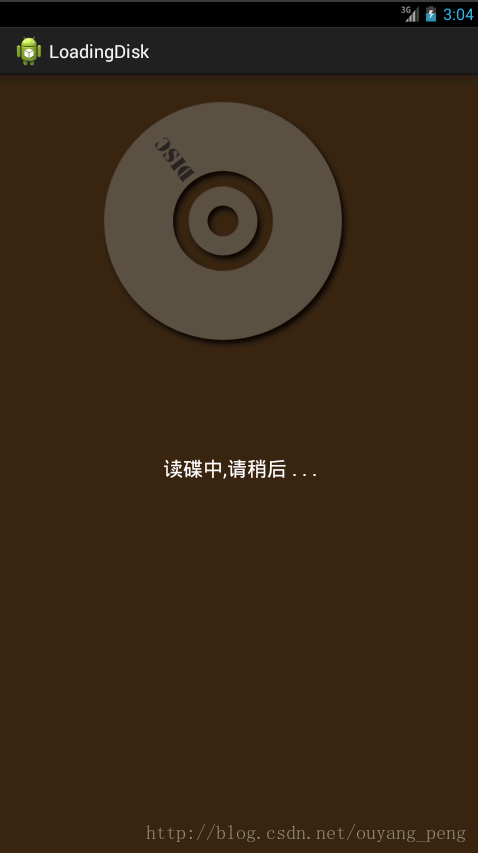
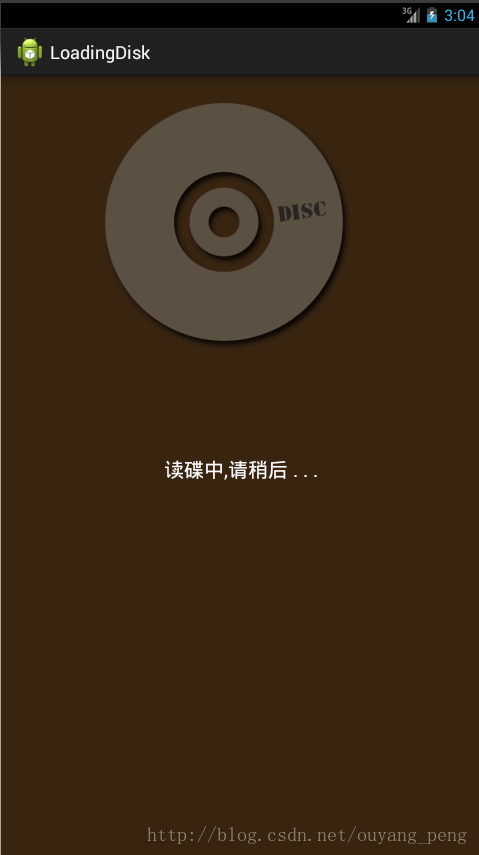
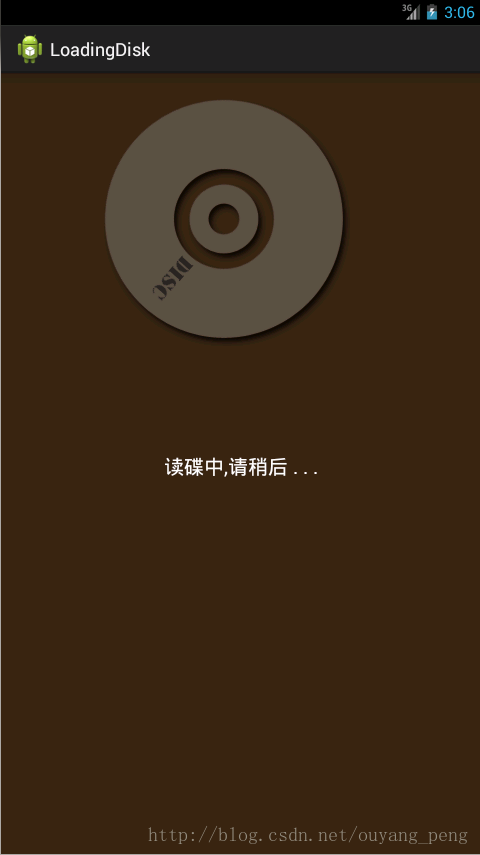
下面简单的将代码列出来。
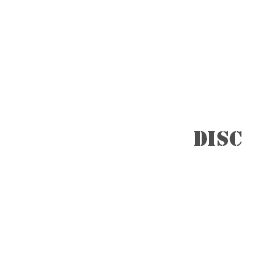
setp1、准备两张用于旋转的图片,如下:loading_disc.png是第一张图片,loading_light.png是第二张图片。

step2、自定义一个View,用来控制这两个图片的旋转。com.oyp.loadingdisk.LoadingDiscView.java
package com.oyp.loadingdisk;

import java.io.InputStream;

import android.content.Context;
import android.content.res.Resources;
import android.graphics.Bitmap;
import android.graphics.BitmapFactory;
import android.graphics.Canvas;
import android.graphics.Matrix;
import android.graphics.Paint;
import android.graphics.PaintFlagsDrawFilter;
import android.view.View;
/**
 * 自定义的View,用来显示加载的图片
 * @author ouyangpeng
 * @link http://blog.csdn.net/ouyang_peng
 *
 * <p>在画图的时候,图片如果旋转或缩放之后,总是会出现那些华丽的锯齿。<br>
 * 方法一:给Paint加上抗锯齿标志。然后将Paint对象作为参数传给canvas的绘制方法。<br>
 * 如:mypaint.setAntiAlias(true);<p>
 * 方法二:给Canvas加上抗锯齿标志。有些地方不能用paint的,就直接给canvas加抗锯齿,更方便。<br>
 * 如:
 * mSetfil = new PaintFlagsDrawFilter(0, Paint.FILTER_BITMAP_FLAG);<br>
 * canvas.setDrawFilter(mSetfil);
 */
public class LoadingDiscView extends View {
  private RefreshHandle refreshHandle;
  private Context context;
  /** 用于旋转的bitmap*/
  private Bitmap m_bmp_disc = null;
  private Matrix m_matrix_disc = new Matrix();
  /** 用于展现高亮背景的bitmap*/
  private Bitmap m_bmp_light = null;
  private Matrix m_matrix_light = new Matrix();
  /**Paint滤波器*/
  private PaintFlagsDrawFilter mSetfil = null;
  /**声明一个画笔*/
  private Paint mypaint = null;
  /**图像缩放比例*/
  private float m_scale =1.0f;
  /**图像旋转的速度*/
  private float m_disc_rot_speed = 0;
  /**图像旋转的状态*/
  private int m_state_play = 1;
  /**图像旋转的最大速度*/
  private float m_disc_max = 20f;

  public void setRefreshHandle(RefreshHandle refreshHandle) {
   this.refreshHandle = refreshHandle;
  }

  public LoadingDiscView(Context context) {
   super(context);
   this.context = context;
   mSetfil = new PaintFlagsDrawFilter(0, Paint.FILTER_BITMAP_FLAG);//设置画布绘图无锯齿
   initBitmap();
  }

  public boolean initBitmap() {
   mypaint = new Paint();
   //给Paint加上抗锯齿标志
   mypaint.setAntiAlias(true);//画笔的抗锯齿(用于线条等)

   Resources res = context.getResources();
   InputStream is = res.openRawResource(R.drawable.loading_disc);
   m_bmp_disc = BitmapFactory.decodeStream(is);
   matrixPostTranslate(m_matrix_disc,m_bmp_disc);

   is = res.openRawResource(R.drawable.loading_light);
   m_bmp_light = BitmapFactory.decodeStream(is);
   matrixPostTranslate(m_matrix_light,m_bmp_light);
   return true;
  }
  /**
   * 旋转图像
   * @param matrix 控制旋转的矩阵
   * @param bitmap 要旋转的图像
   */
  private void matrixPostTranslate(Matrix matrix,Bitmap bitmap) {
   int tmp_width = bitmap.getWidth();
   int tmp_height = bitmap.getHeight();
   matrix.postTranslate(-tmp_width / 2, -tmp_height / 2); //设置平移位置
   matrix.postScale(m_scale, m_scale); //设置缩放比例
   matrix.postTranslate(123 * m_scale, 146 * m_scale);
  }

  protected void onDraw(Canvas canvas) {
   super.onDraw(canvas);
   //给Canvas加上抗锯齿标志
   canvas.setDrawFilter(mSetfil);//图片线条(通用)的抗锯齿
   canvas.drawBitmap(m_bmp_disc, m_matrix_disc, mypaint);
   canvas.drawBitmap(m_bmp_light, m_matrix_light, mypaint);
  }

  public void update() {
   if (m_disc_rot_speed > 0.01 || m_state_play == 1){
    if (m_state_play == 1 && m_disc_rot_speed<m_disc_max){
     m_disc_rot_speed += (m_disc_max+0.5f-m_disc_rot_speed)/30;
    }
    else if (m_disc_rot_speed>0.1){
     m_disc_rot_speed -= (m_disc_rot_speed)/40;
    }
    m_matrix_disc .postRotate(m_disc_rot_speed, 123*m_scale, 146*m_scale);
    invalidate();
   }
  }

  public void onPause(){
   refreshHandle.stop();
  }
  public void onResume(){
   refreshHandle.run();
  }

 }
step3、写一个Handler用来控制图片的旋转 com.oyp.loadingdisk.RefreshHandle.java
package com.oyp.loadingdisk;

import android.os.Handler;
import android.os.Message;
/**
 * 用来发送消息和处理消息的
 * @author ouyangpeng
 * @link http://blog.csdn.net/ouyang_peng
 */
public class RefreshHandle extends Handler {
 LoadingDiscView loadingDiscView;

 public RefreshHandle(LoadingDiscView loadingDiscView) {
  this.loadingDiscView = loadingDiscView;
  loadingDiscView.setRefreshHandle(this);
 }

 public void run() {
  loadingDiscView.update();
  removeCallbacksAndMessages(null);
  sendEmptyMessageDelayed(0, 65);
 }

 public void stop() {
  removeCallbacksAndMessages(null);
 }

 @Override
 public void handleMessage(Message msg) {
  switch (msg.what) {
  case 0:
   run();
   break;
  }
 }
}
step4、应用布局文件 res/layout/loading.xml
<RelativeLayout xmlns:android="http://schemas.android.com/apk/res/android"
 xmlns:tools="http://schemas.android.com/tools"
 android:layout_width="match_parent"
 android:layout_height="match_parent"
 android:background="#382517"
 tools:context=".MainActivity"
 >

 <RelativeLayout
  android:id="@+id/loading_disc"
  android:layout_width="match_parent"
  android:layout_height="wrap_content"
  android:layout_below="@id/loading_disc"
  android:paddingLeft="100dp"
  >
 </RelativeLayout>

 <RelativeLayout
  android:layout_width="fill_parent"
  android:layout_height="wrap_content"
  android:layout_marginTop="380dip" >

  <TextView
   android:id="@+id/loading_text"
   android:layout_width="wrap_content"
   android:layout_height="wrap_content"
   android:layout_centerHorizontal="true"
   android:singleLine="true"
   android:textColor="#FFFFFF"
   android:text="读碟中,请稍后 . . ."
   android:textSize="20sp" />
 </RelativeLayout>
</RelativeLayout>
step5、写一个Activity用来装载布局文件,并展示 com.oyp.loadingdisk.LoadingActivity.java
package com.oyp.loadingdisk;

import android.app.Activity;
import android.os.Bundle;
import android.widget.RelativeLayout;
/**
 * @author ouyangpeng
 * @link http://blog.csdn.net/ouyang_peng
 */
public class LoadingActivity extends Activity {
 private RelativeLayout motionView;
 private LoadingDiscView disc_motion;
 private RefreshHandle refreshHandle;

 @Override
 protected void onCreate(Bundle savedInstanceState) {
  super.onCreate(savedInstanceState);
  setContentView(R.layout.loading);
  disc_motion = new LoadingDiscView(this);
  refreshHandle = new RefreshHandle(disc_motion);
  motionView = (RelativeLayout) findViewById(R.id.loading_disc);
  motionView.addView(disc_motion);
  refreshHandle.sendEmptyMessage(0);
 }
 @Override
 protected void onResume() {
  super.onResume();
  disc_motion.onResume();
 }
}
当然,这里只是模拟碟片加载过程,实际上可以对代码进行处理,使碟片加载过程完毕后,启动相应的界面来展示碟片中的视频、图像、音乐资源等,但是这里不便写出来。
关于源代码,您可以通过 https://github.com/ouyangpeng/LoadingDisk 来免费察看和下载代码。

以上就是本文的全部内容,希望对大家的学习有所帮助,也希望大家多多支持脚本之家。


最新评论