Android实现背景可滑动登录界面 (不压缩背景弹出键盘)
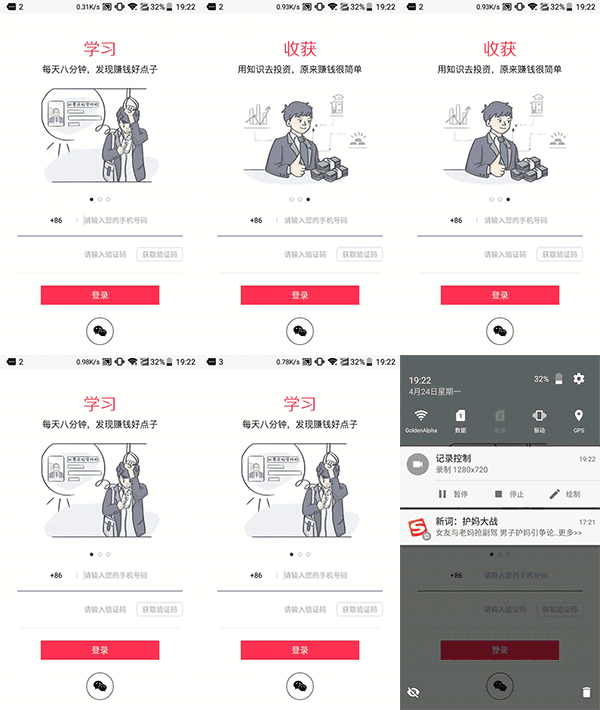
废话不多说,先看下实现后的效果:

实现思路
看到上边 gif 图的效果,主要列举一下实现过程过程中遇到的难点。
如何使键盘弹出时候不遮挡底部登录布局;
当键盘弹出的时候如何不压缩背景图片或者背景延伸至「屏幕以外」;
从 「 windowSoftInputMode 」 说起
相信大家都清楚,Google 官方提供给开发者控制软键盘显示隐藏的方法不多,「windowSoftInputMode」算是我们可控制的软键盘弹出模式的方法之一。关于其属性的说明Google 官方和网上的教程说了很多,他的属性值由两部分组成,形如「 stateHidden|adjustResize 」的格式,其前半部分(事实上也可写在后边)表示所设置的 Activity 进入时软键盘的状态,后半部分表示软键盘弹出的时候页面是如何调整的。
下边分别列出几个可选属性及其含义:
通过上述列表我们可以了解到 windowSoftInputMode 的几个属性值的含义。我们可以根据具体的需求来选择合适属性。However ! 产品需求永远比属性来的奇葩。比如说我们想要实现的的这个效果:
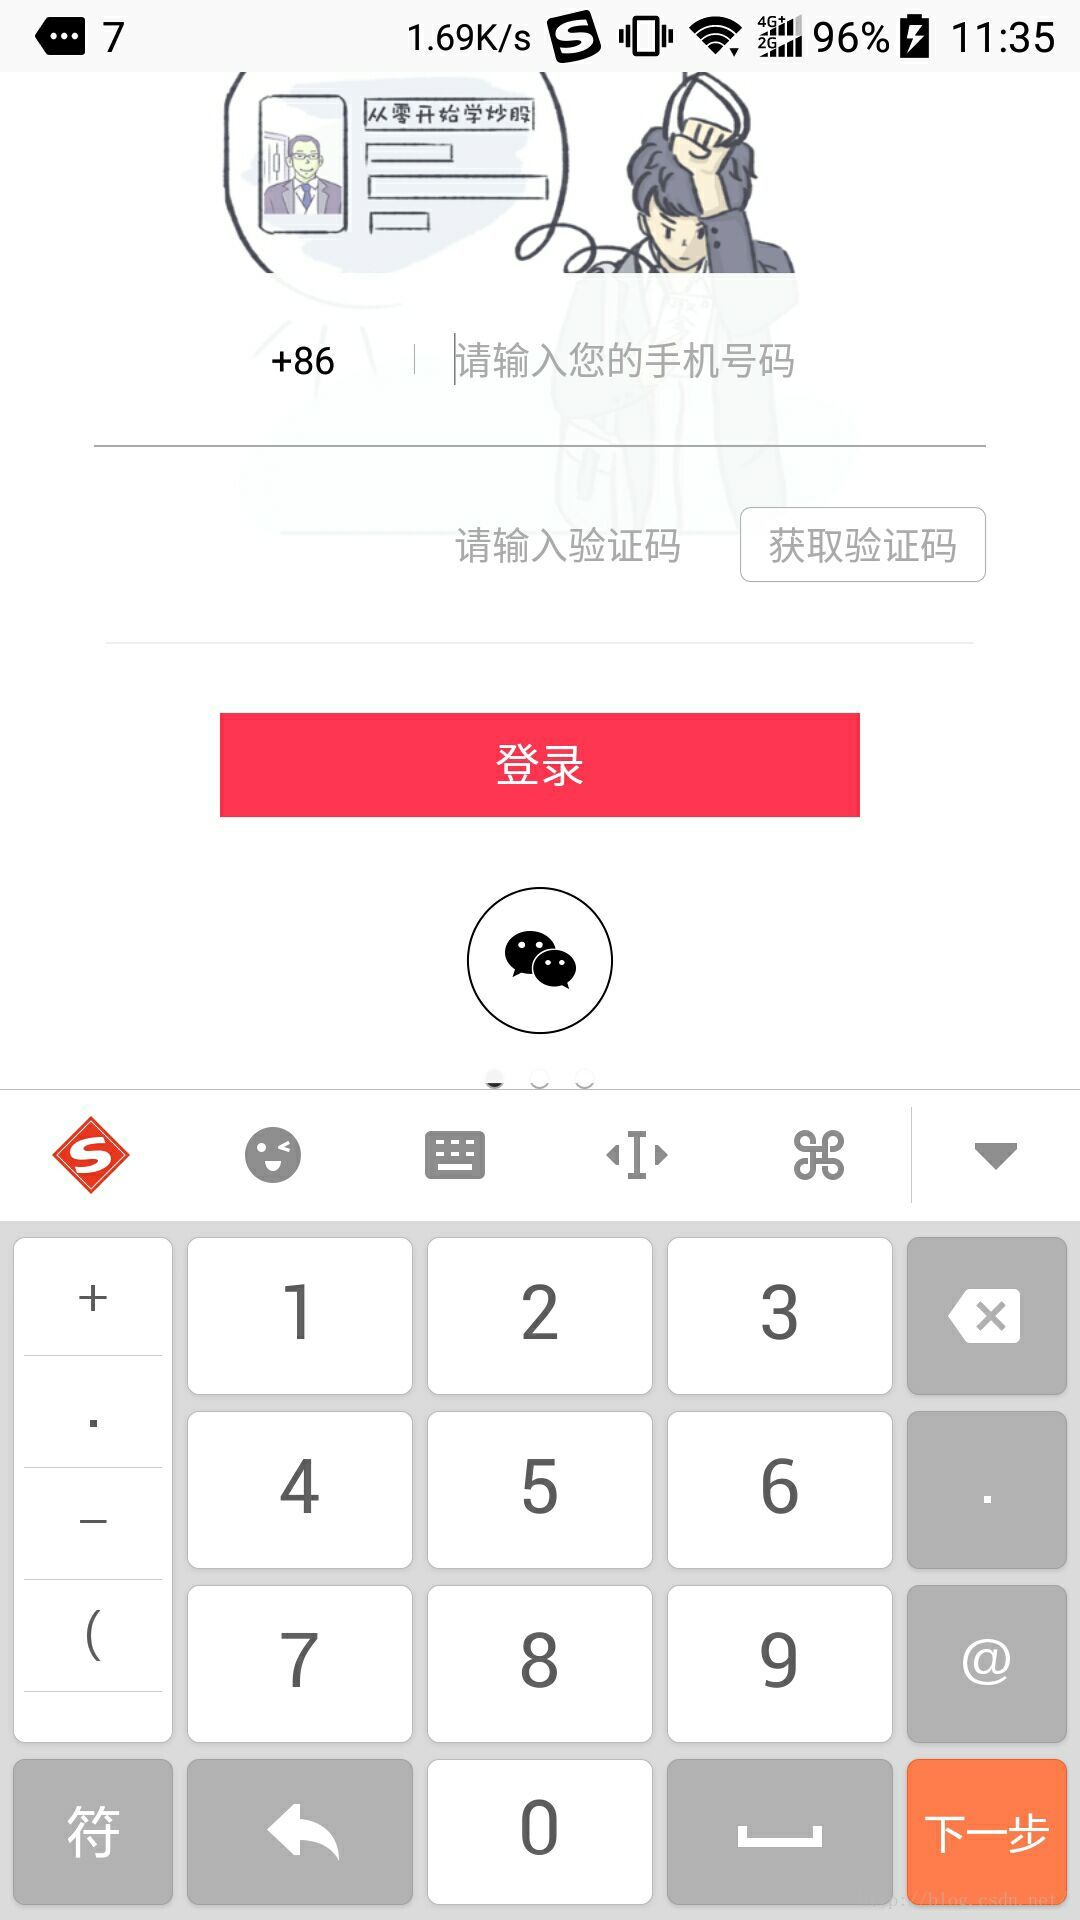
软键盘弹出不遮挡全部的输入布局,并不是单纯的留出一个输入框控件
软键盘被弹起的时候背景不能被压缩,或者向上滑动
首先看第一个需求:我们可以使用 adjustResize 属性来达到效果,可以看到这样图片已经被自动向上移动了,ok,如果效果您还算满意,那我就没什么好说的了,但是我们老板和产品以及 UI 说这样不好,背景不能压缩也就是我们说的第二个需求。当时我心中就有一种 mmp 想对他们说。但是呢作为一个敢于挑战的 Android 程序员来说这个小小的需求并不算什么。

对于第二个需求,首先我们要了解为什么图片会被上滑,是因为我们配置了 adjustResize 属性,系统自动根据键盘所需要的空间向上移动整个页面的布局,并调整页面布局的大小以满足不被软键盘隐藏的效果。举个栗子:
手机屏幕的高为1920px,那么整个Activity的布局高度也为1920px。当设置该属性后点击界面中的EditText,此时弹出软键盘其高度为800px。为了完整地显示此软键盘,系统会调整Activity布局的高度为1920px-800px=1120px。
注意这里说了会调整布局的大小,根据以往的经验,系统自动调节的布局都不是我们想要的结果,比如各种可滑动 View 嵌套的问题。那么这个需求能否依据这个思路来结局呢?
当 windowSoftInputMode 被设置为 adjustResize 时候,当布局调整的时候被调整的布局均会重绘制,并走了onMeasure,onSizeChanged,onLayout 。
当 windowSoftInputMode 被设置为 adjustPan 时候,当布局调整的时候被调整的布局均会重绘制,并走了onMeasure, onLayout 。
这里只需要注意 两者都走了 onMeasure 方法,至于 adjustPan 没走 onSizeChanged ,我们会在之后关于软键盘弹出的监控的文章中详细说明。
那么我们就利用其走了 onMeasure 方法,来「阻止」系统自动调整的布局大小。由于我们背景用了 ViewPager,所以我们需要重写 ViewPager 的 OnMeasure 方法。
public class AutoViewPager extends ViewPager {
 private int mScreenHeight;
 public AutoViewPager(Context context) {
  this(context,null);
 }
 public AutoViewPager(Context context, AttributeSet attrs) {
  super(context, attrs);
  mScreenHeight = DensityUtil.getHeight(getContext());
 }
 @Override
 protected void onMeasure(int widthMeasureSpec, int heightMeasureSpec) {
  heightMeasureSpec = MeasureSpec.makeMeasureSpec(mScreenHeight, MeasureSpec.EXACTLY);
  super.onMeasure(widthMeasureSpec, heightMeasureSpec);
 }
}
DensityUtil.getHeight 方法是获取屏幕高度的方法。
public static int getHeight(Context context) {
  DisplayMetrics dm = new DisplayMetrics();
  WindowManager mWm = (WindowManager) context.getSystemService(Context.WINDOW_SERVICE);
  mWm.getDefaultDisplay().getMetrics(dm);
  int screenHeight = dm.heightPixels;
  return screenHeight;
}
经过这样的设置我们就讲背景 ViewPager 的高度写死为屏幕的高度。这样当键盘弹出的时候ViewPager 的大小就会变了。 经过测试我们这个方法就就可以组织背景向上移动了。其实我们并没有组织系统对控件的重绘,而是改变了最终重绘的 ViewPager 的高度大小,给用户的感觉就是我的背景没有改变。
最后附送实现的布局代码:
<?xml version="1.0" encoding="utf-8"?>
<RelativeLayout
 xmlns:android="http://schemas.android.com/apk/res/android"
 xmlns:app="http://schemas.android.com/apk/res-auto"
 android:id="@+id/rl_root"
 android:layout_width="match_parent"
 android:layout_height="match_parent"
 android:orientation="vertical">
 <RelativeLayout
  android:layout_width="match_parent"
  android:layout_height="wrap_content">
  <com.goldenalpha.stock.master.views.AutoViewPager
   android:id="@+id/login_bg_banner"
   android:layout_width="match_parent"
   android:layout_height="match_parent"/>
  <LinearLayout
   android:id="@+id/ll_dot"
   android:layout_width="wrap_content"
   android:layout_height="wrap_content"
   android:layout_centerHorizontal="true"
   android:layout_gravity="center_horizontal">
   <ImageView
    android:id="@+id/iv_dot_1"
    android:layout_width="7dp"
    android:layout_height="7dp"
    android:layout_marginRight="8dp"
    android:background="@drawable/banner_dot_shape_select"/>
   <ImageView
    android:id="@+id/iv_dot_2"
    android:layout_width="7dp"
    android:layout_height="7dp"
    android:layout_marginRight="8dp"
    android:background="@drawable/bander_dot_shape_noselect"/>
   <ImageView
    android:id="@+id/iv_dot_3"
    android:layout_width="7dp"
    android:layout_height="7dp"
    android:background="@drawable/bander_dot_shape_noselect"/>
  </LinearLayout>
 </RelativeLayout>
 <RelativeLayout
  android:id="@+id/activity_login"
  android:layout_width="match_parent"
  android:layout_height="270dp"
  android:layout_alignParentBottom="true"
  android:paddingBottom="@dimen/login_margin_bottom"
  android:layout_marginLeft="10dp"
  android:layout_marginRight="10dp"
  android:background="@drawable/login_shape"
  android:orientation="vertical">
  <LinearLayout
   android:layout_width="match_parent"
   android:layout_height="match_parent"
   android:orientation="vertical">
   <RelativeLayout
    android:layout_width="match_parent"
    android:layout_height="wrap_content">
    <RelativeLayout
     android:id="@+id/rl_phone_name"
     android:layout_width="match_parent"
     android:layout_height="wrap_content">
     <TextView
      android:id="@+id/tv_area_code"
      style="@style/Text.normal"
      android:layout_width="wrap_content"
      android:layout_height="wrap_content"
      android:layout_centerVertical="true"
      android:layout_marginLeft="@dimen/login_tv_margin_left"
      android:padding="5dp"
      android:text="+86">
      <requestFocus/>
     </TextView>
     <View
      android:layout_width="0.3dp"
      android:layout_height="10dp"
      android:layout_centerHorizontal="true"
      android:layout_centerVertical="true"
      android:layout_marginLeft="@dimen/login_line_margin"
      android:layout_toRightOf="@id/tv_area_code"
      android:background="@color/gray"/>
     <EditText
      android:id="@+id/et_phone_num"
      android:layout_width="match_parent"
      android:layout_height="wrap_content"
      android:layout_marginLeft="@dimen/login_et_margin_left"
      android:background="@null"
      android:hint="请输入您的手机号码"
      android:inputType="phone"
      android:maxLength="11"
      android:maxLines="1"
      android:paddingBottom="20dp"
      android:paddingTop="20dp"
      android:textColor="@color/black"
      android:textColorHint="@color/gray"
      android:textCursorDrawable="@null"
      android:textSize="@dimen/font_normal">
      <requestFocus/>
     </EditText>
    </RelativeLayout>
    <View
     android:id="@+id/line_phone_num"
     android:layout_width="match_parent"
     android:layout_height="0.5dp"
     android:layout_below="@+id/rl_phone_name"
     android:layout_centerHorizontal="true"
     android:layout_marginLeft="@dimen/login_line_margin"
     android:layout_marginRight="@dimen/login_line_margin"
     android:background="@color/gray"/>
    <RelativeLayout
     android:id="@+id/rl_check_num"
     android:layout_width="match_parent"
     android:layout_height="wrap_content"
     android:layout_alignLeft="@+id/line_phone_num"
     android:layout_alignRight="@+id/line_phone_num"
     android:layout_below="@+id/line_phone_num">
     <EditText
      android:id="@+id/et_check_num"
      android:layout_width="match_parent"
      android:layout_height="wrap_content"
      android:layout_centerInParent="true"
      android:layout_toLeftOf="@+id/btn_get_check"
      android:background="@null"
      android:hint="请输入验证码"
      android:inputType="number"
      android:maxLength="4"
      android:maxLines="1"
      android:paddingBottom="20dp"
      android:paddingLeft="120dp"
      android:paddingTop="20dp"
      android:textColor="@color/black"
      android:textColorHint="@color/gray"
      android:textCursorDrawable="@null"
      android:textSize="@dimen/font_normal"/>
     <com.goldenalpha.stock.master.views.CountDownButton
      android:id="@+id/btn_get_check"
      android:layout_width="@dimen/login_btn_check_width"
      android:layout_height="@dimen/login_btn_check_height"
      android:layout_alignParentRight="true"
      android:layout_centerVertical="true"
      android:layout_marginBottom="@dimen/login_btn_check_margin_bottom"
      android:layout_marginTop="@dimen/login_btn_check_margin_top"
      android:gravity="center"
      android:text="获取验证码"
      android:textColor="@color/gray"
      android:textSize="@dimen/font_normal"
      app:defaultBackgroundResource="@drawable/btn_check_gray_shape"/>
    </RelativeLayout>
    <View
     android:id="@+id/line_check_num"
     android:layout_width="match_parent"
     android:layout_height="0.5dp"
     android:layout_below="@+id/rl_check_num"
     android:layout_centerHorizontal="true"
     android:layout_marginLeft="25.3dp"
     android:layout_marginRight="25.3dp"
     android:background="@color/driver_color"/>
   </RelativeLayout>
   <com.goldenalpha.stock.master.views.LoadingButton
    android:id="@+id/btn_phone_login"
    android:layout_width="@dimen/login_btn_phone_width"
    android:layout_height="@dimen/login_btn_phone_height"
    android:layout_gravity="center_horizontal"
    android:layout_marginTop="23dp"/>
   <FrameLayout
    android:layout_width="match_parent"
    android:layout_height="wrap_content"
    android:layout_marginTop="23dp">
    <ImageView
     android:id="@+id/tv_wx_login"
     android:layout_width="wrap_content"
     android:layout_height="wrap_content"
     android:layout_gravity="center"
     android:src="@drawable/wx_login_selector"/>
   </FrameLayout>
  </LinearLayout>
 </RelativeLayout>
</RelativeLayout>
清单文件中的配置
<activity
  android:name=".activities.LoginActivity"
  android:launchMode="singleTask"
  android:screenOrientation="portrait"
  android:theme="@style/AppTheme"
  android:windowSoftInputMode="stateHidden|adjustResize">
 </activity>
以上所述是小编给大家介绍的Android实现背景可滑动登录界面 (不压缩背景弹出键盘),希望对大家有所帮助,如果大家有任何疑问请给我留言,小编会及时回复大家的。在此也非常感谢大家对脚本之家网站的支持!
相关文章

Android Studio 3.3.2 正式版的安装教程图解
这篇文章主要介绍了Android Studio 3.3.2 正式版的安装教程图解,本文分步骤通过图文并茂的形式给大家介绍的非常详细,需要的朋友可以参考下2020-02-02


最新评论