vue 封装自定义组件之tabal列表编辑单元格组件实例代码
更新时间:2017年09月07日 17:17:50 作者:kefe2
这篇文章主要介绍了vue 封装自定义组件tabal列表编辑单元格组件实例代码,需要的朋友可以参考下
vue 封装自定义组件
tabal列表编辑单元格组件
<template>
 <div class="editable-cell">
  <div class="editable-cell-input-wrapper" v-if='editable'>
   <el-input class="editInput" v-model="cellValue" placeholder="请输入内容" v-loading="editLoading" size="small"></el-input>
   <el-button type="text"><i class="el-icon-check" @click='check'></i></el-button>
  </div>
  <div class="editable-cell-text-wrapper" v-else>
   {{cellValue || ' '}}
   <el-button type="text"><i class="el-icon-edit" @click='edit'></i></el-button>
  </div>
 </div>
</template>
<script>
import util from '../../common/js/util';
import $ from 'jquery';
import axios from './../../common/ajax/axios.js';
export default {
 data() {
  return {
   cellValue:this.value,
   editable:false,
   editLoading:false,
  };
 },
 props : [
  'value'
 ],
 methods: {
  check(){
   const self = this;
   function callback(){
    self.editLoading = false;
    self.editable=false;
   }
   this.editLoading = true;
   self.$emit('cellChange',self.cellValue,callback)
  },
  edit(){
   this.editable = true;
  }
 }
};
</script>
<style lang="less" scoped>
.taskDetail{
 margin-left: 10px;
 margin-top:10px;
}
.editInput{
 width: 200px;
 height: 30px;
}
.el-icon-edit{
 margin-left: 20px;
}
.el-icon-check{
 margin-left: 20px;
}
</style>
<style>
.editInput .el-loading-spinner .circular{
 width:20px;
}
</style>

解释一下:
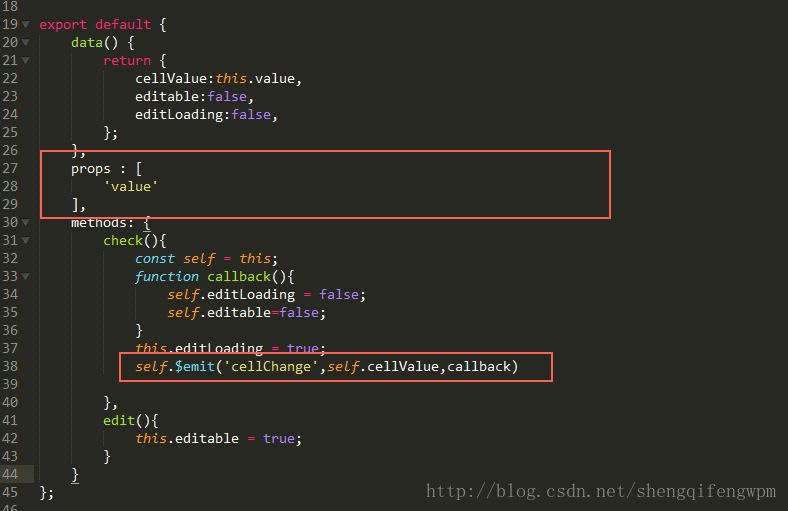
props:父组件传递给子组件的值;
$emit(‘方法名',数据) 返回父级数据,会触发父组件中调用子组件的方法;
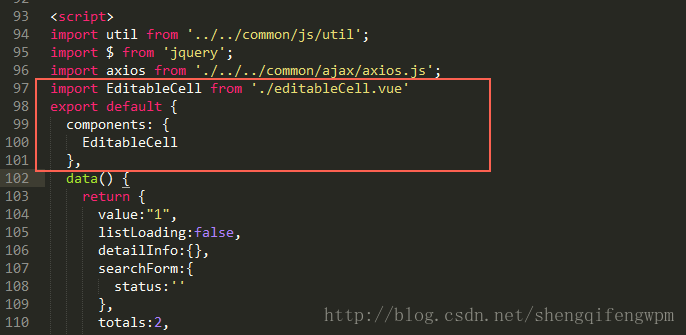
父组件中的使用方法:

1.先将组件import 进来;
2.然后将组件暴露出去,这样父组件就可以用了;

总结
以上所述是小编给大家介绍的vue 封装自定义组件tabal列表编辑单元格组件,希望对大家有所帮助,如果大家有任何疑问请给我留言,小编会及时回复大家的。在此也非常感谢大家对脚本之家网站的支持!
相关文章

vue-cli+iview项目打包上线之后图标不显示问题及解决方法
这篇文章主要介绍了解决vue-cli+iview项目打包上线之后图标不显示问题,本文通过两种方法给大家介绍的非常详细,具有一定的参考借鉴价值,需要的朋友可以参考下2019-10-10
Vue配置proxy代理接口报错2007 bad domain的解决
本文主要介绍了Vue配置proxy代理接口报错2007 bad domain的解决,文中通过示例代码介绍的非常详细,对大家的学习或者工作具有一定的参考学习价值,需要的朋友们下面随着小编来一起学习学习吧2023-06-06
vue-next/runtime-core 源码阅读指南详解
这篇文章主要介绍了vue-next/runtime-core 源码阅读指南详解,文中通过示例代码介绍的非常详细,对大家的学习或者工作具有一定的参考学习价值,需要的朋友们下面随着小编来一起学习学习吧2019-10-10


最新评论