Python 读取串口数据,动态绘图的示例
更新时间:2019年07月02日 10:21:22 作者:happyliuliming
今天小编就为大家分享一篇Python 读取串口数据,动态绘图的示例,具有很好的参考价值,希望对大家有所帮助。一起跟随小编过来看看吧
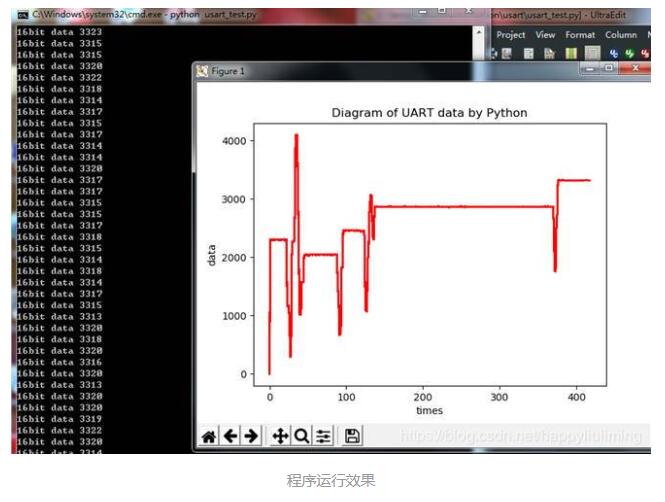
最近工作需要把单片机读取的传感器电压数据实时在PC上通过曲线显示出来,刚好在看python, 就试着用了python 与uart端口通讯,并且通过matplotlib.pyplot 模块实时绘制图形出来。
1. 废话少说,上图

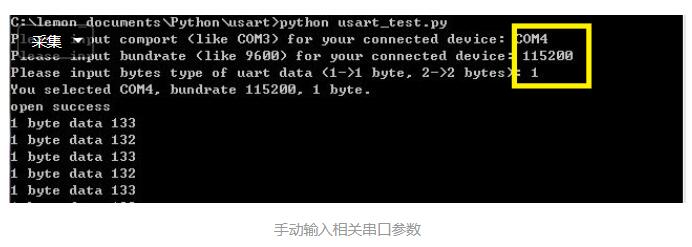
因为没有UI,运行时需要在提示符下输入串口相关参数,com端口,波特率...

代码如下:
#-*- coding: utf-8 -*-

# 串口测试程序
import serial
import matplotlib.pyplot as plt
import numpy as np
import time
import re


# User input comport and bundrate
comport = input('Please input comport (like COM3) for your connected device: ')
baudrate = input('Please input baudrate (like 9600) for your connected device: ')
bytes = input('Please input bytes type of uart data (1->1 byte, 2->2 bytes): ')
bytes = int(bytes)
print('You selected %s, baudrate %d, %d byte.' % (comport, int(baudrate), bytes))

serialport = serial.Serial(comport, int(baudrate), timeout=1, parity=serial.PARITY_EVEN, rtscts=1)
if serialport.isOpen():
	print("open success")
else:
	print("open failed")

plt.grid(True) # 添加网格
plt.ion()	# interactive mode
plt.figure(1)
plt.xlabel('times')
plt.ylabel('data')
plt.title('Diagram of UART data by Python')
t = [0]
m = [0]
i = 0
intdata = 0
data = ''
count = 0

while True:
	if i > 300:  # 300次数据后,清除画布,重新开始,避免数据量过大导致卡顿。
		t = [0]
		m = [0]
		i = 0
		plt.cla()
	count = serialport.inWaiting()
	if count > 0 :
		if (bytes == 1):
			data = serialport.read(1)
		elif (bytes == 2):
			data = serialport.read(2)
		if data !='':
			intdata = int.from_bytes(data, byteorder='big', signed = False)
			print('%d byte data %d' % (bytes, intdata))
			i = i+1
			t.append(i)
			m.append(intdata)
			plt.plot(t, m, '-r')
			# plt.scatter(i, intdata)
			plt.draw()

	plt.pause(0.002)
目前功能比较简单,但是发现一个问题,但单片机送出数据速度很快时, python plot 绘图会明显卡顿。
为解决此问题,已经用C# 重新做了个winform UI, 使用chart控件来绘图。
以上这篇Python 读取串口数据,动态绘图的示例就是小编分享给大家的全部内容了,希望能给大家一个参考,也希望大家多多支持脚本之家。
相关文章

Python 多线程,threading模块,创建子线程的两种方式示例
这篇文章主要介绍了Python 多线程,threading模块,创建子线程的两种方式,结合实例形式分析了Python线程的原理与创建子线程的相关实现技巧,需要的朋友可以参考下2019-09-09


最新评论