基于PHP+Mysql简单实现了图书购物车系统的实例详解
PHP+Mysql简单实现了图书购物车
本文主要讲述如何通过PHP+HTML简单实现图书购物车的功能,这是提取我们php项目的部分内容。主要内容包括:
1.通过JavaScript和Iframe实现局部布局界面
2.PHP如何定义类实现访问数据库功能
3.实现简单的添加购物车功能
4.实现了后台管理前台的页面
由于这个项目是在期末完成,PHP只是刚学的,比较简单。
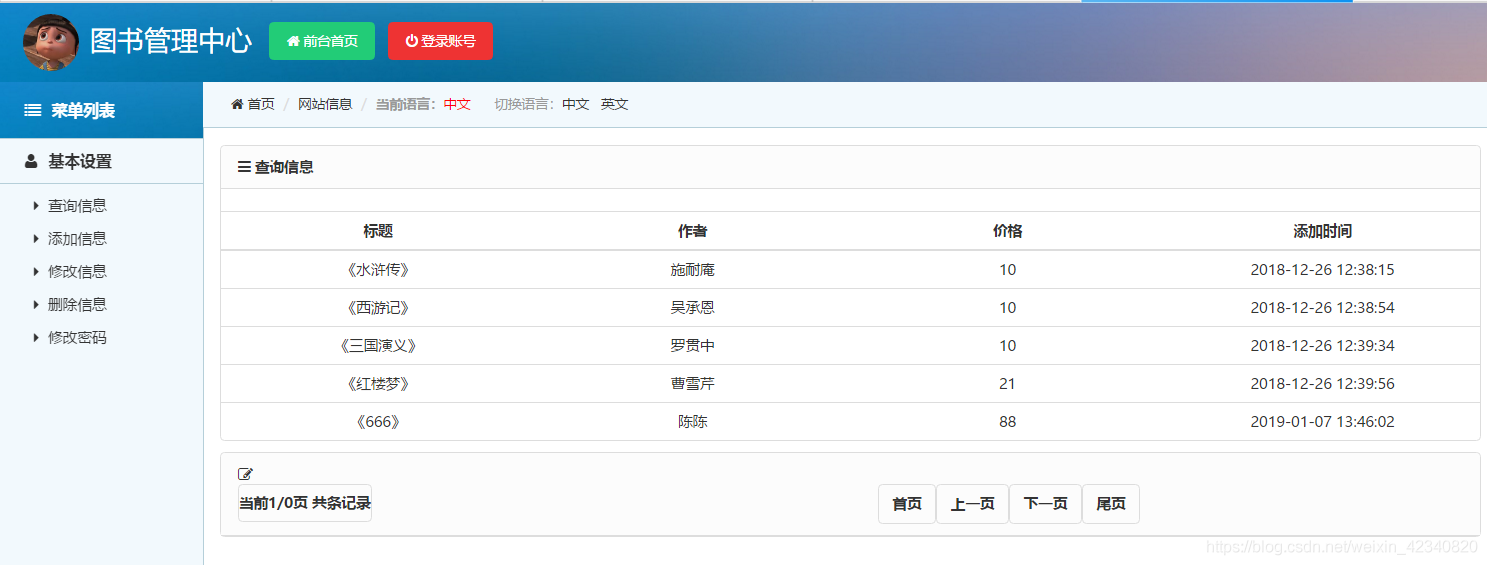
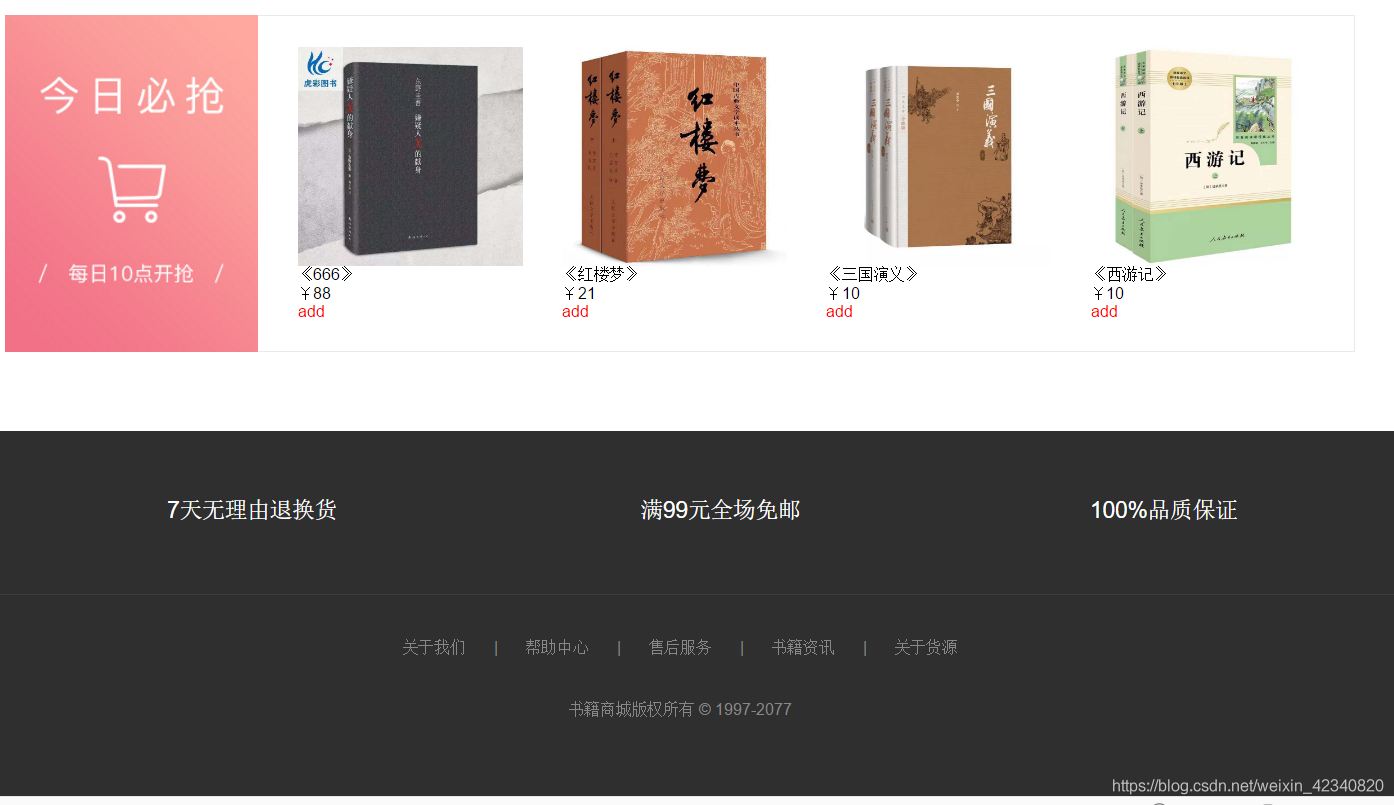
效果图如下:
这是后台管理的页面:

这是前台页面:


index.php页面:
<!DOCTYPE html> <html lang="zh-cn"> <head> <meta http-equiv="Content-Type" content="text/html; charset=utf-8" /> <meta http-equiv="X-UA-Compatible" content="IE=edge"> <meta name="viewport" content="width=device-width, initial-scale=1.0, maximum-scale=1.0, user-scalable=no" /> <meta name="renderer" content="webkit"> <title>后台管理中心</title> <link rel="stylesheet" href="css/pintuer.css" rel="external nofollow" rel="external nofollow" > <link rel="stylesheet" href="css/admin.css" rel="external nofollow" rel="external nofollow" > <script src="js/jquery.js"></script> </head> <body style="background-color:#f2f9fd;"> <div class="header bg-main"> <div class="logo margin-big-left fadein-top"> <h1><img src="images/y.jpg" class="radius-circle rotate-hover" height="50" alt="" />图书管理中心</h1> </div> <div class="head-l"><a class="button button-little bg-green" href="home/index.php" rel="external nofollow" target="_blank"><span class="icon-home"></span> 前台首页</a> <a class="button button-little bg-red" href="../lab/login.php" rel="external nofollow" ><span class="icon-power-off"></span> 登录账号</a> </div> </div> <div class="leftnav"> <div class="leftnav-title"><strong><span class="icon-list"></span>菜单列表</strong></div> <h2><span class="icon-user"></span>基本设置</h2> <ul style="display:block"> <li><a href="info.php" rel="external nofollow" target="right"><span class="icon-caret-right"></span>查询信息</a></li> <li><a href="page.php" rel="external nofollow" target="right"><span class="icon-caret-right"></span>添加信息</a></li> <li><a href="adv.php" rel="external nofollow" target="right"><span class="icon-caret-right"></span>修改信息</a></li> <li><a href="book.php" rel="external nofollow" target="right"><span class="icon-caret-right"></span>删除信息</a></li> <li><a href="pass.html" rel="external nofollow" target="right"><span class="icon-caret-right"></span>修改密码</a></li> </ul> </div> <ul class="bread"> <li><a href="##" rel="external nofollow" rel="external nofollow" rel="external nofollow" rel="external nofollow" target="" class="icon-home"> 首页</a></li> <li><a href="##" rel="external nofollow" rel="external nofollow" rel="external nofollow" rel="external nofollow" id="a_leader_txt">网站信息</a></li> <li><b>当前语言:</b><span style="color:red;">中文</php></span> 切换语言:<a href="##" rel="external nofollow" rel="external nofollow" rel="external nofollow" rel="external nofollow" >中文</a> <a href="##" rel="external nofollow" rel="external nofollow" rel="external nofollow" rel="external nofollow" >英文</a> </li> </ul> <div class="admin"> <iframe scrolling="auto" rameborder="0" src="info.php" name="right" width="100%" height="100%"></iframe> </div> <div style="text-align:center;"> </div> </body> </html>
login.php页面:
<!DOCTYPE html>
<html lang="zh-cn">
<head>
 <meta http-equiv="Content-Type" content="text/html; charset=utf-8" />
 <meta http-equiv="X-UA-Compatible" content="IE=edge">
 <meta name="viewport" content="width=device-width, initial-scale=1.0, maximum-scale=1.0, user-scalable=no" />
 <meta name="renderer" content="webkit">
 <title>登录</title>
 <link rel="stylesheet" href="css/pintuer.css" rel="external nofollow" rel="external nofollow" >
 <link rel="stylesheet" href="css/admin.css" rel="external nofollow" rel="external nofollow" >
 <script src="js/jquery.js"></script>
 <script src="js/pintuer.js"></script>
</head>
<body>
<div class="bg"></div>
<div class="container">
 <div class="line bouncein">
  <div class="xs6 xm4 xs3-move xm4-move">
   <div style="height:150px;"></div>
   <div class="media media-y margin-big-bottom">
   </div>
   <form action="login_ok.php" method="post">
   <div class="panel loginbox">
    <div class="text-center margin-big padding-big-top"><h1>图书管理中心</h1></div>
    <div class="panel-body" style="padding:30px; padding-bottom:10px; padding-top:10px;">
     <div class="form-group">
      <div class="field field-icon-right">
       <input type="text" class="input input-big" placeholder="登录账号" name="username" data-validate="required:请填写账号" />
       <span class="icon icon-user margin-small"></span>
      </div>
     </div>
     <div class="form-group">
      <div class="field field-icon-right">
       <input type="password" class="input input-big" placeholder="登录密码" name="password" data-validate="required:请填写密码" />
       <span class="icon icon-key margin-small"></span>
      </div>
     </div>
     <div class="form-group">
      <div class="field">
       <input type="text" class="input input-big" name="code" placeholder="填写右侧的验证码" data-validate="required:请填写右侧的验证码" />
       <img src="images/passcode.jpg" alt="" width="80" height="32" class="passcode" style="height:43px;cursor:pointer;" onclick="this.src=this.src+'?'">

      </div>
     </div>
    </div>
    <div style="padding:30px;"><input type="submit" class="button button-block bg-main text-big input-big" value="登录"></div>
   </div>
   </form>
  </div>
 </div>
</div>

</body>
</html>
最后希望文章对大家有所帮助,同时更希望大家学习下PHP类相关的知识。第一次学来写博客,就是练练手,总感觉自己写博客有些问题,但自己说不出来,希望大家提出不足之处!也可以添加我WeChat
到此这篇关于基于PHP+Mysql简单实现了图书购物车系统的实例详解的文章就介绍到这了,更多相关PHP+Mysql实现图书购物车内容请搜索脚本之家以前的文章或继续浏览下面的相关文章希望大家以后多多支持脚本之家!
相关文章

Linux+Nginx+MySQL下配置论坛程序Discuz的基本教程
这篇文章主要介绍了Linux+Nginx+MySQL下配置论坛程序Discuz的基本教程,Discuz是用PHP写成的国内最流行的论坛软件,文中默认前提是已经构建好了PHP环境,需要的朋友可以参考下2015-12-12
laravel 数据迁移与 Eloquent ORM的实现方法
laravel 提供了很实用的 Eloquent ORM 模型类,简单、直观的与数据库进行交互。同时使用数据迁移管理数据库,可以与团队进行共享以及编辑,本文详细的介绍了laravel 数据迁移与 Eloquent ORM的实现方法,感兴趣的可以了解一下2019-04-04


最新评论