Android绘制钟表的方法
本文实例为大家分享了Android绘制钟表的具体代码,供大家参考,具体内容如下
首先要画一个表,我们要先知道步骤如何:
1、仪表盘----外面最大的圆盘
2、刻度线----四个长刻度和剩下的短刻度
3、刻度值----对应的刻度下的数字
4、指针------钟表的三个指针
5、指针动起来
明确思路,下来就是画图了
1、仪表盘,画圆
outCirclePaint = new Paint();
outCirclePaint.setStrokeWidth(2);
outCirclePaint.setAntiAlias(true);
outCirclePaint.setStyle(Paint.Style.STROKE);
canvas.drawCircle(mWidth/2,mHeight/2,mWidth/2,outCirclePaint);
2、画刻度,同时写刻度值
画刻度的思路是每次画一个刻度(短的线段)完成之后,旋转画布30°,因为360/12。遇到3、6、9、12 把刻度线画粗,画稍长一点。
for (int i = 0; i <= 12;i++){
  if (i==3||i==6||i==9 || i==12){
    degreePaint.setStrokeWidth(3);
    degreePaint.setTextSize(30);
    canvas.drawLine(mWidth/2,mHeight/2-mWidth/2,mWidth/2,mHeight/2-mWidth/2+30,degreePaint);
    String degree = String.valueOf(i);
    canvas.drawText(degree,
        mWidth/2-degreePaint.measureText(degree)/2,
        mHeight/2-mWidth/2 + 60,
        degreePaint);
    }else{
      if (i!=0){ //遇到0不考虑划线 写刻度值
       degreePaint.setStrokeWidth(2);
       degreePaint.setTextSize(20);
        canvas.drawLine(mWidth/2,mHeight/2-mWidth/2,mWidth/2,mHeight/2-mWidth/2+15,degreePaint);
        String degree = String.valueOf(i);
        canvas.drawText(degree,
          mWidth/2-degreePaint.measureText(degree)/2,
          mHeight/2-mWidth/2 + 40,
          degreePaint);
      }
    }
    canvas.rotate(30,mWidth/2,mHeight/2);
}
3、画指针
canvas.translate(mWidth/2,mHeight/2);
canvas.drawLine(0,0,hx,hy,hourPaint); // 小时
canvas.drawLine(0,0,mx,my,minPaint); // 分钟
canvas.drawLine(0,0,sx,sy,sPaint);  // 秒
4、指针动起来
指针动起来也就是说让指针的一端固定,另外一端需要通过sin计算Y值,cos计算X值,指针长度自己确定好即可。
这样秒针每次动一下就是6°,以这个为秒针单位。
Math.PI/30 //π/30
分针同理
时针不一样,每次动一下是要30°
Math.PI/6 //π/6
Calendar calendar = Calendar.getInstance();
hcount = calendar.get(Calendar.HOUR_OF_DAY);
mcount = calendar.get(Calendar.MINUTE);
scount = calendar.get(Calendar.SECOND);
int hx = (int) (70*Math.cos(Math.PI*(hcount%12-15) / 6));
 int hy = (int) (70*Math.sin(Math.PI*(hcount%12-15) / 6));
 int mx = (int) (90*Math.cos(Math.PI*(mcount-15) / 30));
 int my = (int) (90*Math.sin(Math.PI*(mcount-15) / 30));
 int sx = (int) (110*Math.cos(Math.PI*(scount-15) / 30)); // -15 是为了调整时差(角度差)
 int sy = (int) (110*Math.sin(Math.PI*(scount-15) / 30));
最后和画指针的结合起来进行绘制就可以让指针动起来。
附加一个功能 显示上午下午的功能
//绘制 上午下午
APMPaint.setTextSize(20);
APMPaint.setStrokeWidth(2);
canvas.rotate(-30,mWidth/2,mHeight/2);
String apm ;
if (hcount < 12){
  apm = "AM";
}else{
  apm = "PM";
}

canvas.drawText(apm,
    mWidth/2-degreePaint.measureText(apm)/2,
    mHeight/2+100,
    APMPaint);
大家还可以继续拓展,添加星期,和每个月的日期,做成一个属于你自己的表。
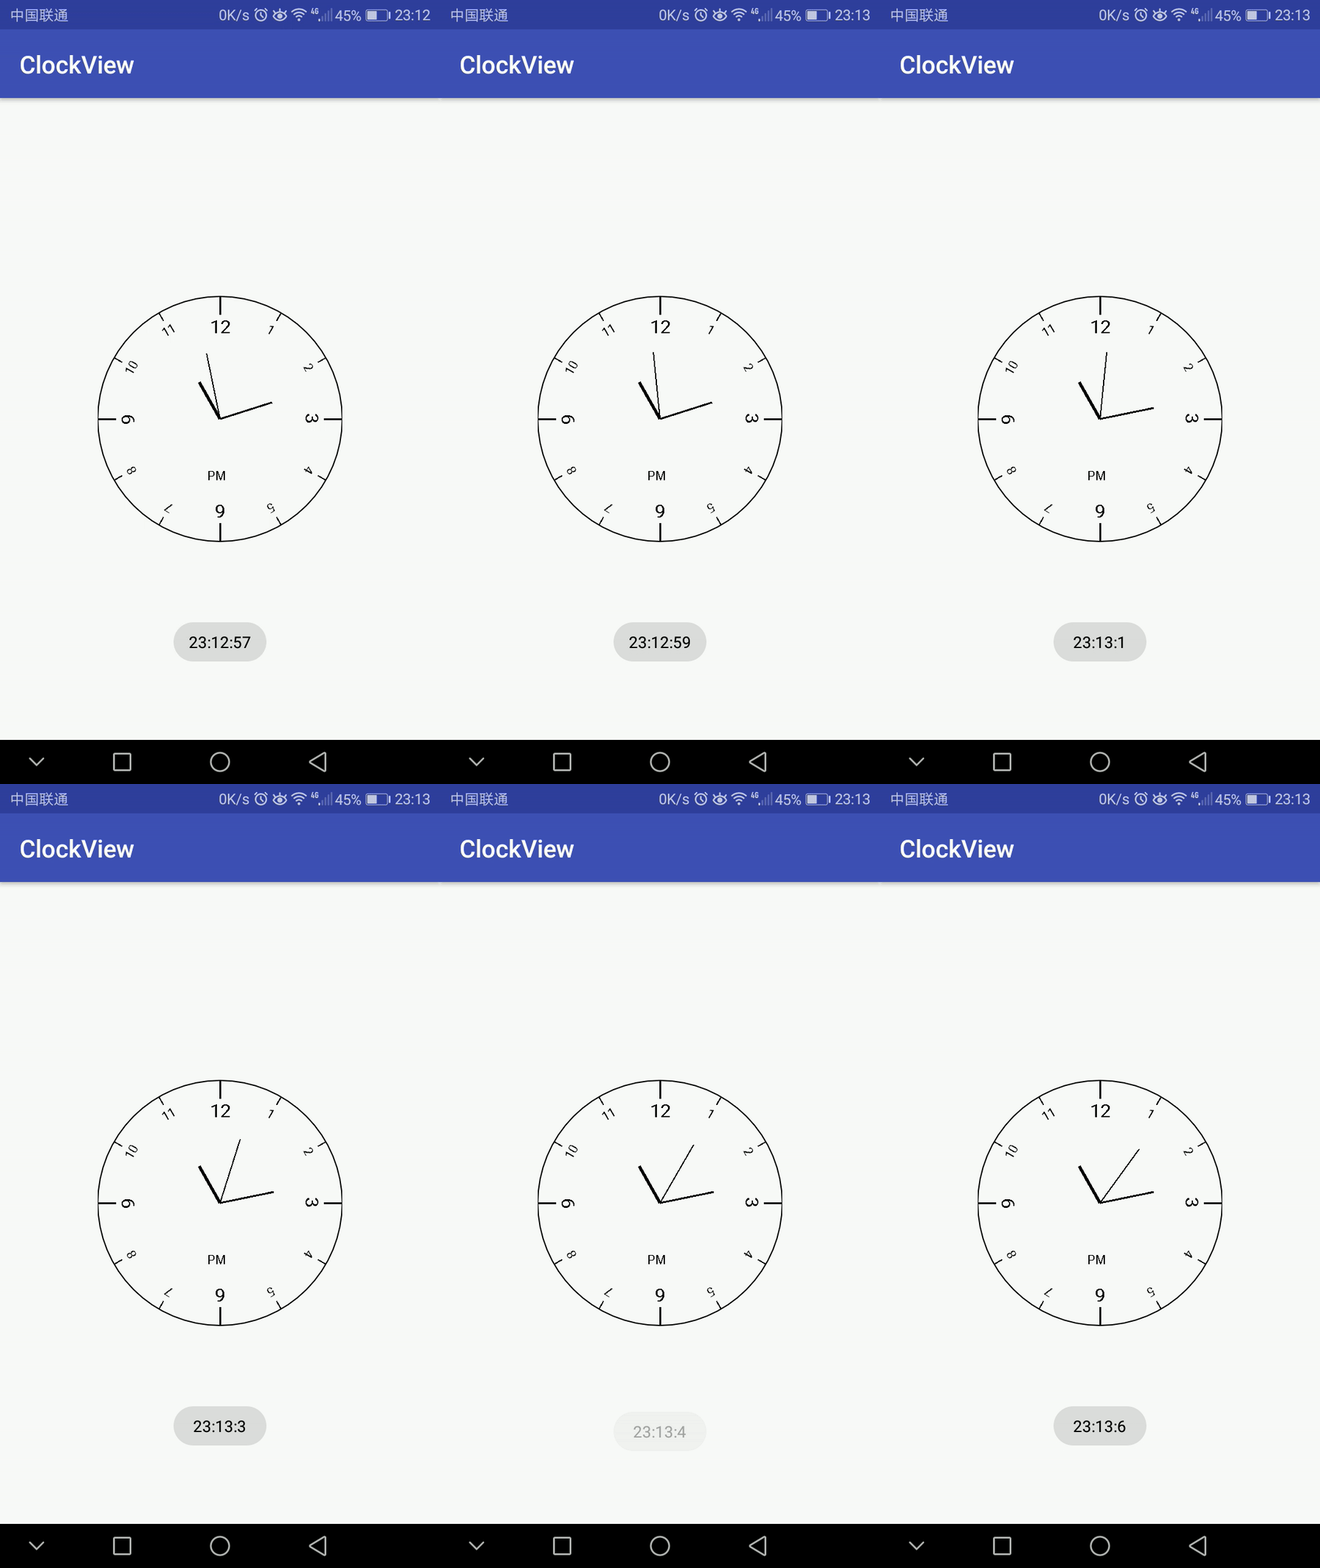
效果图:

以上就是本文的全部内容,希望对大家的学习有所帮助,也希望大家多多支持脚本之家。
相关文章

android studio 新手入门教程(二)项目的导入教程图解
这篇文章主要介绍了android studio 新手入门教程(二)项目的导入教程图解,需要的朋友可以参考下2017-12-12
Android Handler移除Message详解及实例代码
这篇文章主要介绍了Android Handler移除Message详解及实例代码的相关资料,需要的朋友可以参考下2017-02-02
SQLiteStudio优雅调试Android手机数据库Sqlite(推荐)
这篇文章主要介绍了SQLiteStudio优雅调试Android手机数据库Sqlite的相关资料,需要的朋友可以参考下2017-11-11
Android实现联动下拉框 下拉列表spinner的实例代码
这篇文章介绍了Android实现联动下拉框 下拉列表spinner的实例代码,有需要的朋友可以参考一下2013-10-10
详解Android PopupWindow怎么合理控制弹出位置(showAtLocation)
本篇文章主要介绍了详解Android PopupWindow怎么合理控制弹出位置(showAtLocation),具有一定的参考价值,有兴趣的可以了解一下2017-10-10
Android开发笔记之Android中数据的存储方式(二)
我们在实际开发中,有的时候需要储存或者备份比较复杂的数据。这些数据的特点是,内容多、结构大,比如短信备份等,通过本文给大家介绍Android开发笔记之Android中数据的存储方式(二),对android数据存储方式相关知识感兴趣的朋友一起学习吧2016-01-01


最新评论