jquery 步骤进度轴插件的实现代码
每天一个jquery插件-步骤进度轴 步骤进度轴
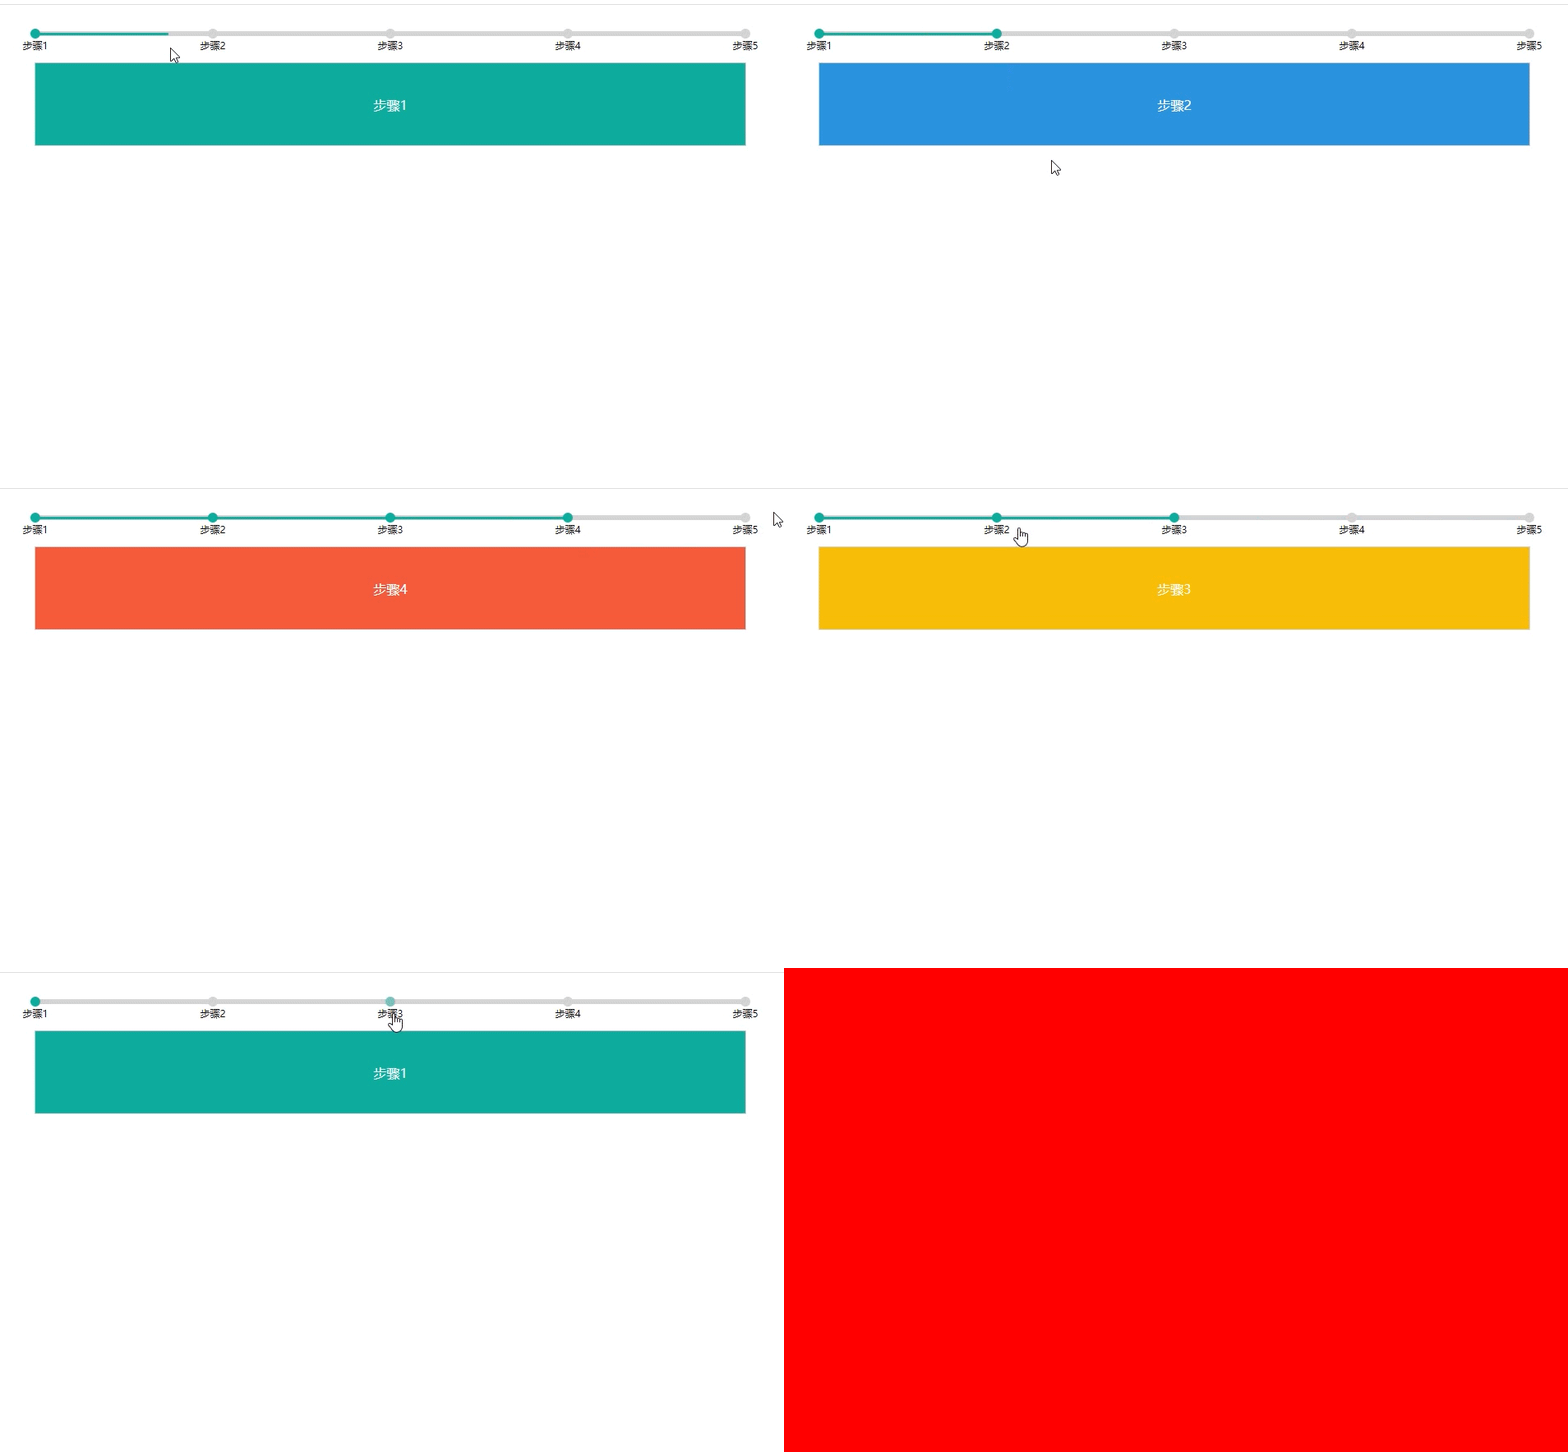
很多工具型的网站入门教程或者注册账号走流程的时候会有这个结构存在,所以做了一个来尝试一下,回调动作也能用吧
效果如下

代码部分
*{
	margin: 0;
	padding: 0;
}
#div{
	width: 90%;
	height: 50px;
	margin: 10px auto;
	display: flex;
	justify-content: center;
	align-items: center;
}
#box{
	width: 90%;
	height: 100px;
	border: 1px solid lightgray;
	margin: 10px auto;
	display: flex;
	justify-content: center;
	align-items: center;
	position: relative;
}
.box{
	position: absolute;
	width: 100%;
	height: 100%;
	top: 0;
	left: 0;
	display: flex;
	justify-content: center;
	align-items: center;
	background-color: black;
	color: white;
}
.tbar{
	width: 90%;
	height: 6px;
	border-radius: 5px;
	background-color: lightgray;
	display: flex;
	align-items: center;
	position: absolute;
}
.bar{
	width: 100%;
	height: 50%;
	border-radius: 5px;
	background-color: #1abc9c;
	transition: all 0.2s linear;
}
.dot{
	position: absolute;
	width: 12px;
	height: 12px;
	border-radius: 50%;
	background-color: lightgray;
	cursor: pointer;
	display: flex;
	justify-content: center;
	align-items: center;
}
.dot:hover{
	transition: all 0.5s linear;
	background-color: #1abc9c;
}
.dot.check{
	background-color: #1abc9c;
}
.dot .txt{
	top: 100%;
	font-size: 12px;
	position: absolute;
	width: 100px;
	text-align: center;
}
<!DOCTYPE html>
<html>
	<head>
		<meta charset="utf-8">
		<title>步骤进度轴</title>
		<script src="js/jquery-3.4.1.min.js"></script>
		<script src="js/bzjdz.js"></script>
		<link href="css/bzjdz.css" rel="external nofollow"  rel="stylesheet" type="text/css" />
	</head>
	<body>
		<div id="div">

		</div>
		<div id="box">
			<div class="box" id="box1" style="background-color: #1abc9c;">步骤1</div>
			<div class="box" id="box2" style="background-color: #3498db;">步骤2</div>
			<div class="box" id="box3" style="background-color: #f1c40f;">步骤3</div>
			<div class="box" id="box4" style="background-color: #e74c3c;">步骤4</div>
			<div class="box" id="box5" style="background-color:	#9b59b6;">步骤5</div>
		</div>
	</body>
</html>
<script>
	$(function(){
		$("#div").timeline({
			data:[
				{name:'步骤1',id:'#box1',click:hide},
				{name:'步骤2',id:'#box2',click:hide},
				{name:'步骤3',id:'#box3',click:hide},
				{name:'步骤4',id:'#box4',click:hide},
				{name:'步骤5',id:'#box4',click:hide},
			]
		})
	})
	function hide(item){
		$(".box").hide();
		$(item.id).show();
	}
</script>
$.prototype.timeline =function(op){
	console.log(op.data);
	var $that = $(this);
	var $tbar =$("<div class='tbar'></div>");
	var $bar  =$("<div class='bar'></div>");
	$bar.appendTo($tbar)
	$tbar.appendTo($that);
	var length = op.data.length;//元素长度
	var index = 0;//当前进行到哪个步骤
	op.data.forEach((item,index)=>{
		var per = getper(index,length)
		var $dot  = $("<div class='dot' data-index='"+index+"'><div class='txt'>"+item.name+"</div></div>");
		$dot.appendTo($tbar);
		$dot.css('left',"calc("+per+"% - 6px)")
	})
	//点击事件
	$that.find('.dot').click(function(){
		index = parseInt($(this).attr('data-index'));
		//执行对应的方法
		click();
	})
	click();
	function click(){
		//回调
		var item = op.data[index];
		item.click(item);
		//动画样式
		var per = getper(index,length)
		$bar.css('width',per+'%')
		//按钮选中的控制
		op.data.forEach((item,i)=>{
			if(i<=index){
				$tbar.find(".dot[data-index='"+i+"']").addClass('check');
			}else{
				$tbar.find(".dot[data-index='"+i+"']").removeClass('check');
			}
		})
	}
	function getper(i,l){
		var temp = 0;
		if(i!=0&&i!=l-1){
			temp = i/(l-1)*100//算出大概的距离
		}else if(i==l-1){
			temp = 100
		}
		return temp;
	}
}
思路解释
要做的内容很简单,画出时间轴,标记对应的点,然后在触发对应事件的时候正确调用回调
时间轴画的时候就那样,百分比一填满就没啥了,然后里面把会变化进度的和校园点分开绘制
小圆点点击的时候改变当前结构标记,然后触发一个事件,把动画效果和回调一并执行、
完事,休息
以上就是jquery 步骤进度轴插件的实现代码的详细内容,更多关于jQuery步骤进度轴的资料请关注脚本之家其它相关文章!
相关文章

Jquery实现列表(隔行换色,全选,鼠标滑过当前行)效果实例
Jquery实现列表(隔行换色,全选,鼠标滑过当前行)效果实例,需要的朋友可以参考一下2013-06-06
jquery mobile 实现自定义confirm确认框效果的简单实例
下面小编就为大家带来一篇jquery mobile 实现自定义confirm确认框效果的简单实例。小编觉得挺不错的,现在就分享给大家,也给大家做个参考。一起跟随小编过来看看吧2016-06-06
jQuery修改li下的样式以及li下的img的src的值的方法
这篇文章主要为大家介绍了jQuery如何修改li下的样式,以及修改li下的img的src的值,示例代码很简单,一看就会2014-11-11
全面解析jQuery $(document).ready()和JavaScript onload事件
这篇文章主要介绍了全面解析jQuery $(document).ready()和JavaScript onload事件的相关资料,非常不错具有参考借鉴价值,需要的朋友可以参考下2016-06-06


最新评论