Python趣味挑战之用pygame实现飞机塔防游戏
更新时间:2021年05月28日 10:13:33 作者:dhjabc_1
一步步实现有趣的飞机塔防游戏,有兴趣了解一下吗?文中有非常详细的代码示例,对喜欢玩游戏的小伙伴们很有帮助哦,需要的朋友可以参考下
一、先让飞机在屏幕上飞起来吧。
(一)实现飞机类
class Plane:
    def __init__(self,filename,screen):
        self.plane = pygame.image.load(filename).convert_alpha()
        self.height = self.plane.get_height()
        self.width = self.plane.get_width()

        self.radius = randint(2, 10)
        self.xpos = randint(self.radius, 800-self.radius)
        self.ypos = randint(self.radius, 700-self.radius)
       # self.xpos = randint(100, 600)
        # self.ypos = randint(100, 600)

        self.xvelocity = randint(2, 6)/5
        self.yvelocity = randint(2, 6)/5

        self.angle = math.atan2(self.yvelocity,self.xvelocity)
        self.fangle = math.degrees(self.angle)+90

        self.screen = screen
        self.scrnwidth = 800
        self.scrnheight = 700


    def move_ball(self):

        self.xpos += self.xvelocity
        self.ypos += self.yvelocity

        # 如果球的y坐标大于等于屏幕高度和球的半径的差,则调整球的运行y轴方向朝上
        if self.ypos >= self.scrnheight-self.width:
            self.yvelocity = -self.yvelocity
            self.angle = math.atan2(self.yvelocity, self.xvelocity)
            self.fangle = math.degrees(self.angle) + 90

        # 如果球的y坐标小于等于屏幕高度和球的半径的差,则调整球的y轴运行方向朝下
        if self.ypos <= 0:
            self.yvelocity = abs(self.yvelocity)
            self.angle = math.atan2(self.yvelocity, self.xvelocity)
            self.fangle = math.degrees(self.angle) + 90

        # 如果球的x坐标大于等于屏幕宽度和球的半径差,则调整球的运行x轴方向朝左
        if self.xpos >= self.scrnwidth-self.height:
            self.xvelocity = -self.xvelocity
            self.angle = math.atan2(self.yvelocity, self.xvelocity)
            self.fangle = math.degrees(self.angle) + 90

        # 如果球的x坐标小于等于屏幕宽度和球半径的差,则调整球的运行x轴方向朝右
        if self.xpos <= 0:
            self.xvelocity = abs(self.xvelocity)
            self.angle = math.atan2(self.yvelocity, self.xvelocity)
            self.fangle = math.degrees(self.angle) + 90

        self.planed = pygame.transform.rotate(self.plane, -(self.fangle))
        self.screen.blit(self.planed, (self.xpos,self.ypos))
(二)让飞机飞起来
if __name__ == '__main__':
    pygame.init()
    screen = pygame.display.set_mode((800, 700))
    plane = Plane('plane.png',screen)

    clock = pygame.time.Clock()
    while True:
        for event in pygame.event.get():
            if event.type == pygame.QUIT:
                pygame.quit()
                sys.exit()
        clock.tick(200)
        screen.fill((0, 0, 0))
        plane.move_ball()
        pygame.display.update()
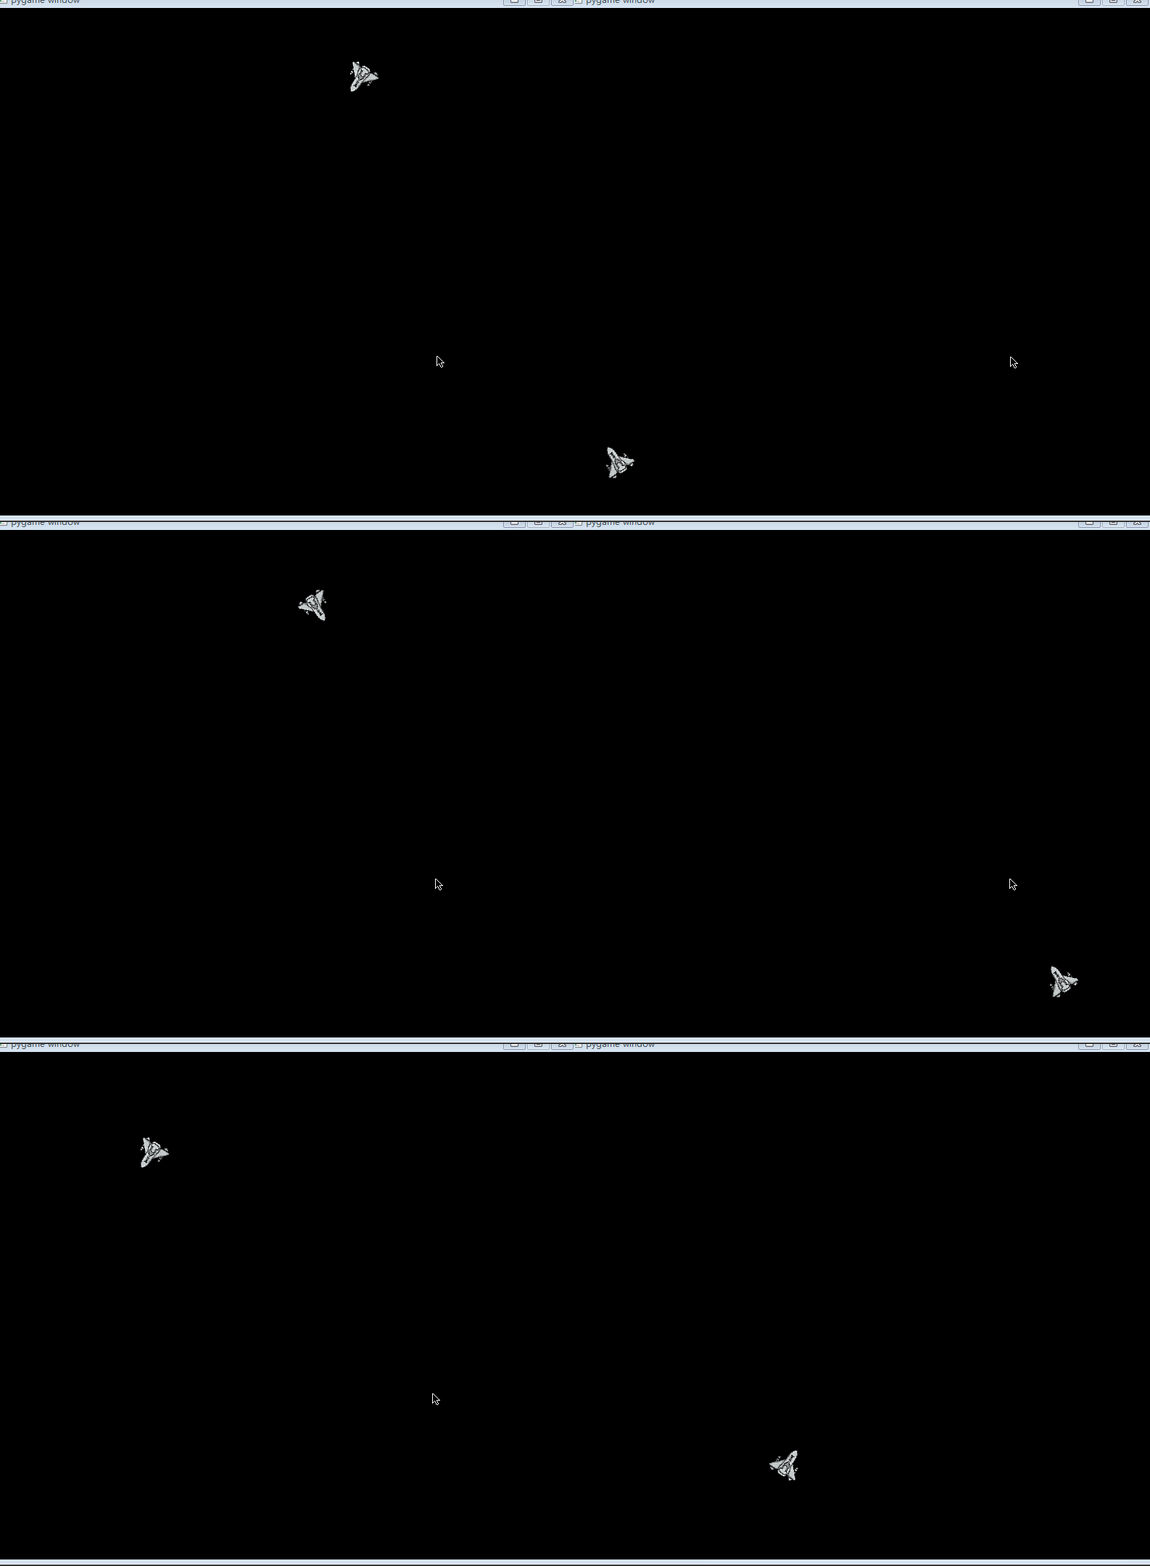
(三)运行效果

二、屏幕下发实现一个塔防设备
(一)实现塔防设备类
class Pao:
    def __init__(self,screen):
        self.start = (100,700)
        self.end = None
        self.screen = screen
        self.count = 0
        self.bullet_list = []
        pass

    def getpos(self,pos2,r):
        self.angle = math.atan2( pos2[1]-self.start[1],pos2[0]-self.start[0])
        self.fangle = math.degrees(self.angle)
        self.x = self.start[0]+r*math.cos(self.angle)
        self.y = self.start[1]+r*math.sin(self.angle)
        self.r = r
        self.end = pos2

    def move(self):
        pygame.draw.line(self.screen, (255, 0, 0), self.start, (self.x,self.y), 5)
        pygame.draw.circle(self.screen,(0,255,0),self.start,15)
(二)主函数实现调用
pao  = Pao(screen)
    clock = pygame.time.Clock()
    while True:
        for event in pygame.event.get():
            if event.type == pygame.QUIT:
                pygame.quit()
                sys.exit()
        clock.tick(200)
        screen.fill((0, 0, 0))
        plane.move_ball()
        pao.getpos((plane.xpos, plane.ypos), 35)
        pao.move()
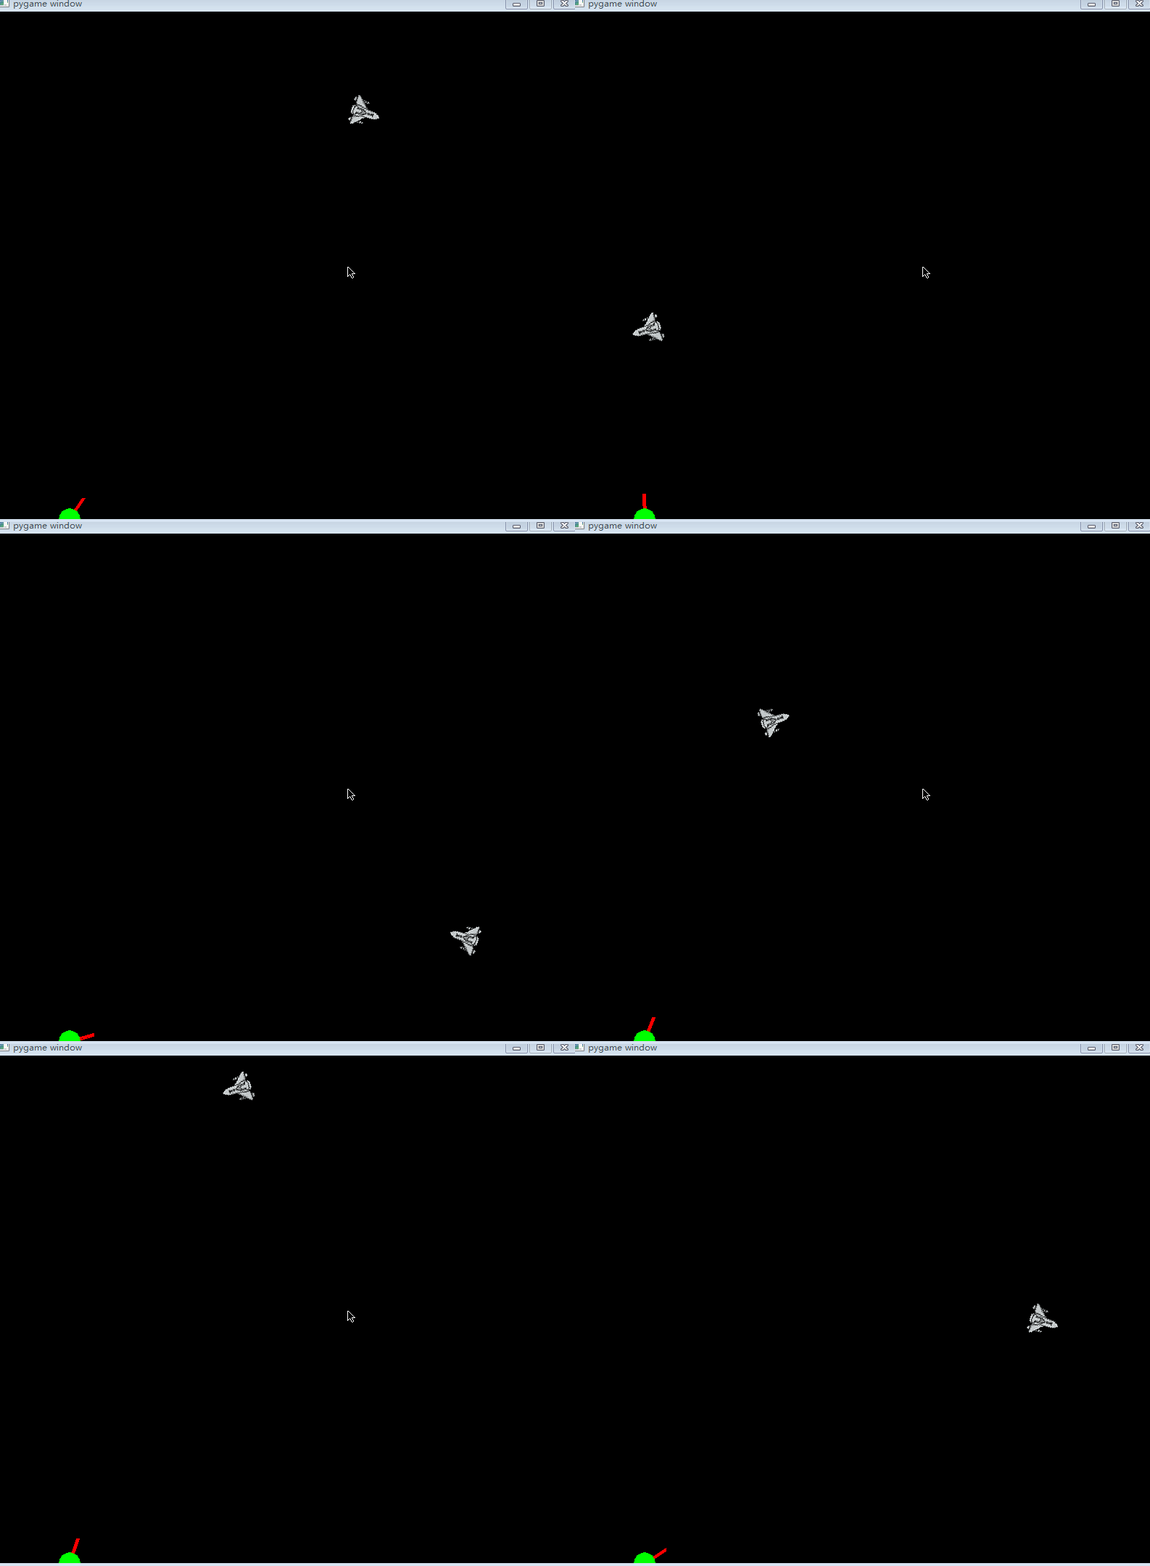
(三)实现效果

发现没有,塔防设备跟踪飞机的运动而运动,一切都在监控中。
三、让子弹也飞起来吧
(一)实现子弹类
class Bullet:
    def __init__(self,x,y,fangle,screen,angle):
        self.posx = x
        self.posy = y
        self.fangle = fangle
        self.angle = angle
        self.alive = True
        self.screen = screen
        self.bullet = pygame.image.load('bullet2.png').convert_alpha()
        self.r = random.randint(5,10)

    def move(self):
        self.planed = pygame.transform.rotate(self.bullet, -(self.fangle))
        self.posx += self.r * math.cos(self.angle)
        self.posy +=  self.r * math.sin(self.angle)
        # self.xpos, self.ypos = (self.xpos + section * cosa, self.ypos - section * sina)
        if self.posy > 700 or self.posy < 0 or self.posx < 0 or self.posx > 800:
            self.alive = False
        if self.alive:
            self.screen.blit(self.planed, (self.posx, self.posy))
(二)在塔防设备实现子弹生成
在move函数上写相关代码
 def move(self):
        pygame.draw.line(self.screen, (255, 0, 0), self.start, (self.x,self.y), 5)
        pygame.draw.circle(self.screen,(0,255,0),self.start,15)
        if self.count % 100 == 19:
            self.bullet_list.append(Bullet(self.x,self.y,self.fangle,self.screen,self.angle))
        self.count += 1
        for bullet in self.bullet_list:
            if bullet.alive is not True:
                del bullet
            else:
                bullet.move()
(三)完整代码
import pygame,sys
from math import *
from Ball import Ball
import random
from random import randint
import math

class Plane:
    def __init__(self,filename,screen):
        self.plane = pygame.image.load(filename).convert_alpha()
        self.height = self.plane.get_height()
        self.width = self.plane.get_width()

        self.radius = randint(2, 10)
        self.xpos = randint(self.radius, 800-self.radius)
        self.ypos = randint(self.radius, 700-self.radius)

        self.xvelocity = randint(2, 6)/5
        self.yvelocity = randint(2, 6)/5

        self.angle = math.atan2(self.yvelocity,self.xvelocity)
        self.fangle = math.degrees(self.angle)+90

        self.screen = screen
        self.scrnwidth = 800
        self.scrnheight = 700


    def move_ball(self):

        self.xpos += self.xvelocity
        self.ypos += self.yvelocity

        # 如果球的y坐标大于等于屏幕高度和球的半径的差,则调整球的运行y轴方向朝上
        if self.ypos >= self.scrnheight-self.width:
            self.yvelocity = -self.yvelocity
            self.angle = math.atan2(self.yvelocity, self.xvelocity)
            self.fangle = math.degrees(self.angle) + 90

        # 如果球的y坐标小于等于屏幕高度和球的半径的差,则调整球的y轴运行方向朝下
        if self.ypos <= 0:
            self.yvelocity = abs(self.yvelocity)
            self.angle = math.atan2(self.yvelocity, self.xvelocity)
            self.fangle = math.degrees(self.angle) + 90

        # 如果球的x坐标大于等于屏幕宽度和球的半径差,则调整球的运行x轴方向朝左
        if self.xpos >= self.scrnwidth-self.height:
            self.xvelocity = -self.xvelocity
            self.angle = math.atan2(self.yvelocity, self.xvelocity)
            self.fangle = math.degrees(self.angle) + 90

        # 如果球的x坐标小于等于屏幕宽度和球半径的差,则调整球的运行x轴方向朝右
        if self.xpos <= 0:
            self.xvelocity = abs(self.xvelocity)
            self.angle = math.atan2(self.yvelocity, self.xvelocity)
            self.fangle = math.degrees(self.angle) + 90

        self.planed = pygame.transform.rotate(self.plane, -(self.fangle))
        self.newRect = self.plane.get_rect(center=(self.xpos,self.ypos))
        self.screen.blit(self.planed,self.newRect)

class Pao:
    def __init__(self,screen):
        self.start = (100,700)
        self.end = None
        self.screen = screen
        self.count = 0
        self.bullet_list = []
        pass

    def getpos(self,pos2,r):
        self.angle = math.atan2( pos2[1]-self.start[1],pos2[0]-self.start[0])
        self.fangle = math.degrees(self.angle)
        self.x = self.start[0]+r*math.cos(self.angle)
        self.y = self.start[1]+r*math.sin(self.angle)
        self.r = r
        self.end = pos2

    def move(self):
        pygame.draw.line(self.screen, (255, 0, 0), self.start, (self.x,self.y), 5)
        pygame.draw.circle(self.screen,(0,255,0),self.start,15)
        if self.count % 100 == 19:
            self.bullet_list.append(Bullet(self.x,self.y,self.fangle,self.screen,self.angle))
        self.count += 1
        for bullet in self.bullet_list:
            if bullet.alive is not True:
                del bullet
            else:
                bullet.move()

class Bullet:
    def __init__(self,x,y,fangle,screen,angle):
        self.posx = x
        self.posy = y
        self.fangle = fangle
        self.angle = angle
        self.alive = True
        self.screen = screen
        self.bullet = pygame.image.load('bullet2.png').convert_alpha()
        self.r = random.randint(5,10)

    def move(self):
        self.planed = pygame.transform.rotate(self.bullet, -(self.fangle))
        self.posx += self.r * math.cos(self.angle)
        self.posy +=  self.r * math.sin(self.angle)
        # self.xpos, self.ypos = (self.xpos + section * cosa, self.ypos - section * sina)
        if self.posy > 700 or self.posy < 0 or self.posx < 0 or self.posx > 800:
            self.alive = False
        if self.alive:
            self.screen.blit(self.planed, (self.posx, self.posy))


if __name__ == '__main__':
    pygame.init()
    screen = pygame.display.set_mode((800, 700))
    plane = Plane('plane.png',screen)
    pao  = Pao(screen)

    clock = pygame.time.Clock()
    while True:
        for event in pygame.event.get():
            if event.type == pygame.QUIT:
                pygame.quit()
                sys.exit()
        clock.tick(200)
        screen.fill((0, 0, 0))
        plane.move_ball()
        pao.getpos((plane.xpos, plane.ypos), 35)
        pao.move()
        pygame.display.update()
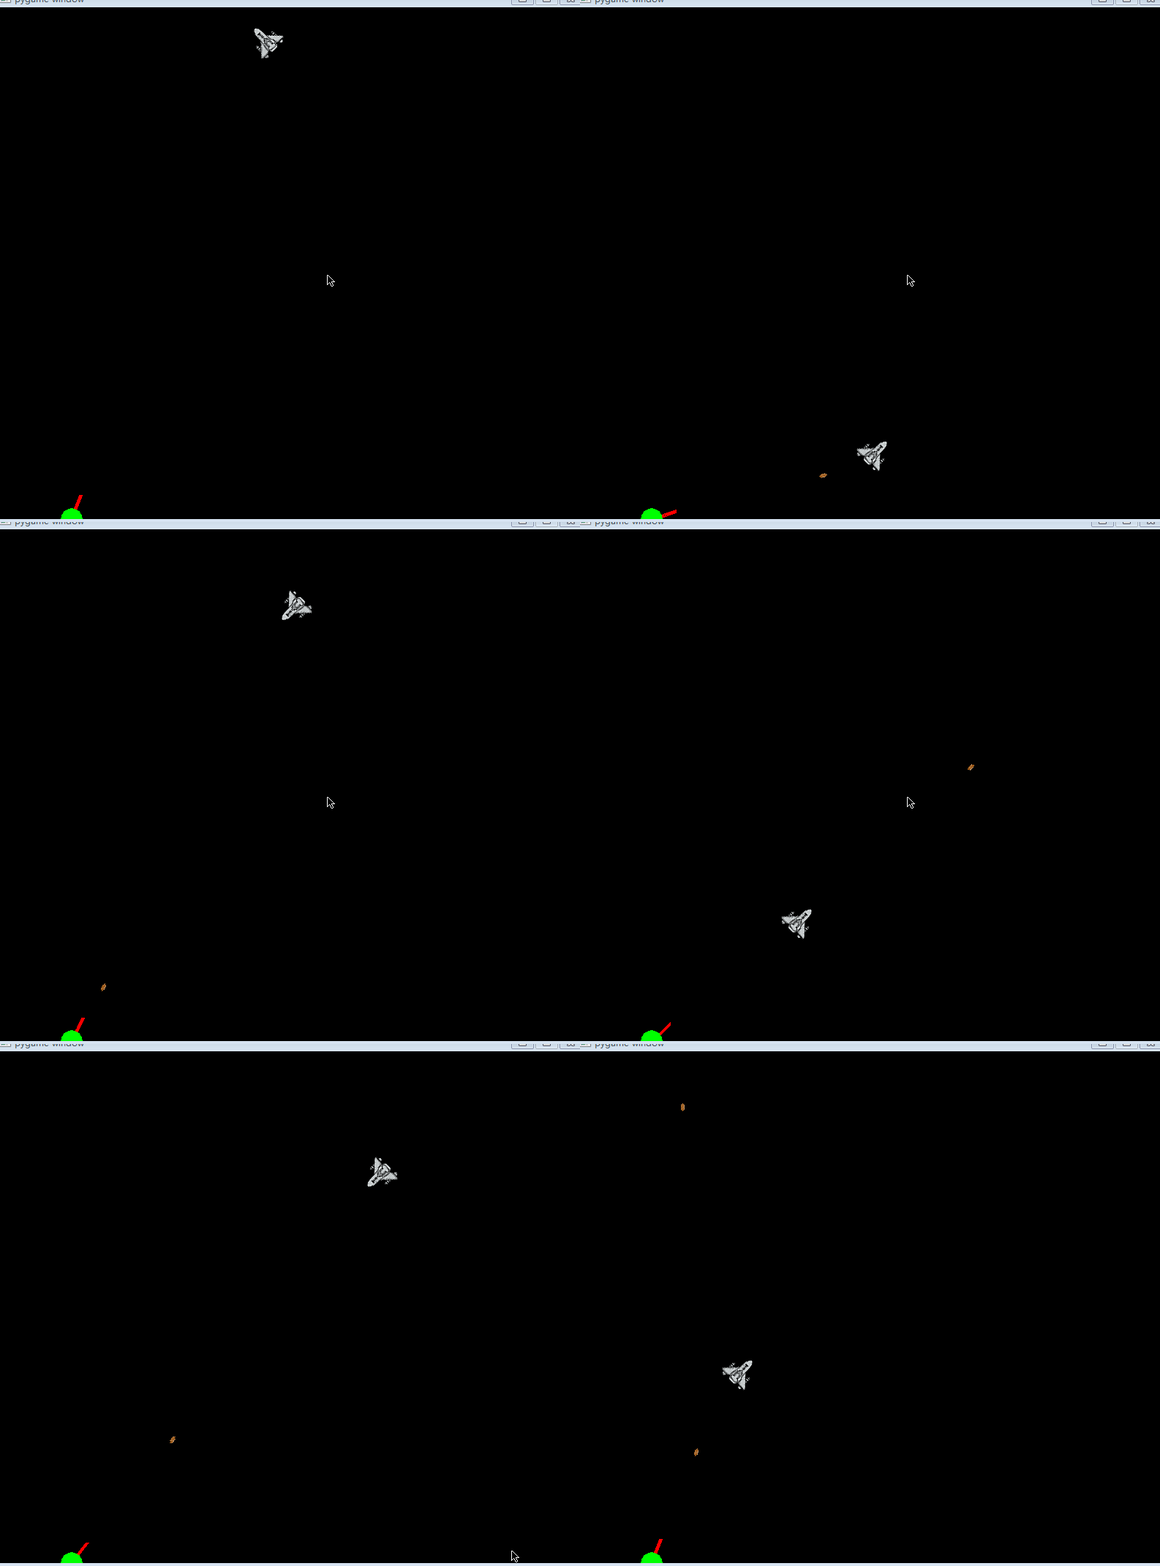
(四)运行效果

四、碰撞监测和爆炸效果实现
(一)碰撞监测
plane_rect = plane.newRect # planed.get_rect()
        # print(plane_rect)
        # print(len(pao.bullet_list))
        for bullet in pao.bullet_list:
            # print(bullet.alive)
            # print(bullet.planed.get_rect())
            if plane_rect.colliderect(bullet.newRect):
                bullet.alive = False
                plane.reset()
                print('1')
(二)爆炸效果
检测是否碰撞
 if plane.alive:
                plane.move_ball()
            else:
                plane.destroy(fCount, screen)
碰撞后的效果
def destroy(self, fCount, winSurface):
        self.screen.blit(self.dList[self.dIndex],self.newRect)
        if fCount % 3 == 0:
            self.dIndex += 1
        if self.dIndex == 4:
            self.reset()
(三)记录得分
初始化变量
self.score = 0
展示变量
text1 = self.font.render('score:%s' % self.score, True, (255, 255, 0))
self.screen.blit(text1, (45, 15))
五、完整代码
import pygame,sys
from math import *
from Ball import Ball
import random
from random import randint
import math

class Plane:
    def __init__(self,filename,screen):
        self.plane = pygame.image.load(filename).convert_alpha()
        self.height = self.plane.get_height()
        self.width = self.plane.get_width()
        self.alive = True
        self.dIndex = 0
        self.newRect = None
        # 爆炸
        self.dSurface1 = pygame.image.load("./images/enemy1_down1.png").convert_alpha()
        self.dSurface2 = pygame.image.load("./images/enemy1_down2.png").convert_alpha()
        self.dSurface3 = pygame.image.load("./images/enemy1_down3.png").convert_alpha()
        self.dSurface4 = pygame.image.load("./images/enemy1_down4.png").convert_alpha()
        self.dList = [self.dSurface1, self.dSurface2, self.dSurface3, self.dSurface4]

        self.radius = randint(2, 10)
        self.xpos = randint(self.radius, 800-self.radius)
        self.ypos = randint(self.radius, 700-self.radius)

        self.xvelocity = randint(2, 6)/5
        self.yvelocity = randint(2, 6)/5

        self.angle = math.atan2(self.yvelocity,self.xvelocity)
        self.fangle = math.degrees(self.angle)+90

        self.screen = screen
        self.scrnwidth = 800
        self.scrnheight = 700

    def destroy(self, fCount, winSurface):
        self.screen.blit(self.dList[self.dIndex],self.newRect)
        if fCount % 3 == 0:
            self.dIndex += 1
        if self.dIndex == 4:
            self.reset()

    def reset(self):
        self.radius = randint(2, 10)
        self.xpos = randint(self.radius, 800-self.radius)
        self.ypos = randint(self.radius, 700-self.radius)

        self.xvelocity = randint(2, 6)/5
        self.yvelocity = randint(2, 6)/5

        self.angle = math.atan2(self.yvelocity,self.xvelocity)
        self.fangle = math.degrees(self.angle)+90

        self.alive = True
        self.dIndex = 0

    def move_ball(self):

        self.xpos += self.xvelocity
        self.ypos += self.yvelocity

        # 如果球的y坐标大于等于屏幕高度和球的半径的差,则调整球的运行y轴方向朝上
        if self.ypos >= self.scrnheight-self.width:
            self.yvelocity = -self.yvelocity
            self.angle = math.atan2(self.yvelocity, self.xvelocity)
            self.fangle = math.degrees(self.angle) + 90

        # 如果球的y坐标小于等于屏幕高度和球的半径的差,则调整球的y轴运行方向朝下
        if self.ypos <= 0:
            self.yvelocity = abs(self.yvelocity)
            self.angle = math.atan2(self.yvelocity, self.xvelocity)
            self.fangle = math.degrees(self.angle) + 90

        # 如果球的x坐标大于等于屏幕宽度和球的半径差,则调整球的运行x轴方向朝左
        if self.xpos >= self.scrnwidth-self.height:
            self.xvelocity = -self.xvelocity
            self.angle = math.atan2(self.yvelocity, self.xvelocity)
            self.fangle = math.degrees(self.angle) + 90

        # 如果球的x坐标小于等于屏幕宽度和球半径的差,则调整球的运行x轴方向朝右
        if self.xpos <= 0:
            self.xvelocity = abs(self.xvelocity)
            self.angle = math.atan2(self.yvelocity, self.xvelocity)
            self.fangle = math.degrees(self.angle) + 90

        self.planed = pygame.transform.rotate(self.plane, -(self.fangle))
        self.newRect = self.plane.get_rect(center=(self.xpos,self.ypos))
        self.screen.blit(self.planed,self.newRect)

class Pao:
    def __init__(self,screen):
        self.start = (100,700)
        self.end = None
        self.screen = screen
        self.count = 0
        self.bullet_list = []
        self.score = 0
        self.font = pygame.font.Font(r'C:\Windows\Fonts\simsun.ttc', 16)

    def getpos(self,pos2,r):
        self.angle = math.atan2( pos2[1]-self.start[1],pos2[0]-self.start[0])
        self.fangle = math.degrees(self.angle)
        self.x = self.start[0]+r*math.cos(self.angle)
        self.y = self.start[1]+r*math.sin(self.angle)
        self.r = r
        self.end = pos2

    def move(self):
        pygame.draw.line(self.screen, (255, 0, 0), self.start, (self.x,self.y), 5)
        pygame.draw.circle(self.screen,(0,255,0),self.start,15)
        text1 = self.font.render('score:%s' % self.score, True, (255, 255, 0))
        self.screen.blit(text1, (45, 15))

        if self.count % 30 == 19:
            self.bullet_list.append(Bullet(self.x,self.y,self.fangle,self.screen,self.angle))
        self.count += 1
        for bullet in self.bullet_list:
            if bullet.alive is False:
                self.bullet_list.remove(bullet)
            else:
                bullet.move()

class Bullet:
    def __init__(self,x,y,fangle,screen,angle):
        self.posx = x
        self.posy = y
        self.fangle = fangle
        self.angle = angle
        self.alive = True
        self.screen = screen
        self.bullet = pygame.image.load('bullet2.png').convert_alpha()
        self.r = random.randint(5,10)
        self.newRect = None

    def move(self):
        self.planed = pygame.transform.rotate(self.bullet, -(self.fangle))
        self.posx += self.r * math.cos(self.angle)
        self.posy +=  self.r * math.sin(self.angle)
        if self.posy > 700 or self.posy < 0 or self.posx < 0 or self.posx > 800:
            self.alive = False
        self.newRect = self.bullet.get_rect(center=(self.posx, self.posy))
        if self.alive:
            self.screen.blit(self.planed, self.newRect)


if __name__ == '__main__':
    pygame.init()
    screen = pygame.display.set_mode((800, 700))
    pao = Pao(screen)
    plane_list = []
    for i in range(2):
        plane_list.append((Plane('enemy.png',screen)))
    fCount = 0

    clock = pygame.time.Clock()
    plane = random.choice(plane_list)
    while True:
        for event in pygame.event.get():
            if event.type == pygame.QUIT:
                pygame.quit()
                sys.exit()
        clock.tick(200)
        screen.fill((0, 0, 0))
        pao.getpos((plane.xpos, plane.ypos), 35)
        pao.move()
        for plane in plane_list:
            plane_rect = plane.newRect
            for bullet in pao.bullet_list:
                try:
                    if plane_rect.colliderect(bullet.newRect):
                        bullet.alive = False
                        plane.alive = False
                        pao.score += 1
                        plane = random.choice(plane_list)
                        print('1')
                except:
                    pass
            if plane.alive:
                plane.move_ball()
            else:
                plane.destroy(fCount, screen)

        fCount += 1

        pygame.display.update()
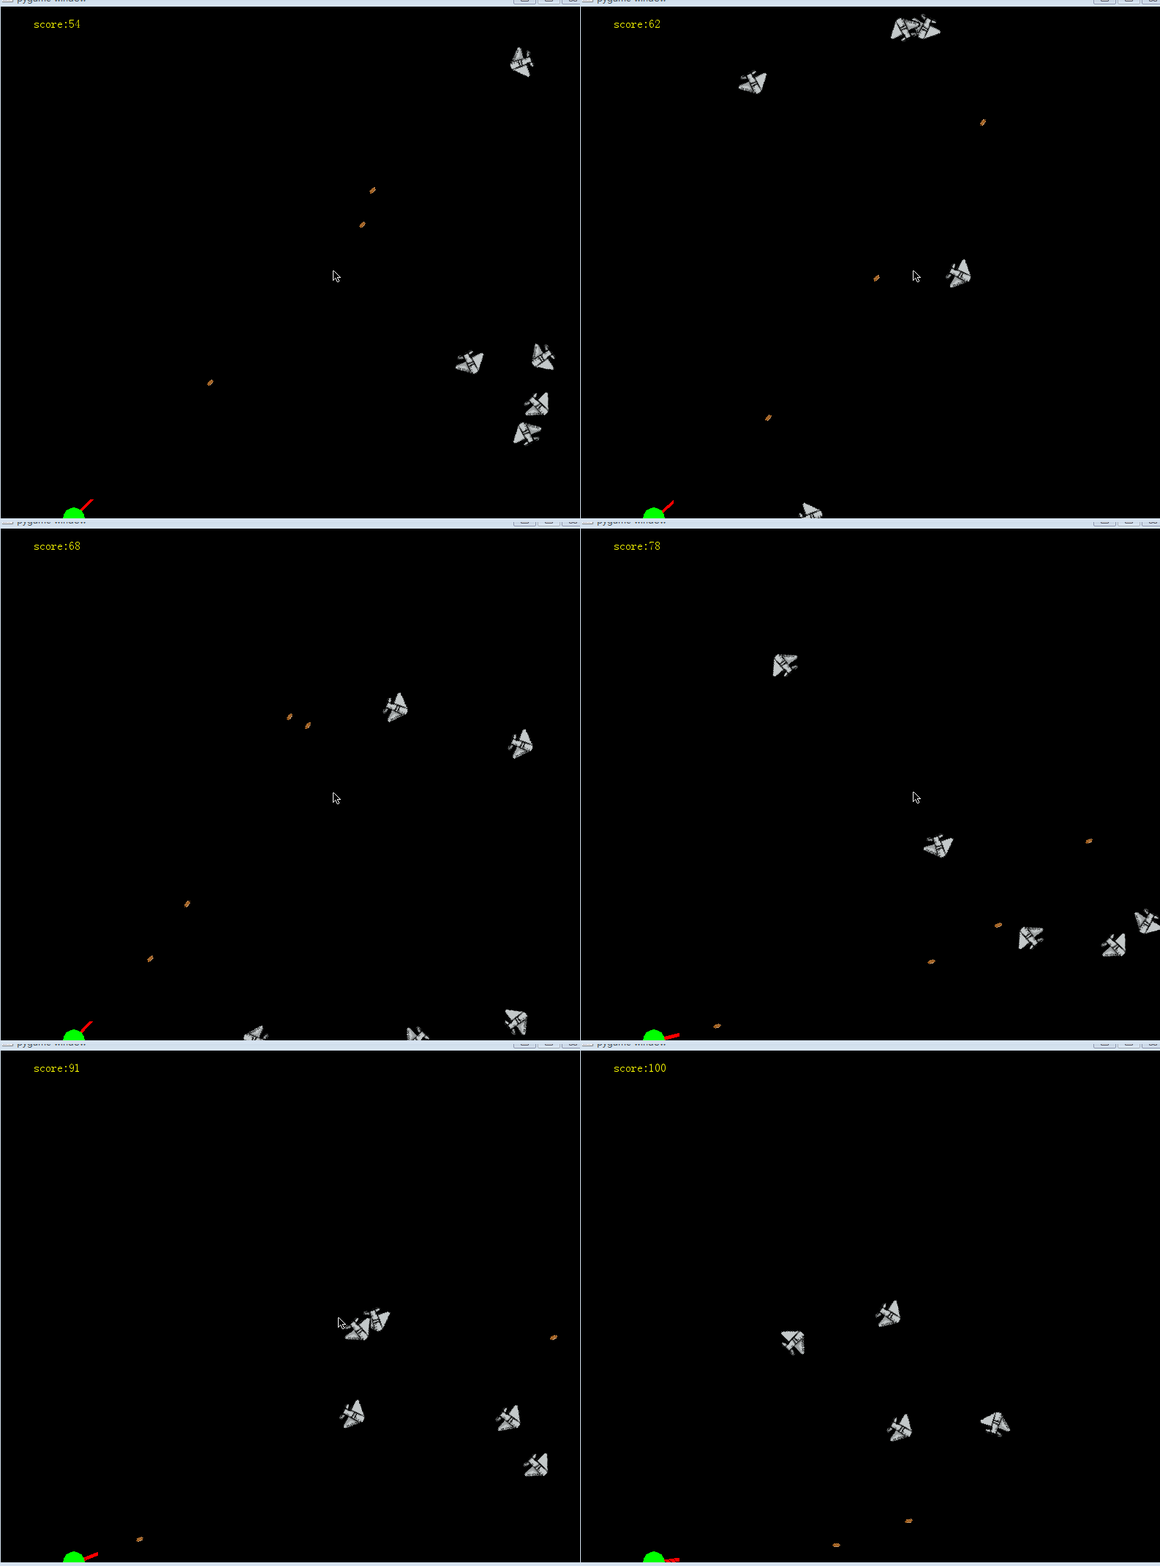
六、运行效果

写完,比心!
到此这篇关于Python趣味挑战之用pygame实现飞机塔防游戏的文章就介绍到这了,更多相关pygame实现飞机塔防游戏内容请搜索脚本之家以前的文章或继续浏览下面的相关文章希望大家以后多多支持脚本之家!
相关文章

pandas将多个dataframe以多个sheet的形式保存到一个excel文件中
这篇文章主要介绍了pandas将多个dataframe以多个sheet的形式保存到一个excel文件中,文中通过示例代码介绍的非常详细,对大家的学习或者工作具有一定的参考学习价值,需要的朋友们下面随着小编来一起学习学习吧2019-10-10
Python 用matplotlib画以时间日期为x轴的图像
这篇文章主要介绍了Python 用matplotlib画以时间日期为x轴的图像,文中通过示例代码介绍的非常详细,对大家的学习或者工作具有一定的参考学习价值,需要的朋友们下面随着小编来一起学习学习吧2019-08-08


最新评论