Vue实现登陆跳转
更新时间:2021年07月19日 15:08:33 作者:前端开发二月半
这篇文章主要为大家详细介绍了Vue实现登陆跳转,文中示例代码介绍的非常详细,具有一定的参考价值,感兴趣的小伙伴们可以参考一下
本文实例为大家分享了Vue实现登陆跳转的具体代码,供大家参考,具体内容如下
不说废话,先上效果图~
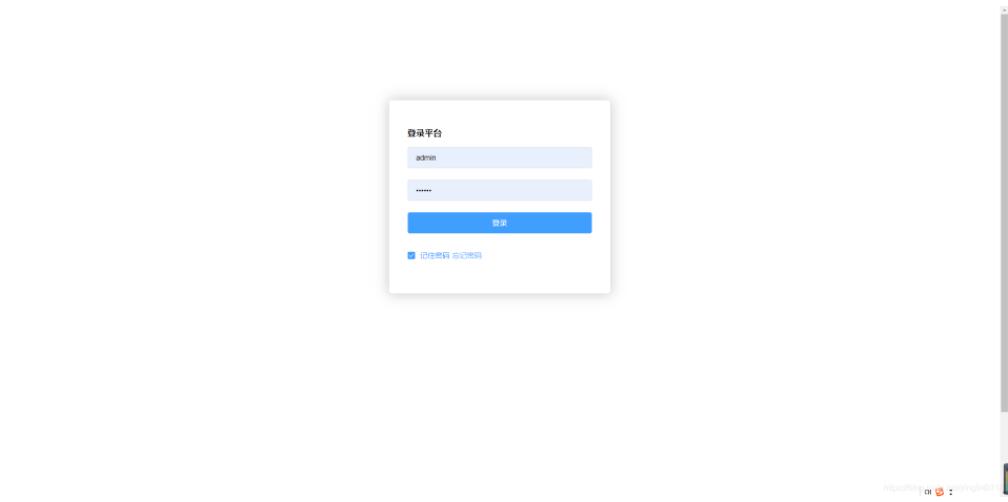
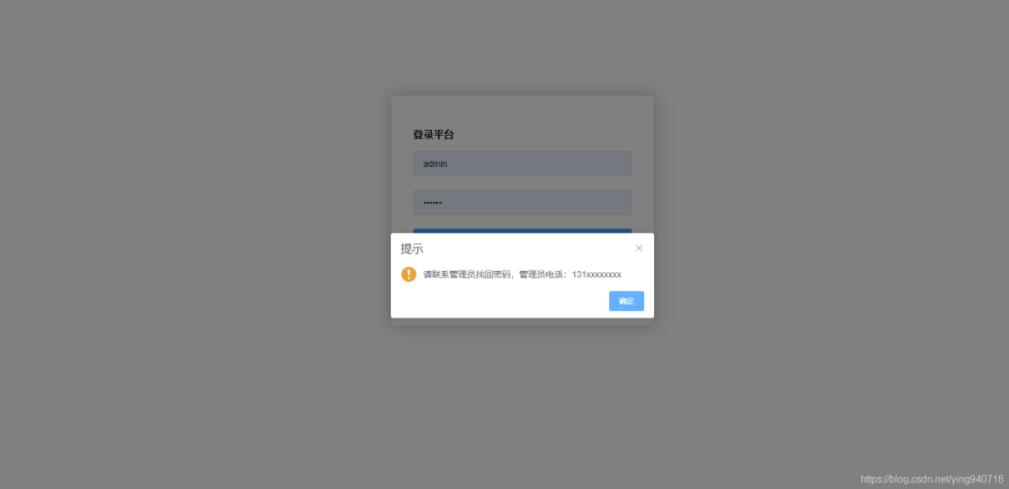
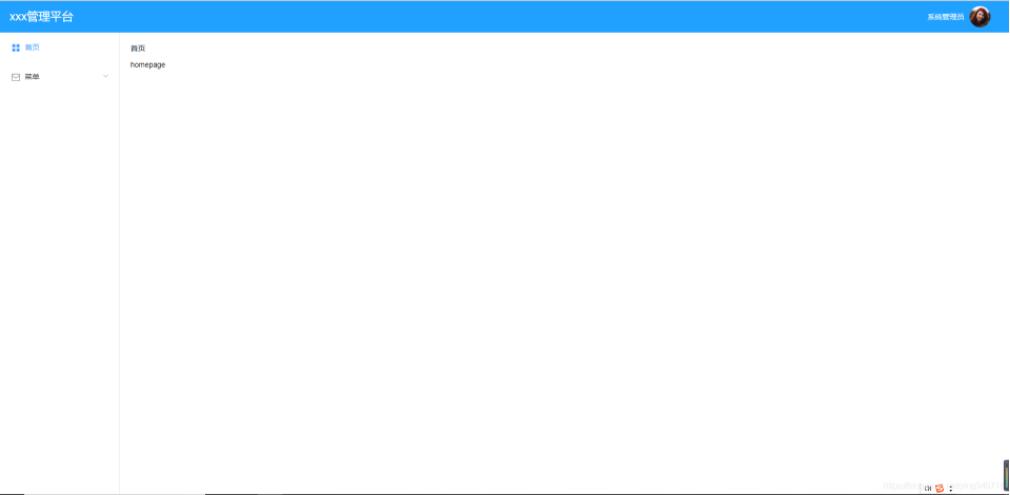
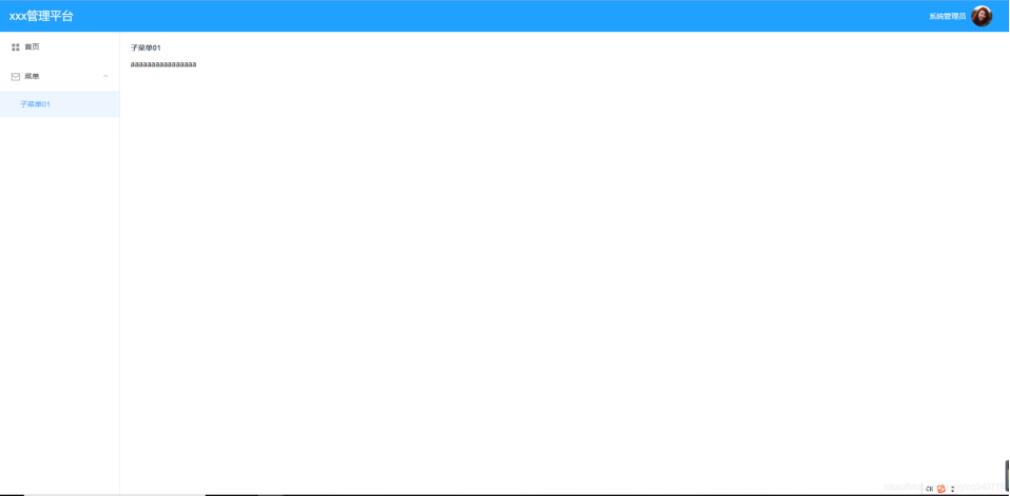
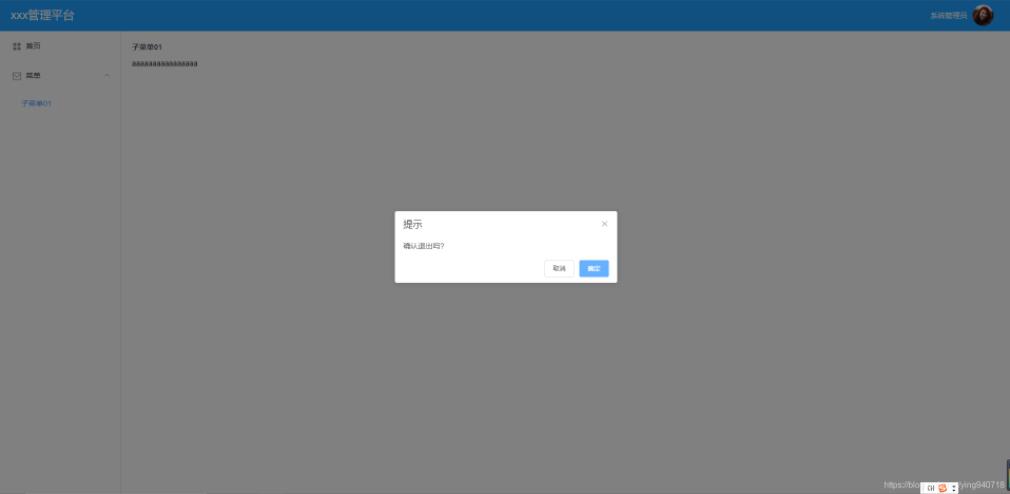
具体的实现方法,参照以下步骤~
1.创建login.vue,绘制login画面,添加跳转事件。
<template>
    <div class="login-container">
        <el-form :model="ruleForm2" :rules="rules2"
         status-icon
         ref="ruleForm2"
         label-position="left"
         label-width="0px"
         class="demo-ruleForm login-page">
            <h3 class="title">登录平台</h3>
            <el-form-item prop="username">
                <el-input type="text"
                    v-model="ruleForm2.username"
                    auto-complete="off"
                    placeholder="用户名"></el-input>
            </el-form-item>
            <el-form-item prop="password">
                <el-input type="password"
                    v-model="ruleForm2.password"
                    auto-complete="off"
                    placeholder="密码"></el-input>
            </el-form-item>
            <el-form-item style="width:100%;">
                <el-button type="primary" style="width:100%;" @click="handleSubmit" :loading="logining">登录</el-button>
            </el-form-item>
            <el-form-item >
                <el-checkbox
                    v-model="checked"
                    class="rememberme">记住密码</el-checkbox>
                <el-button type="text" @click="forgetpassword">忘记密码</el-button>
            </el-form-item>

        </el-form>
    </div>

</template>

<script>
  import { requestLogin } from '../api/api';
  export default {
    data() {
      return {
        logining: false,
        ruleForm2: {
        },
        rules2: {
          account: [
            { required: true, message: '请输入账号', trigger: 'blur' },
          ],
          checkPass: [
            { required: true, message: '请输入密码', trigger: 'blur' },
          ]
        },
        checked: true
      };
    },
    methods: {
      handleReset2() {
        this.$refs.ruleForm2.resetFields();
      },
      handleSubmit(ev) {
        this.$refs.ruleForm2.validate((valid) => {
          if (valid) {
            this.logining = true;
            var loginParams = { username: this.ruleForm2.username, password: this.ruleForm2.password, identifycode: this.ruleForm2.identifycode };
            requestLogin(loginParams).then(data => {
              this.logining = false;
              let { msg, code, user } = data;
              if (code !== 200) {
                this.$message({
                  message: msg,
                  type: 'error'
                });
              } else {
                if (user.type === "admin"){
                    sessionStorage.setItem('user', JSON.stringify(user));
                    this.$router.push({ path: '/homepage' });
                } else if (user.type === "advert") {
                    sessionStorage.setItem('user', JSON.stringify(user));
                    this.$router.push({ path: '/table' });
                }
              }
            });
          } else {
            console.log('error submit!!');
            return false;
          }
        });
      },
      forgetpassword(){
          this.$alert('请联系管理员找回密码,管理员电话:131xxxxxxxx', '提示', {
          confirmButtonText: '确定',
          type: 'warning'
        })
      }
    }
  }
</script>

<style scoped>
    label.el-checkbox.rememberme {
        margin: 0px 0px 15px;
        text-align: left;
    }
    label.el-button.forget {
        margin: 0;
        padding: 0;
        border: 1px solid transparent;
        outline: none;
    }
</style>
2.创建Home.vue菜单栏页面
<template>
    <el-row class="container">
        <el-col :span="24" class="header">
   <el-col :span="18" class="logo" >
                {{sysName}}
   </el-col>
   <el-col :span="4" class="userinfo">
    <el-dropdown trigger="hover">
     <span class="el-dropdown-link userinfo-inner"><img :src="this.sysUserAvatar" /> {{sysUserName}}</span>
     <el-dropdown-menu slot="dropdown">
      <el-dropdown-item>我的消息</el-dropdown-item>
      <el-dropdown-item>设置</el-dropdown-item>
      <el-dropdown-item @click.native="logout">退出登录</el-dropdown-item>
     </el-dropdown-menu>
    </el-dropdown>
   </el-col>
  </el-col>
        <el-col :span="24" class="main">
            <aside>
                <el-menu :default-active="$route.path" class="el-menu el-menu-vertical-demo" @select="handleselect"
                        unique-opened router >
                        <template v-for="(item,index) in $router.options.routes" v-if="!item.hidden">
      <el-submenu :index="index+''" v-if="!item.leaf">
       <template slot="title"><i :class="item.iconCls"></i>{{item.name}}</template>
       <el-menu-item v-for="child in item.children" :index="child.path" :key="child.path" v-if="!child.hidden">{{child.name}}</el-menu-item>
      </el-submenu>
      <el-menu-item v-if="item.leaf&&item.children.length>0" :index="item.children[0].path"><i :class="item.iconCls"></i>{{item.children[0].name}}</el-menu-item>
     </template>
                </el-menu>
            </aside>
   <section class="content-container">
    <div class="grid-content bg-purple-light">
     <el-col :span="24" class="breadcrumb-container">
      <strong class="title">{{$route.name}}</strong>
     </el-col>
     <el-col :span="24" class="content-wrapper">
      <transition name="fade" mode="out-in">
       <router-view></router-view>
      </transition>
     </el-col>
    </div>
   </section>
  </el-col>
    </el-row>
</template>

<script>
export default {
    data() {
   return {
    sysName:'xxx管理平台',
    sysUserName: '',
    sysUserAvatar: '',
    form: {
     name: '',
     region: '',
     date1: '',
     date2: '',
     delivery: false,
     type: [],
     resource: '',
     desc: ''
    }
   }
        },
    methods: {
   //退出登录
   logout: function () {
    var _this = this;
    this.$confirm('确认退出吗?', '提示', {
     //type: 'warning'
    }).then(() => {
     sessionStorage.removeItem('user');
     _this.$router.push('/login');
    }).catch(() => {

    });
   }
  },
    mounted() {
   var user = sessionStorage.getItem('user');
   if (user) {
    user = JSON.parse(user);
    this.sysUserName = user.name || '';
    this.sysUserAvatar = user.avatar || '';
   }

  }
}
</script>

<style scoped lang="scss">
@import '../style/vars.scss';

    .container {
  position: absolute;
  top: 0px;
  bottom: 0px;
  width: 100%;
    }
    .header {
   height: 60px;
            line-height: 60px;
   background: $color-primary;
   color:#fff;
   .userinfo {
    text-align: right;
    padding-right: 35px;
    float: right;
    .userinfo-inner {
     cursor: pointer;
     color:#fff;
     img {
      width: 40px;
      height: 40px;
      border-radius: 20px;
      margin: 10px 0px 10px 10px;
      float: right;
     }
    }
   }
   .logo {
    height:60px;
    font-size: 22px;
    padding-left:20px;
    img {
     width: 40px;
     float: left;
     margin: 10px 10px 10px 0px;
    }
    .txt {
                    color:#fff;
    }
   }
   .logo-width{
    width:230px;
   }
   .logo-collapse-width{
    width:60px
   }
   .title{
                font-size: 22px;
    padding-left:20px;
    line-height: 60px;
    color:#fff;
   }
        }
    .main {
   display: flex;
   position: absolute;
   top: 60px;
   bottom: 0px;
   overflow: hidden;
   aside {
    flex:0 0 230px;
    width: 230px;
    .el-menu{
                    height: 100%;
                    /* width: 34%; */
    }
   }
   .content-container {
    flex:1;
    /* overflow-y: scroll; */
    padding: 20px;
    .breadcrumb-container {
     .title {
      width: 200px;
      float: left;
      color: #475669;
     }
     .breadcrumb-inner {
      float: right;
     }
    }
    .content-wrapper {
     background-color: #fff;
     box-sizing: border-box;
    }
   }
  }
</style>
3.制作子页面
<template>
   <p> homepage</p>
</template>
4.路由配置
import Login from './views/Login.vue'
import Home from './views/Home.vue'
import Homepage from './views/list/homepage.vue'
import Table from './views/list/Table.vue'

let routes = [
    {
        path: '/login',
        component: Login,
        name: '',
        hidden: true
    },
    {
        path: '/',
        component: Home,
        name: '',
        leaf: true,//只有一个节点
        iconCls: 'el-icon-menu', //图标样式class
        children: [
            { path: '/homepage', component: Homepage, name: '首页' },
        ]
    },
    {
        path: '/',
        component: Home,
        name: '菜单',
        // leaf: true,//只有一个节点
        iconCls: 'el-icon-message', //图标样式class
        children: [
            { path: '/table', component: Table, name: '子菜单01' }
        ]
    }
];

export default routes;
5.main.js实现
// The Vue build version to load with the `import` command
// (runtime-only or standalone) has been set in webpack.base.conf with an alias.
import Vue from 'vue'
import App from './App'
import VueRouter from 'vue-router'
import routes from './routes'
import Vuex from 'vuex'
import store from './vuex/store'
import ElementUI from 'element-ui'
import 'element-ui/lib/theme-chalk/index.css'
import Mock from './mock'
Mock.bootstrap();
import './style/login.css'

/* Vue.use(VueAxios, axios) */
Vue.use(ElementUI)
Vue.use(VueRouter)
Vue.use(Vuex)
Vue.config.productionTip = false

const router = new VueRouter({
  routes
})

router.beforeEach((to, from, next) => {
  //NProgress.start();
  if (to.path == '/login') {
    sessionStorage.removeItem('user');
  }
  let user = JSON.parse(sessionStorage.getItem('user'));
  if (!user && to.path != '/login') {
    next({ path: '/login' })
  } else {
    next()
  }
})

new Vue({
  router,
  store,
  render: h => h(App)
}).$mount('#app')
这样一个登陆画面就实现了,具体的源码可以参照:Vue实现登陆跳转
以上就是本文的全部内容,希望对大家的学习有所帮助,也希望大家多多支持脚本之家。
相关文章

vue+echarts+datav大屏数据展示及实现中国地图省市县下钻功能
这篇文章主要介绍了vue+echarts+datav大屏数据展示及实现中国地图省市县下钻,本文通过实例代码给大家介绍的非常详细,对大家的学习或工作具有一定的参考借鉴价值,需要的朋友可以参考下2020-11-11
解析vue 3.0 使用axios库发起 post get 的配置过程
get post 请求开发中最普通最常见的请求方式但是在vue中如何实现呢 这里记录一下配置过程,对vue 使用axios发起 post get配置过程感兴趣的朋友一起看看吧2022-05-05
Vue中 v-if/v-show/插值表达式导致闪现的原因及解决办法
在开发过程中经常会发现当页面明明不应该出现的元素或内容会闪现一下然后消失,这篇文章给大家分享Vue中 v-if/v-show/插值表达式导致闪现的原因及解决办法,一起看看吧2018-10-10


最新评论