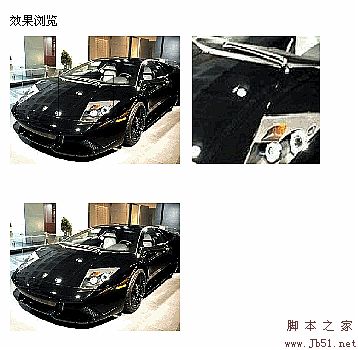
javascript 放大镜 v1.0 基于Yui2 实现的放大镜效果
更新时间:2010年03月08日 18:00:12 作者:
javascript 放大镜 v1.0 基于Yui2 实现的放大镜效果代码。

v1.0实现功能
1 放大倍数设置
2 透明度设置
3 反转特效
4 放大图片层的大小自定义
5 鼠标层的大小自定义
6 ie6下select遮盖问题
7 光标样式自定义
8 zIndex设置
简单初始化方法举例
复制代码 代码如下:
new flower.init("Demo","mag");
new flower.init("Demo1","mag1",{
max:3,zoomType:false,zoomWidth:200,zoomHeight:200,iframe:true,zIndex:666,cursor:"row-resize"
});
代码讲解
复制代码 代码如下:
defaultConfig={
/**
* 放大镜的倍数
* @type Number
*/
max:3,
/**
* *放大镜鼠标移动层的透明度
* @type Number
*/
opacity:0.5,
/**显示效果 false为默认,true为反色效果
* @type Boolean
*/
zoomType:false,
/**显示动画
* @type String
*/
showEffect:'fadein',
/**放大层的宽度
* @type Number
*/
zoomWidth:'auto',
/**放大层的高度
* @type Number
*/
zoomHeight:'auto',
/**鼠标层的宽度
* @type Number
*/
tipsWidth:'auto',
/**鼠标层的高度
* @type Number
*/
tipsHeight:'auto',
/**iframe遮盖select
* @type Boolean
*/
iframe:false,
/**iframe zIndex
* @type Number
*/
zIndex:999,
/**光标样式
* @type String
*/
cursor:"auto"
};
组件默认的参数配置,包括放大倍数,宽度,高度,透明度等的设置
2 定义属性
复制代码 代码如下:
namespace.init=function(content,mag,config){
/**
* 原始图片容器
* @type HTMLElement
*/
this.content=D.get(content);
/**
* 放大图片容器
* @type HTMLElement
*/
this.mag=D.get(mag);
/**
* 原始图片
* @type HTMLElement
*/
this.imgsource=this.content.getElementsByTagName("img")[0];
/**
* 放大图片
* @type HTMLElement
*/
this.img=this.mag.getElementsByTagName("img")[0];
/**
* 鼠标layer
* @type HTMLElement
*/
this.tips=this.content.getElementsByTagName("div")[0];
/**
* 配置参数
* @type this.tipsect
*/
this.config=L.merge(defaultConfig,config||{});
/*初始化*/
this._init();
};
init函数接受三个实参 原图的容器id,和放大后的图片容器id和配置参数 (装firebug的同学可以看下代码结构)
this.config=L.merge(defaultConfig,config||{});
这句话是后面的对象的属性覆盖前面的对象的属性,并返回
如 this.config=L.merge({"a":"aa"},{"a":"bb"});
此时的this.config.a == "bb"
config||{}
如果config不存在,则返回空的对象自变量
原型初始化方法
代码
复制代码 代码如下:
_init:function(){
var self=this;
/*赋值src给大图*/
this.img.src=this.imgsource.src;
/*get边框长度*/
this.borderwidth=this.imgsource.offsetWidth - this.imgsource.clientWidth;
/**
* 设置大图片的宽度和高度 (X倍数)
* 设置大图容器的宽高和位置
* 设置鼠标跟随层的宽高和透明度
*/
this.pi=(this.config.zoomWidth!='auto'?this.config.zoomWidth/this.imgsource.offsetWidth:1)
this.pi2=(this.config.zoomHeight!='auto'?this.config.zoomHeight/this.imgsource.offsetHeight:1)
this._css(this.img,{
'position':'absolute',
'width':(this.config.zoomWidth!='auto' ?this.imgsource.offsetWidth*this.config.max*this.pi:this.imgsource.offsetWidth*this.config.max)+"px",
'height':(this.config.zoomHeight!='auto' ?this.imgsource.offsetHeight*this.config.max*this.pi2:this.imgsource.offsetHeight*this.config.max)+"px"
})._css(this.mag,{
'width':(this.config.zoomWidth!='auto' ? this.config.zoomWidth:this.imgsource.offsetWidth)+"px",
'height':(this.config.zoomHeight!='auto'?this.config.zoomHeight:this.imgsource.offsetHeight)+"px",
'left':D.getX(this.content)+this.imgsource.offsetWidth+10+"px",
'top':this.content.offsetTop+"px",
'position' : 'absolute',
"zIndex":this.config.zIndex
})._css(this.tips,{
'display':'',
'width':(this.config.tipsWidth!='auto' ? this.config.tipsWidth: parseInt(this.imgsource.offsetWidth / this.config.max)- this.borderwidth)+"px",
'height' : (this.config.tipsHeight!='auto' ? this.config.tipsHeight: parseInt(this.imgsource.offsetHeight / this.config.max) - this.borderwidth )+ 'px',
'opacity' : this.config.opacity
})
E.on(this.content,'mousemove',function(e){
self._css(self.mag,{"display":"block"})._css(self.tips,{"display":"block"})._move(e,self.tips)
})
E.on(this.content,'mouseout',function(e){
self._css(self.tips,{"display":"none"})._css(self.mag,{"display":"none"});
})
!!this.config.zoomType && E.on(self.tips,'mouseout',function(e){
self._css(self.imgsource,{"opacity":1});
self.tips.getElementsByTagName("img")[0] && self.tips.removeChild(self.tips.getElementsByTagName("img")[0]);
})
if(ie6 && !!this.config.iframe){
this._createIframe(this.mag);
}
D.setStyle(this.content,"cursor",this.config.cursor);
},
组件的初始化原代码
默认鼠标跟随的层和大图是隐藏的
1.把图片的链接赋值给将要放大显示的图片。
2. 如有自定义zoomWidth或zoomHeight大小的时候,设置 this.pi 宽比 和this.pi2 高比 (为与实际图片大小间的比值)
3.设置大图的宽度和高度
4. 设置大图容器的宽高和位置
5.设置鼠标层的位置和宽高和透明度
6 给原图容器增加mousemove事件
7. 给原图容器增加mouseout事件
8 反色特效后,还原透明度,并删除用来实现效果的 Dom (在鼠标层结构内用appendChild一个img元素)
9 ie6 创建iframe 用来遮挡的select。(默认情况下在无iframe的时候,ie6会被select挡住,无法用zIndex来修正 )
10 设置光标样式
style设置的方法
复制代码 代码如下:
_css:function(el,json){
for(var s in json){
D.setStyle(el,s,json[s]);
}
return this;
},
Yui有提供自己的 设置Dom样式的方法 D.setStyle(dom,style属性名,属性的值);
用 for (var s in json) 来遍历 json对象的所有属性
return this; 常用的链式调用写法 // this._css(/**/)._css(/**/) ._css(/**/) ……
核心mousemove事件代码
复制代码 代码如下:
_move:function(e,tips){
var point=E.getXY(e);
/**
* 提示层位置
* 大图显示位置
*/
this._css(tips,{
'top' : Math.min(Math.max(point[1] - this.content.offsetTop-parseInt(tips.offsetHeight)/2 ,0),this.content.offsetHeight - tips.offsetHeight) + 'px',
'left' : Math.min(Math.max(point[0] - this.content.offsetLeft-parseInt(tips.offsetWidth)/2 ,0),this.content.offsetWidth - tips.offsetWidth) + 'px'
})._css(this.img,{
'top':-(parseInt(tips.style.top) * this.config.max *this.pi2) + 'px',
'left' : - (parseInt(tips.style.left) * this.config.max *this.pi) + 'px'
});
/**
* 反色效果
*/
if(!!this.config.zoomType){
if(!tips.getElementsByTagName("img").length){
var imgs=document.createElement("img");
imgs.id='temp';
imgs.src=this.imgsource.src;
this._css(imgs,{
'width':this.imgsource.offsetWidth+"px",
'height':this.imgsource.offsetHeight+"px",
'position':'absolute'
});
tips.appendChild(imgs);
this.imgs=imgs;
}
this._css(this.imgsource,{
"opacity":0.2
})._css(this.tips,{
"opacity":1,
"visibility":"visible"
})._css(D.get("temp"),{
'top':-(parseInt(tips.style.top))+"px",
'left':-(parseInt(tips.style.left))+"px"
})
}
},
提示层位置的移动 鼠标位置X轴 - this.offsetLeft - 鼠标框宽度/2
并用Math.max和Math.min,不让鼠标框超出tuxiang
大图位置的移动=小图的位置 X 放大倍数 X 宽比(默认为1)
反色效果是在jquery的一个插件上看到的 没有看他的代码 看了下他dom结构 应该和我这种实现方式是一样的
设置原图的透明度为0.2 这样就变灰色了 然后设置鼠标层透明为1,也就是不透明.层内是一个图片 和 imgsource的地址是一样的
这图片的父元素position也是absolute,所以我们要实时设置top和left值来定位鼠标层的图片
创建iframe
复制代码 代码如下:
_createIframe:function(el){
var layer = document.createElement('iframe');
layer.tabIndex = '-1';
layer.src = 'javascript:false;';
el.appendChild(layer);
this._css(layer,{
"width":(this.config.zoomWidth!='auto' ? this.config.zoomWidth:this.imgsource.offsetWidth)+"px",
"height":(this.config.zoomHeight!='auto'?this.config.zoomHeight:this.imgsource.offsetHeight)+"px",
"zIndex":this.config.zIndex
})
}
iframe元素的宽高和zIndex的设置,配置参数设置iframe:true并在ie6下 才会创建,在其他浏览器下设置true也不会创建,因为没有必要
代码改进中
1 增加特效的插件机制
2 优化设定宽高值表达式的代码 感觉太长太臃肿
3 增加图片预载
4 增加回调函数接口
5 增加className,让用户可自定义
6 等等(...)
地址打包下载 :放大镜
相关文章

解决extjs在firefox中关闭窗口再打开后iframe中js函数访问不到的问题
最近做ext时遇到一个问题,在firefox中浏览ext应用,加载后第一次打开一个嵌入iframe的Window时,可以直接通过js代码来执行 iframe中的js函数,但是如果将窗口关闭后重新再打开,将会抛出异常,说是funcName is not a function2008-11-11
学习YUI.Ext 第六天--关于树TreePanel(Part 2异步获取节点)
学习YUI.Ext 第六天--关于树TreePanel(Part 2异步获取节点)...2007-03-03


最新评论