iOS中多线程的入门使用教程(Swift)
一、iOS的三种多线程技术
1、NSThread
–优点:NSThread 比其他两个轻量级,使用简单
–缺点:需要自己管理线程的生命周期、线程同步、加锁、睡眠以及唤醒等。线程同步对数据的加锁会有一定的系统开销
2、NSOperation
不需要关心线程管理,数据同步的事情,可以把精力放在自己需要执行的操作上
3、GCD
基于C语言的
二、基本使用
NSThread的基本使用
方式一:
//        block
        let thread =  Thread.init {
                print("1、----this is thread \(Thread.current) ")
        }
        thread.start()
方式二:
//        SEL
        let thread2 = Thread.init(target: self, selector: #selector(text), object: nil)
        thread2.start()
    @objc func text(){
        print("2、----this is thread \(Thread.current) ")
    }
方式三:\
self.performSelector(inBackground: #selector(text2), with: nil)
输出

tips:可以给任意一个线程增加延迟看看
   print(thread.isCancelled)//是否取消
   print(thread.isExecuting)//是否在执行
   print(thread.isFinished)//是否完成
   print(thread.isMainThread)//是否是主线程
NSOperation的基本使用
方式一:
      let queue = OperationQueue.init()
//     最大线程数
        queue.maxConcurrentOperationCount = 2
        queue.addOperation {
            sleep(1)
            print("1111")
        }
        queue.addOperation {
            print("2222")
        }
输出结果如下:

方式二:可设置优先级
        let queue = OperationQueue.init()
      	let op =  BlockOperation.init {
            print("op")
        }
        op.queuePriority = .normal //设置优先级
        queue.addOperation(op)
        let op2 = BlockOperation.init {
            print("op2")
        }
        op2.queuePriority = .normal
        queue.addOperation(op2)

        queue.addOperation {
            print("op3")
        }

略作修改
        let queue = OperationQueue.init()
        let op =  BlockOperation.init {
            sleep(1)
            print("op")
        }
        op.queuePriority = .normal //设置优先级
        queue.addOperation(op)
        let op2 = BlockOperation.init {
            sleep(1)
            print("op2")
        }
        op2.queuePriority = .veryHigh
        queue.addOperation(op2)

        queue.addOperation {
            print("op3")
        }
输出如下:

优先级如下:

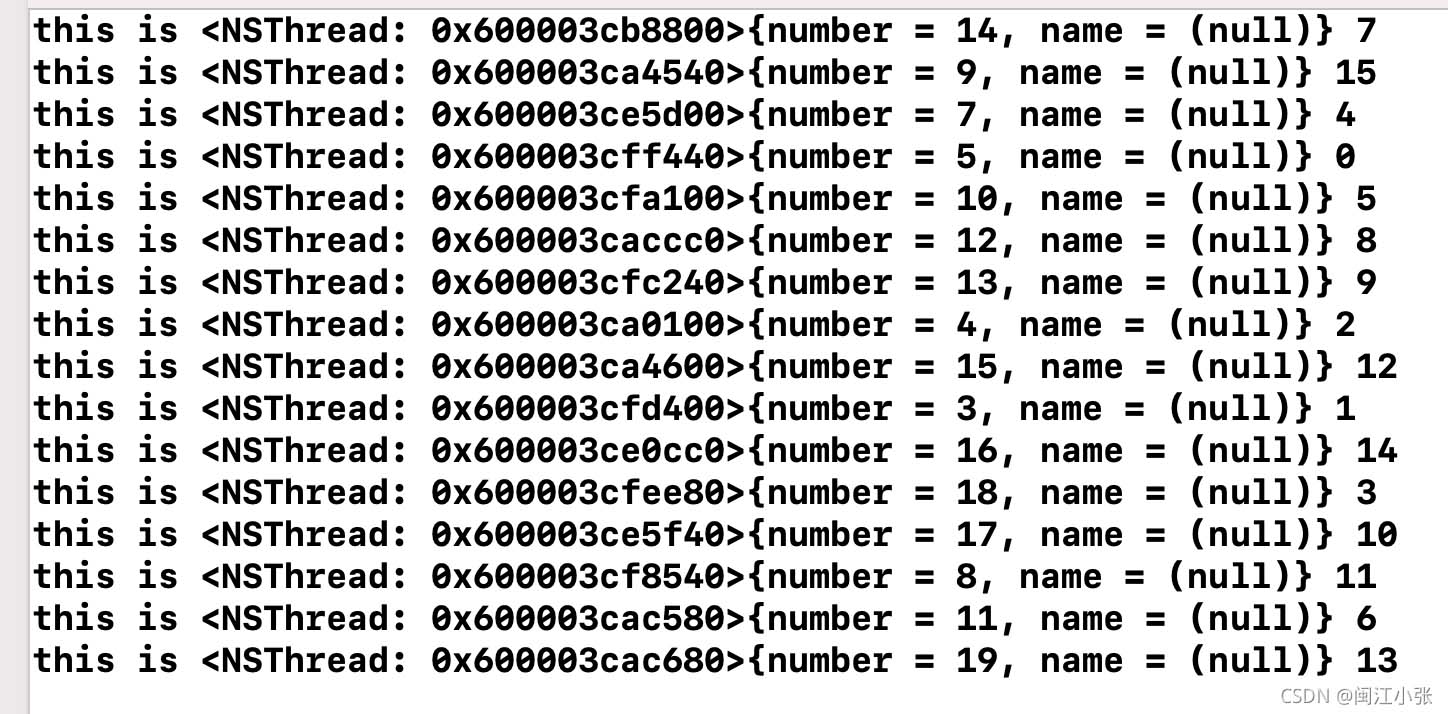
GCD的基本使用
方式一:queue.async 异步
   let queue =   DispatchQueue.init(label: "com.zjb.concurrent",attributes: .concurrent)
        for i in 0...15 {
            queue.async {
                sleep(1)
                print("this is \(Thread.current) \(i)")
            }
        }

方式二:queue.sync 同步
  let queue =   DispatchQueue.init(label: "com.zjb.concurrent",attributes: .concurrent)
        for i in 0...15 {
            queue.sync {
                sleep(1)
                print("this is \(Thread.current) \(i)")
            }
        }

附加网络上一段代码
        for i in 1...10 {
               DispatchQueue.global(qos: DispatchQoS.QoSClass.default).async {
                   NSLog("DispatchQoS.QoSClass.default, %d", i)
               }

               DispatchQueue.global(qos: DispatchQoS.QoSClass.background).async {
                   NSLog("DispatchQoS.QoSClass.background, %d", i)
               }

               DispatchQueue.global(qos: DispatchQoS.QoSClass.unspecified).async {
                   NSLog("DispatchQoS.QoSClass.unspecified, %d", i)
               }

               DispatchQueue.global(qos: DispatchQoS.QoSClass.userInitiated).async {
                   NSLog("DispatchQoS.QoSClass.userInitiated, %d", i)
               }

               DispatchQueue.global(qos: DispatchQoS.QoSClass.userInteractive).async {
                   NSLog("DispatchQoS.QoSClass.userInteractive, %d", i)
               }

               DispatchQueue.global(qos: DispatchQoS.QoSClass.utility).async {
                   NSLog("DispatchQoS.QoSClass.utility, %d", i)
               }
        }
优先级userInteractive最高、background最低
总结
到此这篇关于iOS中多线程入门使用的文章就介绍到这了,更多相关iOS多线程使用内容请搜索脚本之家以前的文章或继续浏览下面的相关文章希望大家以后多多支持脚本之家!
相关文章

iOS中的音频服务和音频AVAudioPlayer音频播放器使用指南
这里我们要介绍的是AVAudio ToolBox框架中的AudioServicesPlaySystemSound函数创建的服务,特别适合用来制作铃声,下面就简单整理一下iOS中的音频服务和音频AVAudioPlayer音频播放器使用指南:2016-06-06
iOS开发之tableView点击下拉扩展与内嵌collectionView上传图片效果
这篇文章主要介绍了iOS开发之tableView点击下拉扩展与内嵌collectionView上传图片效果的相关资料,需要的朋友可以参考下2016-04-04


最新评论