springboot oauth2实现单点登录实例
我们见过的很多网站,容许使用第三方账号登录,他不需要关注用户信息,只需要用户拿到授权码就可以访问。
oauth2是用来做三方登录的,他的授权方式有好几种,授权码模式、密码模式、隐式模式、客户端模式。
oauth2认证的过程如下:一般我们请求一个需要登录的网站A,会提示我们使用第三方网站C的用户登录,我们登录,这时候需要我们授权,就是authorize,授权之后,会得到一个token,我们拿到这个token就可以访问这个网站A了。A网站不关心C网站的用户信息。
springsecurity结合oauth2可以做这个功能,这里给出一个springboot+security+oauth2的实例,这个实例很直观,就是我们有两个服务A,C,A是需要用户登录的网站,而C是授权服务器。当我们访问A的资源:http://localhost:8000/hello,他会跳到C的服务器上登录,登录完成,授权,就直接调回来A网站,这里使用了单点登录功能。
构建项目:我这里构建了一个父级项目securityoauth2,然后加入了两个模块:auth-server,client-1。
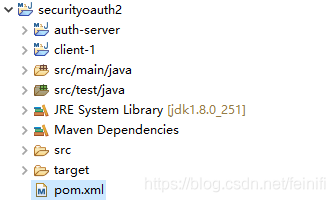
项目依赖:
securityoauth2->pom.xml
<parent>
		<groupId>org.springframework.boot</groupId>
		<artifactId>spring-boot-starter-parent</artifactId>
		<version>2.1.4.RELEASE</version>
	</parent>
  <dependencies>
  	  <dependency>
  	  	<groupId>org.springframework.boot</groupId>
  	  	<artifactId>spring-boot-starter-web</artifactId>
  	  </dependency>
  	  <dependency>
  	  	<groupId>org.springframework.boot</groupId>
  	  	<artifactId>spring-boot-starter-security</artifactId>
  	  </dependency>
  	  <dependency>
  	  	<groupId>org.springframework.security.oauth</groupId>
  	  	<artifactId>spring-security-oauth2</artifactId>
  	  	<version>2.3.4.RELEASE</version>
  	  </dependency>
  	  <dependency>
  		<groupId>org.springframework.security.oauth.boot</groupId>
  		<artifactId>spring-security-oauth2-autoconfigure</artifactId>
  		<version>2.3.2.RELEASE</version>
  	</dependency>
  </dependencies>
  <modules>
  	<module>auth-server</module>
  	<module>client-1</module>
  </modules>
***********auth-server***************************************
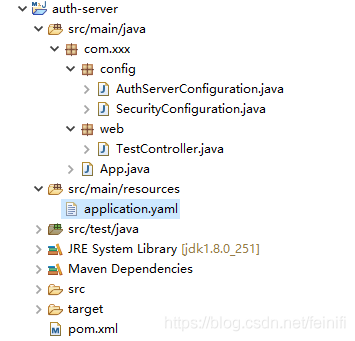
AuthServerConfiguration.java
package com.xxx.config;
import org.springframework.beans.factory.annotation.Autowired;
import org.springframework.context.annotation.Configuration;
import org.springframework.security.crypto.password.PasswordEncoder;
import org.springframework.security.oauth2.config.annotation.configurers.ClientDetailsServiceConfigurer;
import org.springframework.security.oauth2.config.annotation.web.configuration.AuthorizationServerConfigurerAdapter;
import org.springframework.security.oauth2.config.annotation.web.configuration.EnableAuthorizationServer;
@Configuration
@EnableAuthorizationServer
public class AuthServerConfiguration extends AuthorizationServerConfigurerAdapter{
	@Autowired
	private PasswordEncoder passwordEncoder;

	@Override
	public void configure(ClientDetailsServiceConfigurer clients) throws Exception {
		clients.inMemory()
			   .withClient("client")
			   .secret(passwordEncoder.encode("secret"))
			   .autoApprove(true)
			   .redirectUris("http://localhost:8000/login","http://localhost:8001/login")
			   .scopes("user")
			   .accessTokenValiditySeconds(7200)
			   .authorizedGrantTypes("authorization_code");
	}
}
授权服务配置这里,主要设置client_id,以及secret,这里设置了自动授权autoApprove(true),就是我们输入用户名和密码登录之后,不会出现一个需要我们手动点击authorize的按钮进行授权。另外配置了redirect_uri,这个是必须的。最后还设置了授权类型,这里选择的是授权码模式。
SecurityConfiguration.java
package com.xxx.config;
import org.springframework.context.annotation.Bean;
import org.springframework.context.annotation.Configuration;
import org.springframework.core.annotation.Order;
import org.springframework.security.config.annotation.authentication.builders.AuthenticationManagerBuilder;
import org.springframework.security.config.annotation.web.builders.HttpSecurity;
import org.springframework.security.config.annotation.web.configuration.EnableWebSecurity;
import org.springframework.security.config.annotation.web.configuration.WebSecurityConfigurerAdapter;
import org.springframework.security.crypto.bcrypt.BCryptPasswordEncoder;
import org.springframework.security.crypto.password.PasswordEncoder;
@Configuration
@Order(1)
@EnableWebSecurity
public class SecurityConfiguration extends WebSecurityConfigurerAdapter{

	@Bean
	public PasswordEncoder passwordEncoder() {
		return new BCryptPasswordEncoder();
	}

	@Override
	protected void configure(AuthenticationManagerBuilder builder) throws Exception {
		builder.inMemoryAuthentication()
			   .withUser("admin")
			   .password(passwordEncoder().encode("admin"))
			   .roles("admin");
	}

	@Override
	protected void configure(HttpSecurity http) throws Exception {
		http.requestMatchers()
			.antMatchers("/login")
			.antMatchers("/oauth/authorize")
			.and()
			.authorizeRequests().anyRequest().authenticated()
			.and()
			.formLogin()
			.and()
			.csrf().disable();
	}
}
Security是做权限管理的,他需要配置用户和密码,这里采用内存保存的方式,将用户名和密码保存在内存中,而不是数据库或者redis中,关于保存在哪里,对于了解oauth2来说,放在内存是最简单的,省去了建表,做数据库查询的麻烦。
TestController.java
package com.xxx.web;
import java.security.Principal;
import org.springframework.web.bind.annotation.GetMapping;
import org.springframework.web.bind.annotation.RequestMapping;
import org.springframework.web.bind.annotation.RestController;
@RestController
@RequestMapping("/api/test")
public class TestController {
	@GetMapping("/user")
	public Principal currentUser(Principal principal) {
		return principal;
	}
}
这个controller配置,不是用来测试访问他的,而是用来做一个接口,给client-1使用,client-1配置文件中有个配置:security.oauth2.resource.user-info-uri就是配置的这个接口。
App.java
package com.xxx;
import org.springframework.boot.SpringApplication;
import org.springframework.boot.autoconfigure.SpringBootApplication;
import org.springframework.security.oauth2.config.annotation.web.configuration.EnableResourceServer;
@SpringBootApplication
@EnableResourceServer
public class App {
    public static void main( String[] args ){
    	SpringApplication.run(App.class, args);
    }
}
application.yaml //无配置,可以略
***********client-1*********************************************************
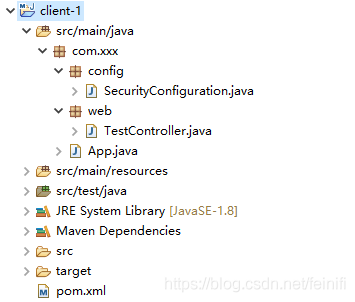
SecurityConfiguration.java
package com.xxx.config;
import org.springframework.boot.autoconfigure.security.oauth2.client.EnableOAuth2Sso;
import org.springframework.context.annotation.Configuration;
import org.springframework.security.config.annotation.web.builders.HttpSecurity;
import org.springframework.security.config.annotation.web.configuration.WebSecurityConfigurerAdapter;
@SuppressWarnings("deprecation")
@Configuration
@EnableOAuth2Sso
public class SecurityConfiguration extends WebSecurityConfigurerAdapter{
	@Override
	protected void configure(HttpSecurity http) throws Exception {
		http.authorizeRequests().anyRequest().authenticated().and().csrf().disable();
	}
}
TestController.java
package com.xxx.web;
import java.util.Arrays;
import org.springframework.security.core.Authentication;
import org.springframework.security.core.context.SecurityContextHolder;
import org.springframework.web.bind.annotation.GetMapping;
import org.springframework.web.bind.annotation.RestController;
@RestController
public class TestController {
	@GetMapping("/hello")
	public String hello() {
		Authentication authentication = SecurityContextHolder.getContext().getAuthentication();
		return authentication.getName()+Arrays.toString(authentication.getAuthorities().toArray());
	}
}
App.java
package com.xxx;
import org.springframework.boot.SpringApplication;
import org.springframework.boot.autoconfigure.SpringBootApplication;
@SpringBootApplication
public class App {
    public static void main( String[] args ){
    	SpringApplication.run(App.class, args);
    }
}
application.yaml
server:
  port: 8000
  servlet:
    session:
      cookie:
        name: s1
security:
  oauth2:
    client:
      client-id: client
      client-secret: secret
      user-authorization-uri: http://localhost:8080/oauth/authorize
      access-token-uri: http://localhost:8080/oauth/token
    resource:
      user-info-uri: http://localhost:8080/api/test/user
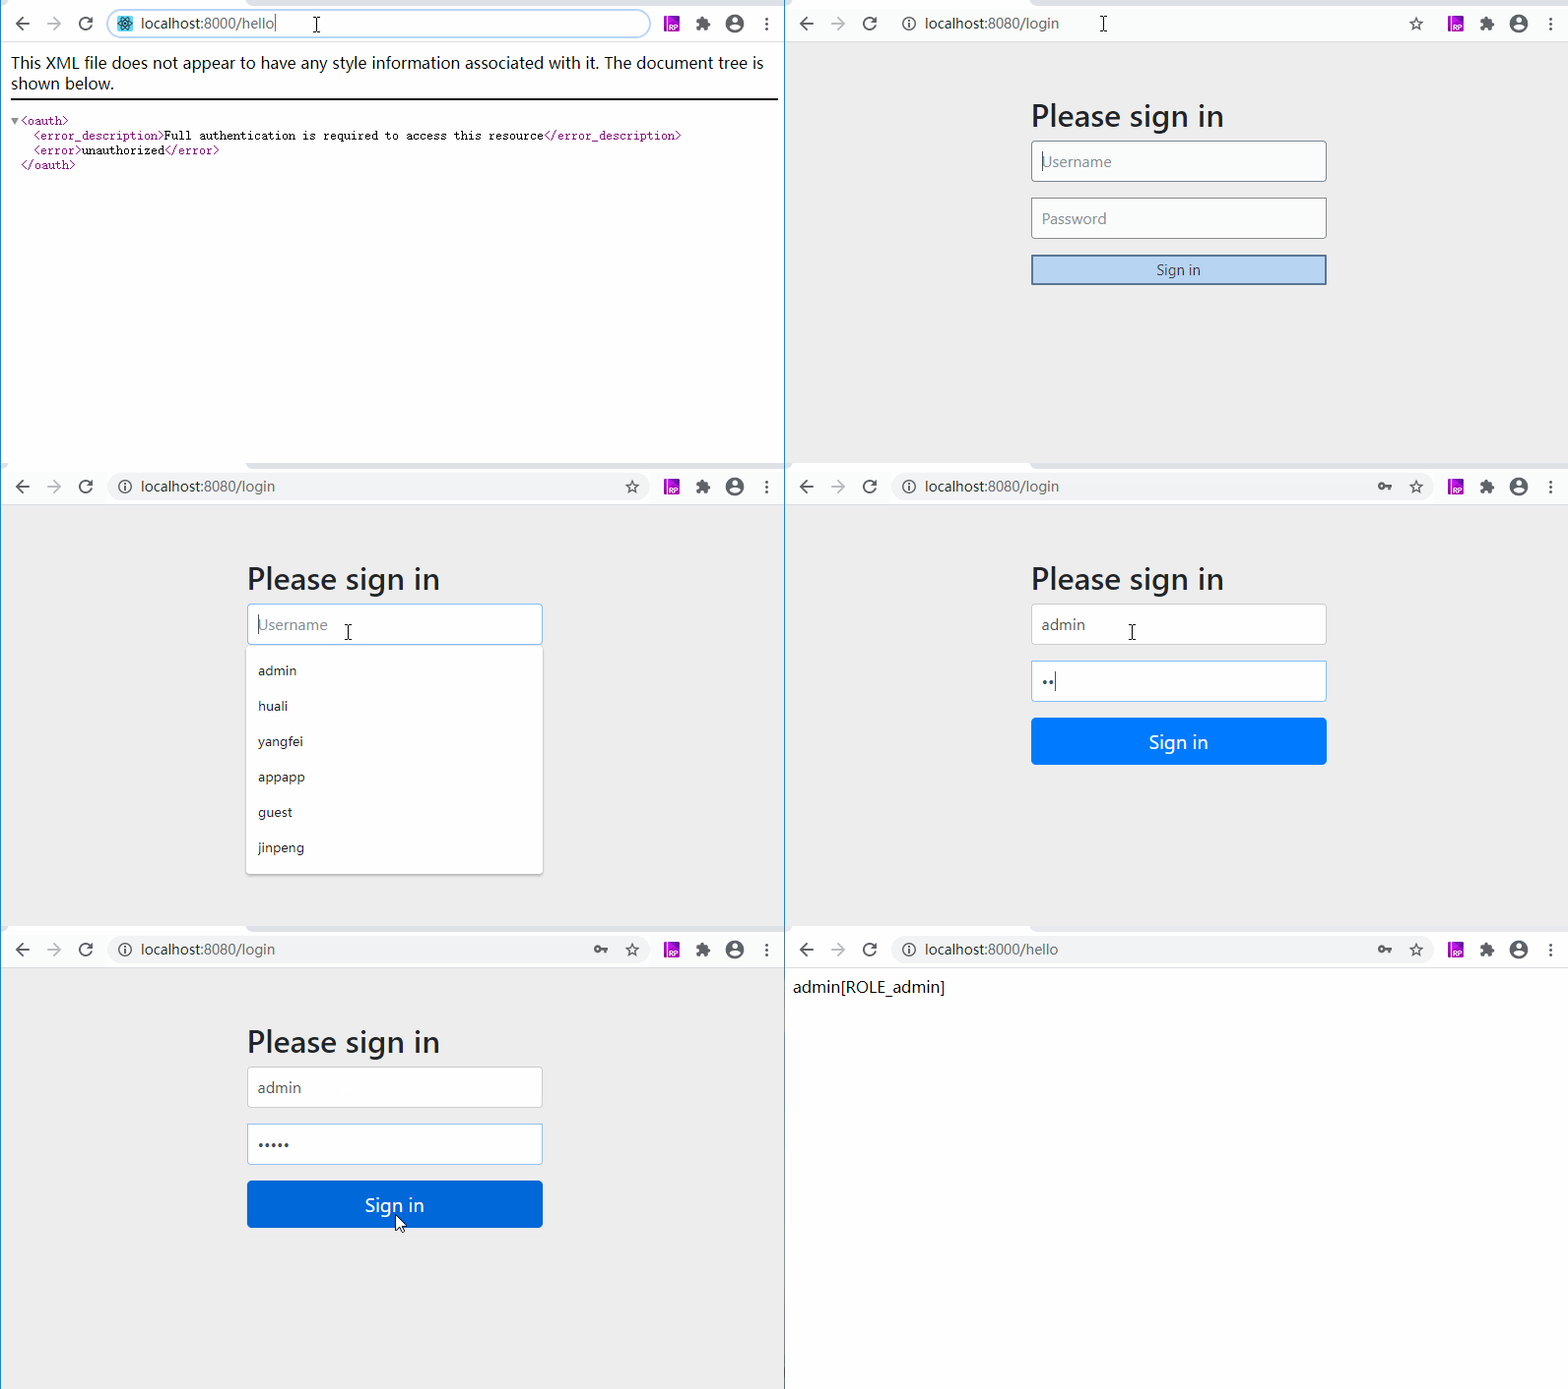
以上都是代码部分,下面主要是测试,测试过程很简单,就是我们启动两个服务,打开浏览器访问client-1的http://localhost:8000/hello接口,这时候因为需要登录,会跳转到auth-server服务的http://localhost:8080/login,登录成功,会接着访问授权接口,授权成功,会跳转到http://localhost:8000/login,然后跳转到http://localhost:8000/hello,貌似很复杂,我们先看看效果:
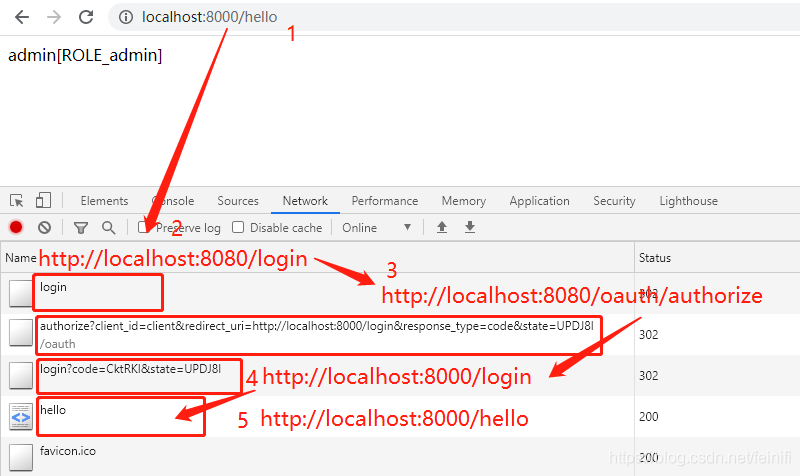
值得注意的是,如图所示的2、3顺序,在这个结果页面是这样的,但是在登录页面并不是这样,而是先3后2:

可以这么解释:client-1的接口http://localhost:8000/hello需要权限才能访问,这时候,需要登录自己的系统http://localhost:8000/login,而自己的系统支持oauth2,他通过封装了client_id,response_type,redirect_uri,state等参数的授权码模式请求接口,向auth-server服务发起授权请求http://localhost:8080/oauth/authorize?client_id=client&redirect_uri=http://localhost:8000/login&response_type=code&state=PphcA2,请求会跳转auth-server的登录页面 http://localhost:8080/login。
这里因为使用了单点登录,先从client-1跳转到了auth-server,最后拿到了code之后,跳回了client-1,访问成功。而页面上显示的内容并不是一开始就是这样子的,他会先跳转auth-server登录页面:
以上代码有了,结果也验证了,但是个人还是不是很了解这个登录授权的原理和过程,也是在学习中,这个所谓的单点登陆,在代码上就用了一个@EnableOAuth2Sso注解在client-1项目的SecurityConfiguration类上,该类也是继承自WebSecurityConfigurerAdapter类,然后覆盖了configure(HttpSecurity http)方法。
到此这篇关于springboot oauth2实现单点登录实例的文章就介绍到这了,更多相关springboot oauth2单点登录内容请搜索脚本之家以前的文章或继续浏览下面的相关文章希望大家以后多多支持脚本之家!
相关文章

解决java.util.NoSuchElementException异常正确方法
java.util.NoSuchElementException是Java中的一种异常,表示在迭代器或枚举中找不到元素,这篇文章主要给大家介绍了关于解决java.util.NoSuchElementException异常的相关资料,需要的朋友可以参考下2023-11-11
Java KeyGenerator.generateKey的19个方法代码示例
在下文中一共展示了KeyGenerator.generateKey方法的19个代码示例,这些例子默认根据受欢迎程度排序2021-12-12


最新评论