vue实现录音功能js-audio-recorder带波浪图效果的示例
前言:
因为业务需要,现在将整理的录音功能资料记录下,使用插件js-audio-recorder
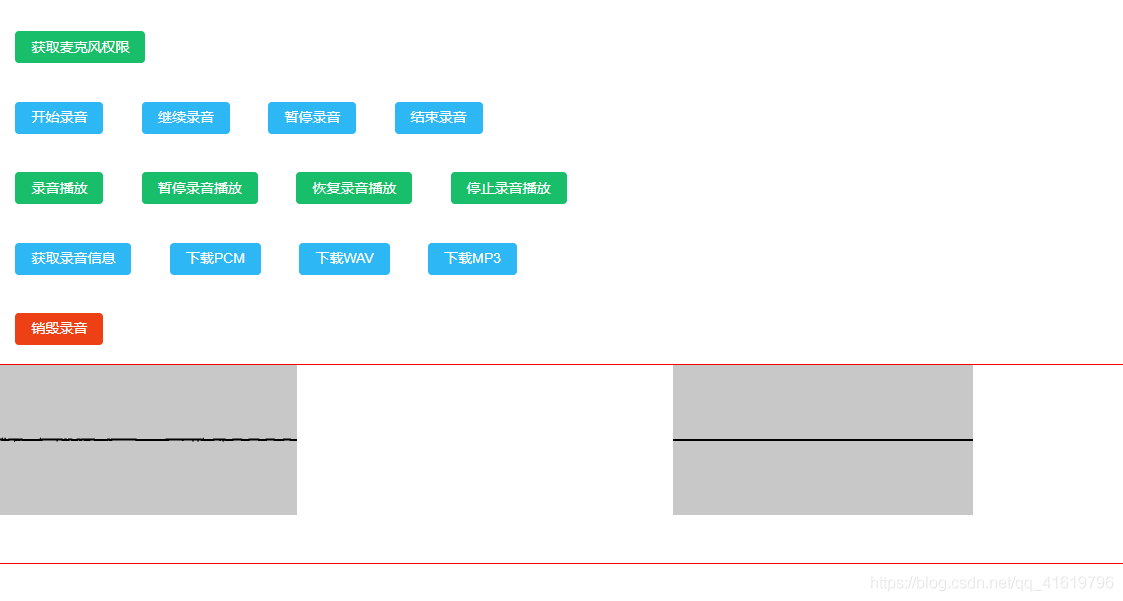
实现效果:可得到三种录音数据,pcm,wav,mp3 等


官方api入口:点我(网不好的童鞋可以看最下面的api截图)
官方案例入口:点我
官方源码git入口:点我
实现步骤:
一:安装插件 js-audio-recorder
cnpm i js-audio-recorder --s
二:安装将格式转换为mp3的插件 lamejs
cnpm install lamejs --s
三:附上实现源码:
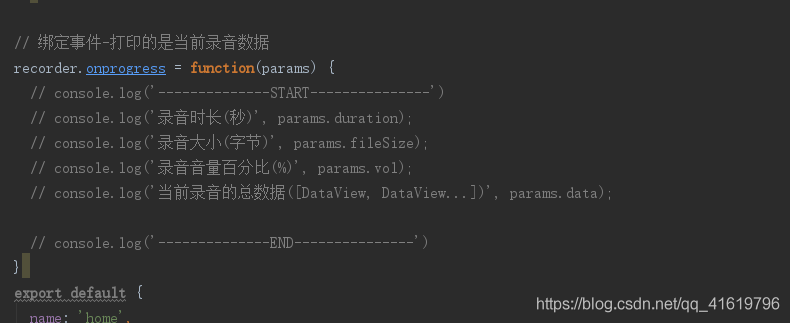
提示:慎用自身的这个监听事件,可以拿到数据,但是每秒拿到的数据非常多

<template>
  <div class="home" style="margin:1vw;">
    <Button type="success" @click="getPermission()" style="margin:1vw;">获取麦克风权限</Button>
    <br/>
    <Button type="info" @click="startRecorder()"  style="margin:1vw;">开始录音</Button>
    <Button type="info" @click="resumeRecorder()" style="margin:1vw;">继续录音</Button>
    <Button type="info" @click="pauseRecorder()" style="margin:1vw;">暂停录音</Button>
    <Button type="info" @click="stopRecorder()" style="margin:1vw;">结束录音</Button>
    <br/>
    <Button type="success" @click="playRecorder()" style="margin:1vw;">录音播放</Button>
    <Button type="success" @click="pausePlayRecorder()" style="margin:1vw;">暂停录音播放</Button>
    <Button type="success" @click="resumePlayRecorder()" style="margin:1vw;">恢复录音播放</Button>
    <Button type="success" @click="stopPlayRecorder()" style="margin:1vw;">停止录音播放</Button>
    <br/>
    <Button type="info" @click="getRecorder()" style="margin:1vw;">获取录音信息</Button>
    <Button type="info" @click="downPCM()" style="margin:1vw;">下载PCM</Button>
    <Button type="info" @click="downWAV()" style="margin:1vw;">下载WAV</Button>
    <Button type="info" @click="getMp3Data()" style="margin:1vw;">下载MP3</Button>
    <br/>
    <Button type="error" @click="destroyRecorder()" style="margin:1vw;">销毁录音</Button>
    <br/>
    <div style="width:100%;height:200px;border:1px solid red;">
      <canvas id="canvas"></canvas>
      <span style="padding: 0 10%;"></span>
      <canvas id="playChart"></canvas>
    </div>
  </div>
</template>
<script>
  import Recorder from 'js-audio-recorder'
  const lamejs = require('lamejs')
  const recorder = new Recorder({
    sampleBits: 16,                 // 采样位数,支持 8 或 16,默认是16
    sampleRate: 48000,              // 采样率,支持 11025、16000、22050、24000、44100、48000,根据浏览器默认值,我的chrome是48000
    numChannels: 1,                 // 声道,支持 1 或 2, 默认是1
    // compiling: false,(0.x版本中生效,1.x增加中)  // 是否边录边转换,默认是false
  })
  // 绑定事件-打印的是当前录音数据
  recorder.onprogress = function(params) {
    // console.log('--------------START---------------')
    // console.log('录音时长(秒)', params.duration);
    // console.log('录音大小(字节)', params.fileSize);
    // console.log('录音音量百分比(%)', params.vol);
    // console.log('当前录音的总数据([DataView, DataView...])', params.data);
    // console.log('--------------END---------------')
  }
  export default {
    name: 'home',
    data () {
      return {
        //波浪图-录音
        drawRecordId:null,
        oCanvas : null,
        ctx : null,
        //波浪图-播放
        drawPlayId:null,
        pCanvas : null,
        pCtx : null,
      }
    },
    mounted(){
      this.startCanvas();
    },
    methods: {
      /**
       * 波浪图配置
       * */
      startCanvas(){
        //录音波浪
        this.oCanvas = document.getElementById('canvas');
        this.ctx = this.oCanvas.getContext("2d");
        //播放波浪
        this.pCanvas = document.getElementById('playChart');
        this.pCtx = this.pCanvas.getContext("2d");
      },
      /**
       *  录音的具体操作功能
       * */
      // 开始录音
      startRecorder () {
        recorder.start().then(() => {
          this.drawRecord();//开始绘制图片
        }, (error) => {
          // 出错了
          console.log(`${error.name} : ${error.message}`);
        });
      },
      // 继续录音
      resumeRecorder () {
        recorder.resume()
      },
      // 暂停录音
      pauseRecorder () {
        recorder.pause();
        this.drawRecordId && cancelAnimationFrame(this.drawRecordId);
        this.drawRecordId = null;
      },
      // 结束录音
      stopRecorder () {
        recorder.stop()
        this.drawRecordId && cancelAnimationFrame(this.drawRecordId);
        this.drawRecordId = null;
      },
      // 录音播放
      playRecorder () {
        recorder.play();
        this.drawPlay();//绘制波浪图
      },
      // 暂停录音播放
      pausePlayRecorder () {
        recorder.pausePlay()
      },
      // 恢复录音播放
      resumePlayRecorder () {
        recorder.resumePlay();
        this.drawPlay();//绘制波浪图
      },
      // 停止录音播放
      stopPlayRecorder () {
        recorder.stopPlay();
      },
      // 销毁录音
      destroyRecorder () {
        recorder.destroy().then(function() {
          recorder = null;
          this.drawRecordId && cancelAnimationFrame(this.drawRecordId);
          this.drawRecordId = null;
        });
      },
      /**
       *  获取录音文件
       * */
      getRecorder(){
        let toltime = recorder.duration;//录音总时长
        let fileSize = recorder.fileSize;//录音总大小
        //录音结束,获取取录音数据
        let PCMBlob = recorder.getPCMBlob();//获取 PCM 数据
        let wav = recorder.getWAVBlob();//获取 WAV 数据
        let channel = recorder.getChannelData();//获取左声道和右声道音频数据
      },
      /**
       *  下载录音文件
       * */
      //下载pcm
      downPCM(){
        //这里传参进去的时文件名
        recorder.downloadPCM('新文件');
      },
      //下载wav
      downWAV(){
        //这里传参进去的时文件名
        recorder.downloadWAV('新文件');
      },
      /**
       *  获取麦克风权限
       * */
      getPermission(){
        Recorder.getPermission().then(() => {
          this.$Message.success('获取权限成功')
        }, (error) => {
          console.log(`${error.name} : ${error.message}`);
        });
      },
      /**
       * 文件格式转换 wav-map3
       * */
      getMp3Data(){
        const mp3Blob = this.convertToMp3(recorder.getWAV());
        recorder.download(mp3Blob, 'recorder', 'mp3');
      },
      convertToMp3(wavDataView) {
        // 获取wav头信息
        const wav = lamejs.WavHeader.readHeader(wavDataView); // 此处其实可以不用去读wav头信息,毕竟有对应的config配置
        const { channels, sampleRate } = wav;
        const mp3enc = new lamejs.Mp3Encoder(channels, sampleRate, 128);
        // 获取左右通道数据
        const result = recorder.getChannelData()
        const buffer = [];
        const leftData = result.left && new Int16Array(result.left.buffer, 0, result.left.byteLength / 2);
        const rightData = result.right && new Int16Array(result.right.buffer, 0, result.right.byteLength / 2);
        const remaining = leftData.length + (rightData ? rightData.length : 0);
        const maxSamples = 1152;
        for (let i = 0; i < remaining; i += maxSamples) {
          const left = leftData.subarray(i, i + maxSamples);
          let right = null;
          let mp3buf = null;
          if (channels === 2) {
            right = rightData.subarray(i, i + maxSamples);
            mp3buf = mp3enc.encodeBuffer(left, right);
          } else {
            mp3buf = mp3enc.encodeBuffer(left);
          }
          if (mp3buf.length > 0) {
            buffer.push(mp3buf);
          }
        }
        const enc = mp3enc.flush();
        if (enc.length > 0) {
          buffer.push(enc);
        }
        return new Blob(buffer, { type: 'audio/mp3' });
      },
      /**
       * 绘制波浪图-录音
       * */
      drawRecord () {
        // 用requestAnimationFrame稳定60fps绘制
        this.drawRecordId = requestAnimationFrame(this.drawRecord);
        // 实时获取音频大小数据
        let dataArray = recorder.getRecordAnalyseData(),
            bufferLength = dataArray.length;
        // 填充背景色
        this.ctx.fillStyle = 'rgb(200, 200, 200)';
        this.ctx.fillRect(0, 0, this.oCanvas.width, this.oCanvas.height);
        // 设定波形绘制颜色
        this.ctx.lineWidth = 2;
        this.ctx.strokeStyle = 'rgb(0, 0, 0)';
        this.ctx.beginPath();
        var sliceWidth = this.oCanvas.width * 1.0 / bufferLength, // 一个点占多少位置,共有bufferLength个点要绘制
                x = 0;          // 绘制点的x轴位置
        for (var i = 0; i < bufferLength; i++) {
          var v = dataArray[i] / 128.0;
          var y = v * this.oCanvas.height / 2;
          if (i === 0) {
            // 第一个点
            this.ctx.moveTo(x, y);
          } else {
            // 剩余的点
            this.ctx.lineTo(x, y);
          }
          // 依次平移,绘制所有点
          x += sliceWidth;
        }
        this.ctx.lineTo(this.oCanvas.width, this.oCanvas.height / 2);
        this.ctx.stroke();
      },
      /**
       * 绘制波浪图-播放
       * */
      drawPlay () {
        // 用requestAnimationFrame稳定60fps绘制
        this.drawPlayId = requestAnimationFrame(this.drawPlay);
        // 实时获取音频大小数据
        let dataArray = recorder.getPlayAnalyseData(),
                bufferLength = dataArray.length;
        // 填充背景色
        this.pCtx.fillStyle = 'rgb(200, 200, 200)';
        this.pCtx.fillRect(0, 0, this.pCanvas.width, this.pCanvas.height);
        // 设定波形绘制颜色
        this.pCtx.lineWidth = 2;
        this.pCtx.strokeStyle = 'rgb(0, 0, 0)';
        this.pCtx.beginPath();
        var sliceWidth = this.pCanvas.width * 1.0 / bufferLength, // 一个点占多少位置,共有bufferLength个点要绘制
                x = 0;          // 绘制点的x轴位置
        for (var i = 0; i < bufferLength; i++) {
          var v = dataArray[i] / 128.0;
          var y = v * this.pCanvas.height / 2;
          if (i === 0) {
            // 第一个点
            this.pCtx.moveTo(x, y);
          } else {
            // 剩余的点
            this.pCtx.lineTo(x, y);
          }
          // 依次平移,绘制所有点
          x += sliceWidth;
        }
        this.pCtx.lineTo(this.pCanvas.width, this.pCanvas.height / 2);
        this.pCtx.stroke();
      }
    },
  }
</script>
<style lang='less' scoped>
</style>
到这里,代码就结束了,上面每个方法都有很详细的注释,就不累赘了
整理api:(有代理的可以看官网,这里是摘取官网的api)
1,使用
安装
npm 方式
推荐使用npm安装的方式:
安装:
npm i js-audio-recorder
调用:
import Recorder from 'js-audio-recorder';
let recorder = new Recorder();
script 标签方式
<script type="text/javascript" src="./dist/recorder.js"></script>
let recorder = new Recorder();
2,属性
实例初始化
可以配置输出数据参数,
let recorder = new Recorder({
    sampleBits: 16,                 // 采样位数,支持 8 或 16,默认是16
    sampleRate: 16000,              // 采样率,支持 11025、16000、22050、24000、44100、48000,根据浏览器默认值,我的chrome是48000
    numChannels: 1,                 // 声道,支持 1 或 2, 默认是1
    // compiling: false,(0.x版本中生效,1.x增加中)  // 是否边录边转换,默认是false
});
返回: recorder实例。
sampleBits
采样位数。
sampleRate
采样率。
numChannels
声道数。
compiling
(0.x版本中生效,最新目前不支持)
是否边录音边转换。
获取数据方法:
回调方式
recorder.onprogress = function(params) {
    console.log(params.data);       // 当前获取到到音频数据
}
data,DataView型数组,格式如 [DataView, DataView, DataView ...] 。
主动获取
getWholeData();     // [DataView, DataView, DataView ...]
getNextData();      // [DataView, DataView, DataView ...]
getWholeData() 的值和onprogress回调中的data数据一致。
getNextData() 获取的是前一次 getNextData() 之后的值,他只是data数据的一小部分。
实例属性
duration
获取录音的总时长。
console.log(recorder.duration);
fileSize
录音文件大小(单位:字节)。
console.log(recorder.fileSize);
3,操作
start()
开始录音。
返回: Promise。
recorder.start().then(() => {
    // 开始录音
}, (error) => {
    // 出错了
    console.log(`${error.name} : ${error.message}`);
});
pause()
录音暂停。
返回: void
recorder.pause();
resume()
继续录音。
返回: void。
recorder.resume()
stop()
结束录音。
返回: void。
recorder.stop();
play()
录音播放。
返回: void。
recorder.play();
getPlayTime()
获取音频已经播的时长。
返回: number。
recorder.getPlayTime();
pausePlay()
暂停录音播放。
返回: void。
recorder.pausePlay();
resumePlay()
恢复录音播发。
返回: void。
recorder.resumePlay();
stopPlay()
停止播放。
返回: void。
recorder.stopPlay();
destroy()
销毁实例。
返回: Promise。
// 销毁录音实例,置为null释放资源,fn为回调函数,
recorder.destroy().then(function() {
    recorder = null;
});
音频数据
录音结束,获取取录音数据
getPCMBlob()
获取 PCM 数据,在录音结束后使用。
返回: Blob
注:使用该方法会默认调用 stop() 方法。
recorder.getPCMBlob();
getWAVBlob()
获取 WAV 数据,在录音结束后使用
返回: Blob
注:使用该方法会默认调用 stop() 方法。
recorder.getWAVBlob();
getChannelData()
获取左声道和右声道音频数据。
recorder.getChannelData();
录音结束,下载录音文件
downloadPCM([ filename ])
下载 PCM 格式
- fileName String 重命名文件
- 返回: Blob
注:使用该方法会默认调用 stop() 方法。
recorder.downloadPCM(fileName ?);
downloadWAV([ filename ])
下载 WAV 格式
- fileName String 重命名文件
- 返回: Blob
注:使用该方法会默认调用 stop() 方法。
录音中,获取录音数据
(0.x版本中生效,最新目前不支持)
该方式为边录边转换,建议在 compiling 为 true 时使用。
getWholeData()
获取已经录音的所有数据。若没有开启边录边转(compiling为false),则返回是空数组。
返回: Array, 数组中是DataView数据
定时获取所有数据:
setInterval(() => {
    recorder.getWholeData();
}, 1000)
getNextData()
获取前一次 getNextData() 之后的数据。若没有开启边录边转(compiling为false),则返回是空数组。
- 返回: Array, 数组中是DataView数据
定时获取新增数据:
setInterval(() => {
    recorder.getNextData();
}, 1000)
// 实时录音,则可将该数据返回给服务端。
录音波形显示
getRecordAnalyseData()
返回的是一个1024长的,0-255大小的Uint8Array类型。用户可以根据这些数据自定义录音波形。此接口获取的是录音时的。
let dataArray = recorder.getRecordAnalyseData();
getPlayAnalyseData()
返回数据同 getRecordAnalyseData(),该方法获取的是播放时的。
let dataArray = recorder.getPlayAnalyseData();
播放外部
Player.play(blob)
播放外部音频,格式由浏览器的audio支持的类型决定。
Player.play(/* 放入arraybuffer数据 */);
其他
录音权限
未给予录音权限的页面在开始录音时需要再次点击允许录音,才能真正地录音,存在丢失开始这一段录音的情况,增加方法以便用户提前获取麦克风权限。
getPermission()
获取麦克风权限。
返回:promise。
Recorder.getPermission().then(() => {
    console.log('给权限了');
}, (error) => {
    console.log(`${error.name} : ${error.message}`);
});此处then回调与start的一致。
4,Event
js-audio-recorder 支持的事件回调。
onprocess(duration)
用于获取录音时长。
不推荐使用,用onprogress代替。
recorder.onprocess = function(duration) {
    console.log(duration);
}
onprogress(duration)
目前支持获取以下数据:
- 录音时长(duration)。
- 录音大小(fileSize)。
- 录音音量百分比(vol)。
- 所有的录音数据(data)。
recorder.onprogress = function(params) {
    console.log('录音时长(秒)', params.duration);
    console.log('录音大小(字节)', params.fileSize);
    console.log('录音音量百分比(%)', params.vol);
    // console.log('当前录音的总数据([DataView, DataView...])', params.data);
}
onplay
录音播放开始回调。
recorder.onplay = () => {
    console.log('onplay')
}
onpauseplay
录音播放暂停回调。
recorder.onpauseplay = () => {
    console.log('onpauseplay')
}
onresumeplay
录音播放恢复回调。
recorder.onresumeplay = () => {
    console.log('onresumeplay')
}
onstopplay
录音播放停止回调。
recorder.onstopplay = () => {
    console.log('onstopplay')
}
onplayend
录音播放完成回调。
recorder.onplayend = () => {
    console.log('onplayend')
}
5,应用
语音识别
recorder上可以测试,注意选择16000采样率,16采样位数,单声道录音。
6,PlayerPlayer 播放类
import Player from './player/player';
用于协助播放录音文件,包括,开始、暂停、恢复、停止等功能。所支持的格式由浏览器的audio支持的类型决定。可单独使用。
Player.play([arraybuffer])
播放外部的音频。所支持的格式由浏览器的audio支持的类型决定。
实际是调用了decodeAudioData实现音频播放。
Recorder.play(/* 放入arraybuffer数据 */);
Player.pausePlay()
暂停播放。
Player.resumePlay()
恢复播放。
Player.stopPlay()
停止播放。
Player.addPlayEnd(fn)
增加播放完成回调函数。
Player.getPlayTime()
获取播放时间。
Player.getAnalyseData()
获取回放录音的波形数据。
7,其他音频格式
MP3
将pcm(wav)音频文件转化为mp3格式。
注:使用16采样位数。
利用lamejs进行转换,使用情况见demo,例子:
function convertToMp3(wavDataView) {
    // 获取wav头信息
    const wav = lamejs.WavHeader.readHeader(wavDataView); // 此处其实可以不用去读wav头信息,毕竟有对应的config配置
    const { channels, sampleRate } = wav;
    const mp3enc = new lamejs.Mp3Encoder(channels, sampleRate, 128);
    // 获取左右通道数据
    const result = recorder.getChannelData()
    const buffer = [];

    const leftData = result.left && new Int16Array(result.left.buffer, 0, result.left.byteLength / 2);
    const rightData = result.right && new Int16Array(result.right.buffer, 0, result.right.byteLength / 2);
    const remaining = leftData.length + (rightData ? rightData.length : 0);

    const maxSamples = 1152;
    for (let i = 0; i < remaining; i += maxSamples) {
        const left = leftData.subarray(i, i + maxSamples);
        let right = null;
        let mp3buf = null;

        if (channels === 2) {
            right = rightData.subarray(i, i + maxSamples);
            mp3buf = mp3enc.encodeBuffer(left, right);
        } else {
            mp3buf = mp3enc.encodeBuffer(left);
        }

        if (mp3buf.length > 0) {
            buffer.push(mp3buf);
        }
    }

    const enc = mp3enc.flush();

    if (enc.length > 0) {
        buffer.push(enc);
    }

    return new Blob(buffer, { type: 'audio/mp3' });
}
安装lamejs
npm install lamejs
到此这篇关于vue实现录音功能js-audio-recorder带波浪图效果的示例的文章就介绍到这了,更多相关vue js-audio-recorder录音内容请搜索脚本之家以前的文章或继续浏览下面的相关文章希望大家以后多多支持脚本之家!
相关文章

vue2 mint-ui loadmore实现下拉刷新,上拉更多功能
这篇文章主要介绍了vue2 mint-ui loadmore实现下拉刷新,上拉更多功能,需要的朋友可以参考下2018-03-03
vue2.0 better-scroll 实现移动端滑动的示例代码
本篇文章主要介绍了vue2.0 better-scroll 实现移动端滑动的示例代码,具有一定的参考价值,感兴趣的小伙伴们可以参考一下。2018-01-01
vue3+ts重复参数提取成方法多处调用以及字段无值时不传字段给后端问题
在进行API开发时,优化参数传递是一个重要的考量,传统方法中,即使参数值为空,也会被包含在请求中发送给后端,这可能会导致不必要的数据处理,而优化后的方法则只会传递那些实际有值的字段,从而提高数据传输的有效性和后端处理的效率2024-10-10


最新评论