springboot(thymeleaf)中th:field和th:value的区别及说明
一、常用th:标签简介
我们再用spring-boot框架的时候,可能不会采用我们以往用的jsp页面的方式,而是通过采用thymeleaf渲染的方式进行
前后台数据的交互。常用的标签有
th:href,用法:th:href="/brand/selectbrand",(用来指明要要跳转的链接)th:object,用法:th:object="${brand}",(用来接受后台传过来的对象)
样例:
<form class="form form-horizontal" id="form-admin-add" action="#" th:action="@{/brand/updatebyid}" th:object="${brand}">th:field,用法:th:field="*{name}",(用来绑定后台对象和表单数据)th:value,用法:th:value="${brand.name}",(用对象对name值替换value属性)
总结:th:field
样例:
<form class="form form-horizontal" id="form-admin-add" action="#" th:action="@{/brand/updatebyid}" th:object="${brand}">
   <input type="text" class="input-text" value="" th:value="*{id}" name="id" />
   <input type="text" class="input-text"  value="" th:field="*[code]" placeholder="" id="code"/>
二、th:field和th:value的小结
thymeleaf里的th:field等同于th:name和th:value,浏览器在解析th:field的时候,会解析成name="${th:field}"的值。
然后后台就可以接收到从前台传过来的值。而th:value可以接受到后台的的值,后台则可以根据name获取到前台的值。
th:field和th:value都有两种从后台接受值的方式:1、${obj.name} 2、*{name}。需要注意的是,th:field需要有th:object
指定前台传过来的参数,否则浏览器在解析的时候会出现错误。
th:each,用法:th:each="brand:${pageInfo.list}",(后台把对象放在了pageinfo的分页插件的List里,然后用th:each遍
历后台传过来的对象)。
样例:
<tr class="text-c" th:each="order:${pageInfo.list}">
     <td th:text="${order.id}"></td>
     <td th:text="${order.dicMethodDescription}"></td>
     <td th:text="${order.productBrandName}"></td>
<td th:text="${order.productModelName}"></td>th:if,用法:th:if="${pageInfo.list.size() == 0}",(判断传过来的对象是否为空,如果为空,则执行...)th:unless,用法:th:unless="${pageInfo.list.size() == 0}"(判断传过来的对象是否为空,如果不为空,则执行...)
标签只有在th:if中条件成立时才显示,th:unless于th:if恰好相反,只有表达式中的条件不成立,才会显示其内容。
样例:
<td th:if="${order.productStateName}==部分退款" th:text="交易成功" class="validate"></td>
<td th:unless="${order.productStateName}==部分退款" th:text="${order.productStateName}"></td>
三、thymeleaf实现动态访问controller
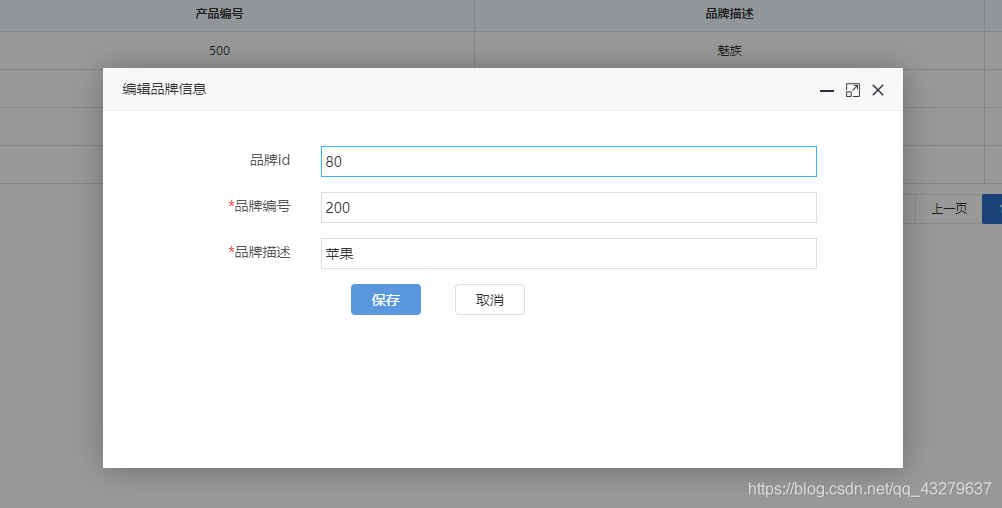
我们一般链接地址都是写死了的,这样其实间接的降低了系统的灵活性,我们可以在th:href的链接里添加参数,这样
就可以动态的访问controller,举个栗子:
//static页面层:
<a title="编辑信息" href="javascript:;" rel="external nofollow" th:οnclick="'javascript:brand_edit(\'编辑品牌信息\',\'/brand'+@{/updatebyid}+'/'+${brand.id}+'\',800,400)'" class="ml-5" style="text-decoration:none"><i class="Hui-iconfont"></i></a>
//controller层:
//根据品牌名更改品牌的名称和编号信息
@RequestMapping(value = "/updatebyid/{id}")
public String updatebyidBefore(Model model, @ModelAttribute(value = "brand") ProductBrand brand,
@PathVariable("id") Long id) {
// 根据ID查询用户 和对应的角色
brand = operatebrand.selectByPrimaryKey(id);
// 查询对应用户的角色
model.addAttribute("brand", brand);
return "maintenance-operate/editor-brand";
}四、对数据库的数据灵活筛选
一般我们在访问数据库的时候,可能在数据库中查询的时候写出我们固定需要的值,比如我们想要查的字段需要在某一
范围内,例如需要查出状态表的状态在(1,3,5,7)状态里。这些状态可以在状态的字典表里查出。
你可能想到会这样写:select id ,name,code from table where state in(1,3,5,7)。但是别人也想查对应的字段,但是筛选
的状态不同,比如他筛选的是2,4,6,8。这时候他可能又需要写一套select语句。则这样也失去的代码灵活性。
我们可以传一个状态数组进去,这时候就会根据状态数组的值来进行筛选。我们来看看实现。
ServiceImpl层:
List<OrderInfoForm> result = null;
result=orderMapper.selectOrdersByStatesSelective(order, new Integer[] {3,4,6,7,8});
dao层:
List<OrderInfoForm> selectOrdersByStatesSelective(@Param(value="order")Order order,
    @Param(value="states")Integer[] states);
mapper层:
<select id="selectOrdersByStatesSelective" resultMap="AllResultMap" >
    select
    <include refid="All_Column_List" />
    from order_list
    LEFT JOIN product_method ON product_method.`code` = order_list.purchase_method
    LEFT JOIN product_color ON product_color.`code` = order_list.color
    LEFT JOIN product_guarantee ON product_guarantee.`code` = order_list.guarantee
    LEFT JOIN product_info ON order_list.product_id = product_info.id
    LEFT JOIN product_model ON product_info.model = product_model.`code`
    LEFT JOIN product_standard ON product_info.standard = product_standard.`code`
    LEFT JOIN product_state ON product_state.`code` = order_list.order_state
    LEFT JOIN product_apperance ON product_apperance.`code` = order_list.apperance
    LEFT JOIN product_brand ON product_brand.`code` = product_info.brand
    <where>
        <if test="order.orderNum != null " >
            order_num like "%"#{order.orderNum,jdbcType=VARCHAR}"%"
        </if>
        <if test="order.operator != null " >
            and operator like "%"#{order.operator,jdbcType=VARCHAR}"%"
        </if>
        <if test="order.purchaseTime != null" >
            and purchase_time = #{order.purchaseTime,jdbcType=DATE}
        </if>
        <if test="order.orderState != null" >
            and order_state = #{order.orderState,jdbcType=VARCHAR}
        </if>
        <if test="order.serialNum != null" >
            and serial_num like "%"#{order.serialNum,jdbcType=VARCHAR}"%"
        </if>

        <if test="states != null and states.length >0">
            <foreach collection="states" item="state" separator="," open=" and order_state in (" close=")">
                #{state,jdbcType=BIGINT}
            </foreach>
        </if>
    </where>
  </select>
注意最后的test的条件:
解释一下各个的参数
1、foreach collection="传过来的状态数组名称"
2、item="state"用于遍历每个状态
3、separator=",":用于分割各个状态
4、open=" 用于在对应位置添加双引号
5、and order_state in (" close=")"用于在对应结束位置添加双引号
以上为个人经验,希望能给大家一个参考,也希望大家多多支持脚本之家。
相关文章

springboot整合Dubbo与Feign的实现 (无注册中心)
本文主要介绍了springboot整合Dubbo与Feign的实现,文中通过示例代码介绍的非常详细,对大家的学习或者工作具有一定的参考学习价值,需要的朋友们下面随着小编来一起学习学习吧2022-04-04
elasticsearch索引index之engine读写控制结构实现
这篇文章主要为大家介绍了elasticsearch索引index之engine读写控制结构实现,有需要的朋友可以借鉴参考下,希望能够有所帮助,祝大家多多进步,早日升职加薪2022-04-04
springboot项目编写发送异常日志到企微工具包的操作方法
本文介绍了Springboot项目如何编写发送异常日志到企业微信的工具包,内容包括创建基础Bean、配置类、pom依赖等步骤,并展示了如何通过nacos进行配置,这为开发者提供了一种有效的日志管理方案,方便快速定位和处理项目中的异常问题,感兴趣的朋友跟随小编一起看看吧2024-09-09
SpringBoot配置文件的优先级顺序、加载顺序、bootstrap.yml与application.yml区别及说明
在SpringBoot中,配置文件的优先级顺序是:application-{profile}.yml或.properties > application.yml或.properties > bootstrap.yml或.properties,{profile}代表不同环境,如dev、test、prod,加载顺序是先加载bootstrap文件2024-09-09


最新评论