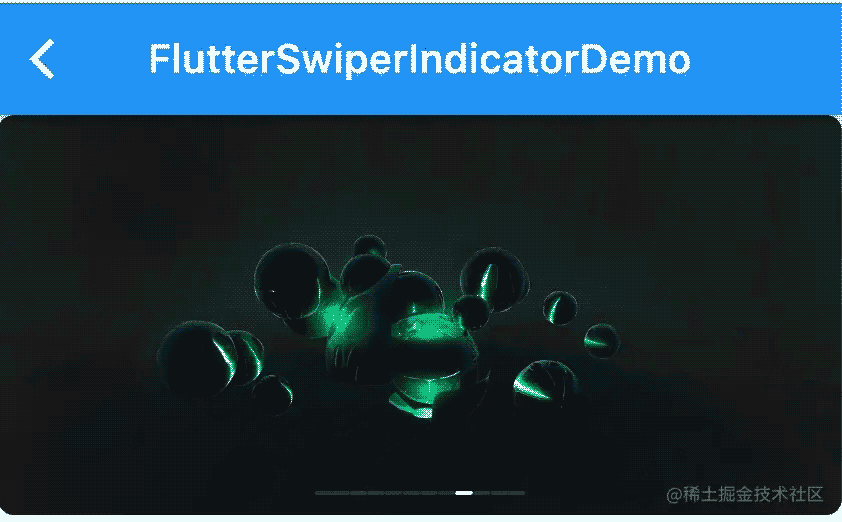
flutter开发技巧自定页面指示器PageIndicator详解
更新时间:2023年01月15日 11:43:42 作者:SoaringHeart
这篇文章主要为大家介绍了flutter开发技巧自定页面指示器PageIndicator详解,有需要的朋友可以借鉴参考下,希望能够有所帮助,祝大家多多进步,早日升职加薪
一、来源
项目中遇到多个需要自定义轮播图指示器的需求,封装成基础组件方便复用;
原理是通过 ValueListenableBuilder 实时监听轮播图的当前索引,然后更新指示器组件,达到最终效果;
二、效果

三、源码实现
1、flutter_swiper_null_safety 使用示例:
import 'package:flutter/material.dart';
import 'package:flutter_swiper_null_safety/flutter_swiper_null_safety.dart';
import 'package:flutter_templet_project/R.dart';
import 'package:flutter_templet_project/basicWidget/page_indicator_widget.dart';
import 'package:flutter_templet_project/extension/buildContext_extension.dart';
class FlutterSwiperIndicatorDemo extends StatefulWidget {
  FlutterSwiperIndicatorDemo({ Key? key, this.title}) : super(key: key);
  final String? title;
  @override
  _FlutterSwiperIndicatorDemoState createState() => _FlutterSwiperIndicatorDemoState();
}
class _FlutterSwiperIndicatorDemoState extends State<FlutterSwiperIndicatorDemo> {
  ValueNotifier<int> currentIndex = ValueNotifier(0);
  BorderRadius borderRadius = BorderRadius.all(Radius.circular(8));
  final items = R.imgUrls;//图片链接数组
  @override
  Widget build(BuildContext context) {
    dynamic arguments = ModalRoute.of(context)!.settings.arguments;
    return Scaffold(
        appBar: AppBar(
          title: Text(widget.title ?? "$widget"),
        ),
        body: _buildSwiper()
    );
  }
  ///创建子项
  _buildItem(context, index) {
    final imgUrl = items[index];
    return InkWell(
      onTap: () => print(index),
      child: Container(
        padding: EdgeInsets.only(bottom: 0), //为了显示阴影
        child: ClipRRect(
          borderRadius: this.borderRadius,
          child: Stack(
            alignment: Alignment.center,
            fit: StackFit.expand,
            children: [
              FadeInImage(
                placeholder: AssetImage('images/img_placeholder.png',),
                image: NetworkImage(imgUrl),
                fit: BoxFit.cover,
              ),
            ],
          ),
        ),
      ),
    );
  }
  _buildSwiper() {
    return Container(
      height: 200,
      child: ClipRRect(
          borderRadius: this.borderRadius,
          child: Stack(
            children: [
              Swiper(
                itemBuilder: (context, index) => _buildItem(context, index),
                // indicatorLayout: PageIndicatorLayout.COLOR,
                autoplay: this.items.length > 1,
                loop: this.items.length > 1,
                itemCount: this.items.length,
                // pagination: this.items.length <= 1 ? null : SwiperPagination(),
                // control: SwiperControl(),
                // itemWidth: 200,
                // viewportFraction: 0.6,
                onIndexChanged: (index){
                  currentIndex.value = index;
                }
              ),
              // if (this.items.length > 1) buildPageIndicator(),
              if (this.items.length > 1) PageIndicatorWidget(
                currentIndex: currentIndex,
                itemCount: this.items.length,
                itemSize: Size(context.screenSize.width/ 4 / this.items.length, 2),
                // itemBuilder: (isSelected, itemSize) {
                //   return Container(
                //     width: itemSize.width,
                //     height: itemSize.height,
                //     color: isSelected ? Colors.red : Colors.green,
                //   );
                // },
              )
            ],
          )
      ),
    );
  }
2、PageIndicatorWidget 指示器源码:
import 'package:flutter/material.dart';
typedef PageIndicatorItemWidgetBuilder = Widget Function(bool isSelected, Size itemSize);
/// 轮播图指示器
class PageIndicatorWidget extends StatelessWidget {
  PageIndicatorWidget({
    Key? key,
    this.margin = const EdgeInsets.only(bottom: 10),
    required this.currentPage,
    required this.itemCount,
    this.normalColor = const Color(0x25ffffff),
    this.selectedColor = Colors.white,
    this.itemSize = const Size(8, 2),
    this.itemBuilder,
    this.hidesForSinglePage = true
  }) : super(key: key);
  /// 当前页面索引
  ValueNotifier<int> currentPage;
  EdgeInsetsGeometry? margin;
  /// item数量
  int itemCount;
  /// 每个item尺寸(最好用固定宽度除以个数,避免总宽度溢出)
  Size itemSize;
  /// 自定义每个item
  PageIndicatorItemWidgetBuilder? itemBuilder;
  /// 默认颜色
  Color? normalColor;
  /// 选中颜色
  Color? selectedColor;
  /// 单页隐藏
  bool hidesForSinglePage;
  @override
  Widget build(BuildContext context) {
    if (this.hidesForSinglePage && this.itemCount == 1) {
      return SizedBox();
    }
    return buildPageIndicator();
  }
  Widget buildPageIndicator() {
    return Container(
      margin: this.margin,
      child: Align(
        alignment: Alignment.bottomCenter,
        child: ValueListenableBuilder(
          valueListenable: this.currentPage,
          builder: (BuildContext context, dynamic value, Widget? child) {
            return Row(
              mainAxisSize: MainAxisSize.min,
              mainAxisAlignment: MainAxisAlignment.start,
              children: buildPageIndicatorItem(
                currentIndex: this.currentPage.value,
                normalColor: this.normalColor,
                selectedColor: this.selectedColor,
              ),
            );
          },
        ),
      ),
    );
  }
  List<Widget> buildPageIndicatorItem({
    currentIndex: 0,
    normalColor: const Color(0x25ffffff),
    selectedColor: Colors.white,
  }) {
    List<Widget> list = List.generate(this.itemCount, (index) {
      return this.itemBuilder != null ? this.itemBuilder!(currentIndex == index, this.itemSize) : ClipRRect(
        borderRadius: BorderRadius.all(Radius.circular(1)),
        child: Container(
          width: this.itemSize.width,
          height: this.itemSize.height,
          color: currentIndex == index ? selectedColor : normalColor,
        ),
      );
    });
    return list;
  }
}
三、总结
此组件封装也秉承最简实现,不超过百行代码。开发工作中,如果我们发现最佳实践,即使它很小,也需要记录下来,常年累月下来机会自然而然拥有一套属于自己的高效的组件库。可以提高我们的开发效率,节约时间,让工作变得轻松。
以上就是flutter开发技巧自定页面指示器PageIndicator详解的详细内容,更多关于flutter PageIndicator的资料请关注脚本之家其它相关文章!
相关文章

Android中使用GridView进行应用程序UI布局的教程
GridView即平常我们见到的类似九宫格的矩阵型布局,只不过默认不带分割线,这里我们就从基础开始来看一下Android中使用GridView进行应用程序UI布局的教程2016-06-06
解决VSCode调试react-native android项目错误问题
这篇文章主要介绍了VSCode调试react-native android项目错误解决办法,本文给大家介绍的非常详细,对大家的学习或工作具有一定的参考借鉴价值,需要的朋友可以参考下2020-12-12
Android带进度条的下载图片示例(AsyncTask异步任务)
本文主要介绍Android带进度条的下载图片示例(AsyncTask异步任务)的方法解析。具有很好的参考价值。下面跟着小编一起来看下吧2017-04-04


最新评论