Android使用socket进行二进制流数据传输
引言
使用socket流传输二进制流数据,比如文件或者视频图片等等信息的时候,我们通常使用tcp协议传输,因为tcp协议可以保证二进制流按序到达,并且保证交付,这样子就可以保证我们传输二进制流的完整性。
使用tcp协议进行二进制流传输的时候通常会有两个问题:
由于tcp进行信息传输的时候是没有边界的,所以可能会产生粘包半包问题。所谓粘包就是指接收的一段数据包含了下一段数据的信息,所谓半包就是指一段数据没有接收完整,实际上都是边界不明确产生的问题。
并且在传输一段很大的二进制流数据的时候,我们可能需要对超大的二进制流分段处理,也就是分段来传输。
在输出端将二进制流分段,输入端在接收到各个片段后再将整个流信息拼接起来,就构成了完整的传输流程。
为了解决上述的两个问题,同时也为了能够统一这个传输流程,我们需要自定义一个简单的传输协议。
简单的自定义协议
我们自定义一个简单的通信协议,协议一共传输两种信息,第一种是文字,第二种是二进制流(其实文字也可以用二进制流表示),传输过程如下图所示。

我们定义的简单通信协议规则如下
1.首先发送一个字节的信息(就是图中的type),表示一段消息的开始,同时也表明了后面二进制数据的类型(文字信息还是二进制流数据)
2.每一个chunk都由三个字节的长度信息和相应的二进制流信息组成,接收方在接收到三个字节的长度信息后,继续使用相应大小的缓冲区接收后面的流数据
3.当接收到三个字节的000的时候表示数据接收完成,接收方将二进制流数据拼接起来即可
我们规定一个最大的分段长度,一旦发送的数据超过这个分段长度就需要进行分段发送。
发送的代码示例如下
    // 发送文件
    public void sendFile(int size) {
        new Thread(()->{
            try {
                // 表示发送文件
                outputStream.write("2".getBytes());
            } catch (IOException e) {
                e.printStackTrace();
            }
            for(int i=0; i<size/SocketUtil.MAX_CHUNK+1; i++) {
                StringBuffer sb = new StringBuffer();
                if (i!=size / SocketUtil.MAX_CHUNK) {
                    for (int j = 0; j < SocketUtil.MAX_CHUNK; j++) {
                        sb.append('a');
                    }
                }
                else if(i==size/SocketUtil.MAX_CHUNK && size%SocketUtil.MAX_CHUNK==0) {
                    break;
                }
                else {
                    for (int j = 0; j < size % SocketUtil.MAX_CHUNK; j++) {
                        sb.append('a');
                    }
                }
                try {
                    SocketUtil.sendInfo("[客户端]发送一个数据包,大小" + sb.toString().getBytes().length + "B");
                    // 发送chunk的长度
                    outputStream.write(SocketUtil.intToStr(sb.toString().getBytes().length).getBytes());
                    // 发送chunk块
                    outputStream.write(sb.toString().getBytes());
                } catch (IOException e) {
                    e.printStackTrace();
                }
            }
            // 最后发送000表示结束
            try {
                outputStream.write("000".getBytes());
            } catch (IOException e) {
                e.printStackTrace();
            }
        }).start();
    }
接收二进制流的代码示例如下
    // 读取二进制信息
    public static byte[] readBytes(InputStream inputStream, String log) {
        byte[] len = new byte[3];
        byte[] allbytes = new byte[10000];
        int idx = 0;
        try {
            inputStream.read(len);
            // 然后再根据读取的长度信息读取二进制流
            // 只要不是最后一个二进制流就继续读取
            while (SocketUtil.parseLen(len) != 0) {
                byte[] temp = new byte[SocketUtil.parseLen(len)];
                inputStream.read(temp);
                idx = SocketUtil.appendBytes(allbytes, temp, idx);
                String info = "[" + log + "]接收一个数据包,大小" + SocketUtil.parseLen(len) + "B";
                SocketUtil.sendInfo(info);
                inputStream.read(len);
            }
        } catch (IOException e) {
            e.printStackTrace();
        }
        return SocketUtil.getNewArr(allbytes, idx);
    }
其实我理解的所谓的通信协议,就是发送方和接收方都遵守的某种规则,按照这种规则发送和接收数据就可以保证数据的完整性。
完整的代码
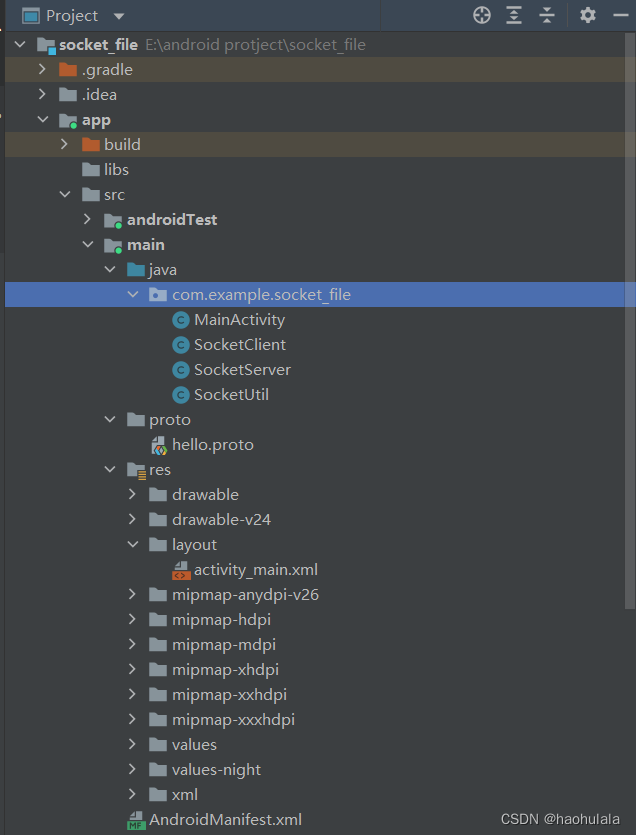
这段代码只有四个java文件,非常简单,只是一个极简的通信协议模型。

首先来看一下界面定义
<?xml version="1.0" encoding="utf-8"?>
<LinearLayout xmlns:android="http://schemas.android.com/apk/res/android"
    xmlns:tools="http://schemas.android.com/tools"
    android:layout_width="match_parent"
    android:layout_height="match_parent"
    android:orientation="vertical"
    tools:context=".MainActivity">
    <EditText
        android:id="@+id/text_file_size"
        android:layout_width="match_parent"
        android:layout_height="wrap_content"
        android:hint="请输入待发送文件大小"/>
    <Button
        android:id="@+id/button_send"
        android:layout_width="match_parent"
        android:layout_height="wrap_content"
        android:text="发送文件"/>
    <TextView
        android:layout_width="match_parent"
        android:layout_height="wrap_content"
        android:text="消息栏:"/>
    <TextView
        android:id="@+id/text_info"
        android:layout_width="match_parent"
        android:layout_height="match_parent"/>
</LinearLayout>
然后是MainActivity
public class MainActivity extends AppCompatActivity {
    private EditText text_file_size;
    private Button button_send;
    private TextView text_info;
    private BroadcastReceiver broadcastReceiver;
    private SocketClient socketClient;
    private SocketServer socketServer;
    @Override
    protected void onCreate(Bundle savedInstanceState) {
        super.onCreate(savedInstanceState);
        setContentView(R.layout.activity_main);
        SocketUtil.context = MainActivity.this;
        // 初始化控件
        initView();
        // 注册广播接收器
        register();
        socketServer = new SocketServer();
        socketClient = new SocketClient();
    }
    private void initView() {
        text_file_size = findViewById(R.id.text_file_size);
        button_send = findViewById(R.id.button_send);
        button_send.setOnClickListener(new View.OnClickListener() {
            @Override
            public void onClick(View v) {
                Integer size = Integer.parseInt(text_file_size.getText().toString());
                socketClient.sendFile(size);
            }
        });
        text_info = findViewById(R.id.text_info);
        text_info.setMovementMethod(new ScrollingMovementMethod());
    }
    private void register() {
        broadcastReceiver = new BroadcastReceiver() {
            @Override
            public void onReceive(Context context, Intent intent) {
                String info = intent.getStringExtra("info");
                text_info.append(info + "\n");
            }
        };
        IntentFilter filter = new IntentFilter("main.info");
        registerReceiver(broadcastReceiver, filter);
    }
}
我们将需要重复用到的一些代码都放到工具类中
public class SocketUtil {
    public static Context context;
    // 一次最多传输多少字节
    public static int MAX_CHUNK = 100;
    public static void sendInfo(String info) {
        Intent intent = new Intent("main.info");
        intent.putExtra("info", info);
        context.sendBroadcast(intent);
    }
    // 读取二进制信息
    public static byte[] readBytes(InputStream inputStream, String log) {
        byte[] len = new byte[3];
        byte[] allbytes = new byte[10000];
        int idx = 0;
        try {
            inputStream.read(len);
            // 然后再根据读取的长度信息读取二进制流
            // 只要不是最后一个二进制流就继续读取
            while (SocketUtil.parseLen(len) != 0) {
                byte[] temp = new byte[SocketUtil.parseLen(len)];
                inputStream.read(temp);
                idx = SocketUtil.appendBytes(allbytes, temp, idx);
                String info = "[" + log + "]接收一个数据包,大小" + SocketUtil.parseLen(len) + "B";
                SocketUtil.sendInfo(info);
                inputStream.read(len);
            }
        } catch (IOException e) {
            e.printStackTrace();
        }
        return SocketUtil.getNewArr(allbytes, idx);
    }
    // 将int转成String
    public static String intToStr(int len) {
        StringBuffer sb = new StringBuffer();
        if(len < 100) {
            sb.append("0");
        }
        else if (len < 10) {
            sb.append("00");
        }
        sb.append(Integer.toString(len));
        return sb.toString();
    }
    public static int parseLen(byte[] len) {
        return Integer.parseInt(new String(len, 0, len.length));
    }
    public static int appendBytes(byte[] arr1, byte[] arr2, int st) {
        for(int i=st; i<arr2.length; i++) {
            arr1[i] = arr2[i-st];
        }
        return arr2.length+st;
    }
    public static byte[] getNewArr(byte[] arr, int idx) {
        byte[] newarr = new byte[idx];
        for(int i=0; i<idx; i++) {
            newarr[i] = arr[i];
        }
        return newarr;
    }
}
最后是定义我们的客户端和服务端
public class SocketClient {
    private final String HOST = "localhost";
    private final int PORT = 50055;
    private Socket socket = null;
    private OutputStream outputStream = null;
    private InputStream inputStream = null;
    public SocketClient() {
        conn();
        while(socket == null) {}
        SocketUtil.sendInfo("服务端连接成功...");
        try {
            outputStream = socket.getOutputStream();
        } catch (IOException e) {
            e.printStackTrace();
        }
    }
    // 连接服务端
    private void conn() {
        new Thread(()->{
            try {
                socket = new Socket(HOST, PORT);
                inputStream = socket.getInputStream();
                while(true) {
                    // 接收服务端消息0
                    byte[] type = new byte[1];
                    inputStream.read(type);
                    if (new String(type, 0, 1).equals("1")) {
                        byte[] infobytes = SocketUtil.readBytes(inputStream, "客户端");
                        String info = "[客户端]接收消息:" + new String(infobytes, 0, infobytes.length);
                        SocketUtil.sendInfo(info);
                        SocketUtil.sendInfo("====================================");
                    }
                }
            } catch (IOException e) {
                e.printStackTrace();
            }
        }).start();
    }
    // 发送文件
    public void sendFile(int size) {
        new Thread(()->{
            try {
                // 表示发送文件
                outputStream.write("2".getBytes());
            } catch (IOException e) {
                e.printStackTrace();
            }
            for(int i=0; i<size/SocketUtil.MAX_CHUNK+1; i++) {
                StringBuffer sb = new StringBuffer();
                if (i!=size / SocketUtil.MAX_CHUNK) {
                    for (int j = 0; j < SocketUtil.MAX_CHUNK; j++) {
                        sb.append('a');
                    }
                }
                else if(i==size/SocketUtil.MAX_CHUNK && size%SocketUtil.MAX_CHUNK==0) {
                    break;
                }
                else {
                    for (int j = 0; j < size % SocketUtil.MAX_CHUNK; j++) {
                        sb.append('a');
                    }
                }
                try {
                    SocketUtil.sendInfo("[客户端]发送一个数据包,大小" + sb.toString().getBytes().length + "B");
                    // 发送chunk的长度
                    outputStream.write(SocketUtil.intToStr(sb.toString().getBytes().length).getBytes());
                    // 发送chunk块
                    outputStream.write(sb.toString().getBytes());
                } catch (IOException e) {
                    e.printStackTrace();
                }
            }
            // 最后发送000表示结束
            try {
                outputStream.write("000".getBytes());
            } catch (IOException e) {
                e.printStackTrace();
            }
        }).start();
    }
}
public class SocketServer {
private final int PORT = 50055;
private ServerSocket serverSocket = null;
public SocketServer() {
// 启动服务端监听
start();
while(serverSocket == null) {}
SocketUtil.sendInfo("服务端启动...");
}
// 启动服务端监听程序
private void start() {
new Thread(()->{
try {
serverSocket = new ServerSocket(PORT);
Socket socket = serverSocket.accept();
InputStream inputStream = socket.getInputStream();
OutputStream outputStream = socket.getOutputStream();
while(true) {
byte[] type = new byte[1];
inputStream.read(type);
String typeinfo = new String(type, 0, 1);
if(typeinfo.equals("2")) {
byte[] file = SocketUtil.readBytes(inputStream, "服务端");
String filetxt = new String(file, 0, file.length);
String info = "[服务端]接收完文件,大小" + file.length + "B" + "\n";
info = info + "[服务端]具体内容如下:" + "\n" + filetxt;
SocketUtil.sendInfo(info);
// 给客户端发送一个响应信息表示接收成功
String typetxt = "1";
outputStream.write(typetxt.getBytes());
String successinfo = "文件接收成功";
String lentxt = SocketUtil.intToStr(successinfo.getBytes().length);
outputStream.write(lentxt.getBytes());
outputStream.write(successinfo.getBytes());
outputStream.write("000".getBytes());
}
}
} catch (IOException e) {
e.printStackTrace();
}
}).start();
}
}上述代码中,服务端只负责接收二进制流,客户端只负责发送二进流,并且服务端在接收完二进制流数据后,会给服务端返回一个表示接收成功的文字信息。

结语
以上就是一个极简的自定义通信协议模型,这个协议非常简单,并且功能非常单一,可以根据上述的逻辑自定义通信协议以符合各种需求。
到此这篇关于Android使用socket进行二进制流数据传输的文章就介绍到这了,更多相关Android二进制流数据传输内容请搜索脚本之家以前的文章或继续浏览下面的相关文章希望大家以后多多支持脚本之家!
相关文章

react native打包apk文件安装好之后进入应用闪退的解决方案
这篇文章主要介绍了react native打包apk文件安装好之后进入应用闪退的解决方案,具有很好的参考价值,希望对大家有所帮助。如有错误或未考虑完全的地方,望不吝赐教2022-09-09
ViewPager+PagerAdapter实现带指示器的引导页
这篇文章主要为大家详细介绍了ViewPager+PagerAdapter实现带指示器的引导页,文中示例代码介绍的非常详细,具有一定的参考价值,感兴趣的小伙伴们可以参考一下2020-09-09
Android内容提供者ContentProvider用法实例分析
这篇文章主要介绍了Android内容提供者ContentProvider用法,结合实例形式较为详细的分析了内容提供者ContentProvider获取及解析数据的相关技巧,需要的朋友可以参考下2016-03-03


最新评论