Android自定义水波纹动画Layout实例代码
话不多说,我们先来看看效果:

Hi前辈搜索预览
这一张是《Hi前辈》的搜索预览图,你可以在这里下载这个APP查看更多效果:
http://www.wandoujia.com/apps/com.superlity.hiqianbei
LSearchView

这是一个MD风格的搜索框,集成了ripple动画以及search时的loading,使用很简单,如果你也需要这样的搜索控件不妨来试试:https://github.com/onlynight/LSearchView
RippleEverywhere
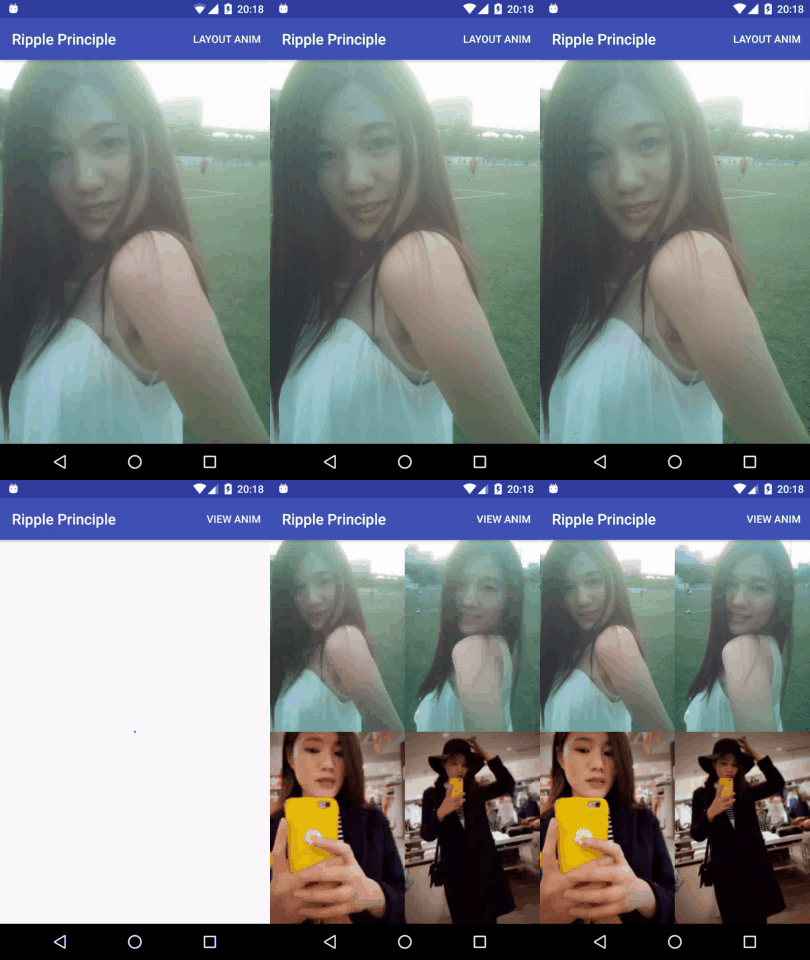
女友的照片:

女友的照片:

这是一个水波纹动画支持库,由于使用暂时只支持Android4.0以上版本。https://github.com/onlynight/RippleEverywhere
实现原理
使用属性动画完成该动画的实现,由于android2.3以下已经不是主流机型,故只兼容4.0以上系统。
关于属性动画,如果还有童鞋不了解可以去看看hongyang大神的这篇文章:
https://www.jb51.net/article/82668.htm
在我看来属性动画实际上就类似于定时器,所谓定时器就是独立在主线程之外的另外一个用于计时的线程,每当到达你设定时间的时候这个线程就会通知你;属性动画也不光是另外一个线程,他能够操作主线程UI元素属性就说明了它内部已经做了线程同步。
基本原理
我们先来看下关键代码:
@Override
protected void onDraw(Canvas canvas) {
if (running) {
// get canvas current state
final int state = canvas.save();
// add circle to path to crate ripple animation
// attention: you must reset the path first,
// otherwise the animation will run wrong way.
ripplePath.reset();
ripplePath.addCircle(centerX, centerY, radius, Path.Direction.CW);
canvas.clipPath(ripplePath);
// the {@link View#onDraw} method must be called before
// {@link Canvas#restoreToCount}, or the change will not appear.
super.onDraw(canvas);
canvas.restoreToCount(state);
return;
}
// in a normal condition, you should call the
// super.onDraw the draw the normal situation.
super.onDraw(canvas);
}
Canvas#save()和Canvas#restoreToCount()
这个两个方法用于绘制状态的保存与恢复。绘制之前先保存上一次的状态;绘制完成后恢复前一次的状态;以此类推直到running成为false,中间的这个过程就是动画的过程。
Path#addCircle()和Canvas#clipPath()
addCircle用于在path上绘制一个圈;clipPath绘制剪切后的path(只绘制path内的区域,其他区域不绘制)。
radiusAnimator = ObjectAnimator.ofFloat(this, "animValue", 0, 1);
/**
* This method will be called by {@link this#radiusAnimator}
* reflection calls.
*
* @param value animation current value
*/
public void setAnimValue(float value) {
this.radius = value * maxRadius;
System.out.println("radius = " + this.radius);
invalidate();
}
这一段是动画的动效关键,首先要有一个随着时间推移而变化的值,当每次这个值变化的时候我们需要跟新界面让view重新绘制调用onDraw方法,我们不能手动调用onDraw方法,系统给我们提供的invalidate会强制view重绘进而调用onDraw方法。
以上就是这个动画的全部关键原理了,下面我们来一份完整的源码:
import android.animation.Animator;
import android.animation.ObjectAnimator;
import android.annotation.TargetApi;
import android.content.Context;
import android.graphics.Canvas;
import android.graphics.Path;
import android.util.AttributeSet;
import android.view.View;
import android.view.animation.AccelerateDecelerateInterpolator;
import android.widget.ImageView;
/**
* Created by lion on 2016/11/11.
* <p>
* RippleImageView use the {@link Path#addCircle} function
* to draw the view when {@link RippleImageView#onDraw} called.
* <p>
* When you call {@link View#invalidate()} function,then the
* {@link View#onDraw(Canvas)} will be called. In that way you
* can use {@link Path#addCircle} to draw every frame, you will
* see the ripple animation.
*/
public class RippleImageView extends ImageView {
// view center x
private int centerX = 0;
// view center y
private int centerY = 0;
// ripple animation current radius
private float radius = 0;
// the max radius that ripple animation need
private float maxRadius = 0;
// record the ripple animation is running
private boolean running = false;
private ObjectAnimator radiusAnimator;
private Path ripplePath;
public RippleImageView(Context context) {
super(context);
init();
}
public RippleImageView(Context context, AttributeSet attrs) {
super(context, attrs);
init();
}
public RippleImageView(Context context, AttributeSet attrs, int defStyleAttr) {
super(context, attrs, defStyleAttr);
init();
}
@TargetApi(21)
public RippleImageView(Context context, AttributeSet attrs, int defStyleAttr, int defStyleRes) {
super(context, attrs, defStyleAttr, defStyleRes);
init();
}
private void init() {
ripplePath = new Path();
// initial the animator, when animValue change,
// radiusAnimator will call {@link this#setAnimValue} method.
radiusAnimator = ObjectAnimator.ofFloat(this, "animValue", 0, 1);
radiusAnimator.setDuration(1000);
radiusAnimator.setInterpolator(new AccelerateDecelerateInterpolator());
radiusAnimator.addListener(new Animator.AnimatorListener() {
@Override
public void onAnimationStart(Animator animator) {
running = true;
}
@Override
public void onAnimationEnd(Animator animator) {
running = false;
}
@Override
public void onAnimationCancel(Animator animator) {
}
@Override
public void onAnimationRepeat(Animator animator) {
}
});
}
@Override
protected void onLayout(boolean changed, int left, int top, int right, int bottom) {
super.onLayout(changed, left, top, right, bottom);
centerX = (right - left) / 2;
centerY = (bottom - top) / 2;
maxRadius = maxRadius(left, top, right, bottom);
}
/**
* Calculate the max ripple animation radius.
*
* @param left view left
* @param top view top
* @param right view right
* @param bottom view bottom
* @return
*/
private float maxRadius(int left, int top, int right, int bottom) {
return (float) Math.sqrt(Math.pow(right - left, 2) + Math.pow(bottom - top, 2) / 2);
}
/**
* This method will be called by {@link this#radiusAnimator}
* reflection calls.
*
* @param value animation current value
*/
public void setAnimValue(float value) {
this.radius = value * maxRadius;
System.out.println("radius = " + this.radius);
invalidate();
}
@Override
protected void onDraw(Canvas canvas) {
if (running) {
// get canvas current state
final int state = canvas.save();
// add circle to path to crate ripple animation
// attention: you must reset the path first,
// otherwise the animation will run wrong way.
ripplePath.reset();
ripplePath.addCircle(centerX, centerY, radius, Path.Direction.CW);
canvas.clipPath(ripplePath);
// the {@link View#onDraw} method must be called before
// {@link Canvas#restoreToCount}, or the change will not appear.
super.onDraw(canvas);
canvas.restoreToCount(state);
return;
}
// in a normal condition, you should call the
// super.onDraw the draw the normal situation.
super.onDraw(canvas);
}
/**
* call the {@link Animator#start()} function to start the animation.
*/
public void startAnimation() {
if (radiusAnimator.isRunning()) {
radiusAnimator.cancel();
}
radiusAnimator.start();
}
}
以上所述是小编给大家介绍的Android自定义水波纹动画Layout实例代码,希望对大家有所帮助,如果大家有任何疑问请给我留言,小编会及时回复大家的。在此也非常感谢大家对脚本之家网站的支持!
相关文章

Android开发之DialogFragment用法实例总结
这篇文章主要介绍了Android开发之DialogFragment用法,结合实例形式总结分析了Android使用DialogFragment代替Dialog功能的相关使用技巧与注意事项,需要的朋友可以参考下2017-11-11
史上最全Android build.gradle配置详解(小结)
这篇文章主要介绍了史上最全Android build.gradle配置详解(小结),小编觉得挺不错的,现在分享给大家,也给大家做个参考。一起跟随小编过来看看吧2019-04-04
Android实现第三方登录的上拉展开,下拉隐藏,下拉隐藏示例
本篇文章抽出了项目登录界面中实现的第三方登录,用户可以上拉展开,下拉隐藏第三方登录这么一个效果,提高用户和软件的交互性。有兴趣的可以了解一下。2017-01-01
android教程之textview解析带图片的html示例
本文介绍的示例适用于android中需要解析带图片的htlm数据,需要的朋友可以参考下2014-02-02


最新评论