使用css与js生成的唯美炫酷的图形树效果
发布时间:2018-02-09 16:12:30 作者:佚名  我要评论
我要评论
这篇文章给大家分享一个使用css与js生成的唯美炫酷的图形树效果,具体实例代码大家参考下本文
GPT4.0+Midjourney绘画+国内大模型 会员永久免费使用!
【 如果你想靠AI翻身,你先需要一个靠谱的工具! 】
效果图如下所示:

在线演示:Here~
给大家分享一个使用css与js生成的唯美炫酷的图形树效果,相关代码如下:
1 2 3 4 5 6 7 8 9 10 11 12 13 14 15 16 17 18 19 20 21 22 23 24 25 26 27 28 29 30 31 32 33 34 35 36 37 38 39 40 41 42 43 44 45 46 47 48 49 50 51 52 53 54 55 56 57 58 59 60 61 62 63 64 65 66 67 68 69 70 71 72 73 74 75 76 77 78 79 80 81 82 83 84 85 86 87 88 89 90 91 92 93 94 95 96 97 98 99 100 101 102 103 104 105 106 107 108 109 110 111 112 113 114 115 116 117 118 119 120 121 122 123 124 125 126 127 128 129 130 131 132 133 134 135 136 137 138 139 140 141 142 143 144 145 146 147 148 149 150 151 152 153 154 155 156 157 158 159 160 161 162 163 164 165 166 167 168 169 170 171 172 173 174 175 176 177 178 179 180 181 182 183 184 185 186 187 188 189 190 191 192 193 194 195 196 197 198 199 200 201 202 203 204 205 206 207 208 209 210 211 212 213 214 215 216 217 218 219 220 221 222 223 224 225 226 227 228 229 230 231 232 233 234 235 236 237 238 239 240 241 242 243 244 245 246 247 248 249 250 251 252 253 254 255 256 257 258 259 260 261 262 263 264 265 266 267 268 269 270 271 272 273 274 275 276 277 278 279 280 281 | <!doctype html><html lang="en"><head> <meta charset="UTF-8"> <title>cloth</title> <style> @import url(http://fonts.googleapis.com/css?family=Poiret+One);html { overflow: hidden; touch-action: none; content-zooming: none;}body { position: absolute; margin: 0; padding: 0; background: #000; width: 100%; height: 100%;}#canvas { width: 100%; height: 100%; background: #000; position: absolute;}#text { position: absolute; left: 0; top: 50%; width: 100%; pointer-events: none;}#text div { position: absolute; color: #888; left: 0; width: 100%; text-align: center; top: -12vmin; font-family: 'Poiret One', cursive; font-size: 6vmin;} </style></head><body> <canvas id="canvas"></canvas><div id="text"> <div id="clic" nowrap></div><script type="text/javascript" src="http://cdn.gbtags.com/jquery/1.11.1/jquery.min.js"></script> <script> ! function() { "use strict"; // variables var root = null; var hue = 0; var automove = true; var angleX = 0; var angleY = 0; ///////////////////////// var resolution = 1; var maxLevels = 6; var branchLength = 10 * resolution; var leafSize = 100; var growSpeed = 2; var maxAngle = 1.2; var freq = 0.3; ///////////////////////// // branch constructor function Branch(parent, level, hue, x, y) { this.parent = parent; this.b1 = null; this.b2 = null; this.b3 = null; this.hue = hue; this.p0 = parent ? parent.p1 : new Point(x, y, 0); this.p1 = new Point( x, y, parent === root ? 0 : ( parent ? parent.p1.z + ( level ? Math.random() * 10 - 5 : 0 ) : 0 ) ); this.level = level; this.life = 0; this.angle = 0; this.vx = 0; this.vy = 0; } // grow branch Branch.prototype.grow = function() { // z move this.p1.z--; // 3D projection this.p1.project(); // recursively grow children branches this.b1 && this.b1.grow(); this.b2 && this.b2.grow(); // grow if (this.life-- > 1) { this.p1.x += this.vx; this.p1.y += this.vy; } // done - push more children branches if (this.life === 1 && this.level > 0) { this.b1 = newBranch(this); if (Math.random() <= freq) this.b2 = newBranch(this); this.life--; } // cut the tree if (this.p0.z <= -250) { this.parent = null; } // draw the branch var width = resolution * (this.level === 1 ? 1 : ((this.level + 1) * (this.level + 1)) * 0.5 * this.p1.scale ); var color = 100 - Math.abs(this.p0.z * 0.5); ctx.beginPath(); if (this.level) { ctx.lineWidth = width; ctx.strokeStyle = "hsl(" + (this.hue % 360) + ", 14%," + color + "%)"; ctx.moveTo(this.p0.xp, this.p0.yp); ctx.lineTo(this.p1.xp, this.p1.yp); ctx.stroke(); } else { ctx.globalCompositeOperation = "lighter"; var c = ((this.hue + 180) % 360); ctx.fillStyle = "hsl(" + c + ", 100%, 70%)"; ctx.arc(this.p1.xp, this.p1.yp, width * leafSize * 0.1, 0, Math.PI * 2); ctx.fill(); ctx.beginPath(); ctx.fillStyle = "hsl(" + c + ", 60%, 6%)"; ctx.arc(this.p1.xp, this.p1.yp, width * leafSize, 0, Math.PI * 2); ctx.fill(); ctx.globalCompositeOperation = "source-over"; } } // 3D point constructor function Point(x, y, z) { this.x = x; this.y = y; this.z = z; this.scale = 0; this.xp = 0; this.yp = 0; } // 3D point projection Point.prototype.project = function() { this.scale = 265 / (265 + this.z); this.xp = canvas.centerX + (this.x - canvas.centerX) * this.scale; this.yp = canvas.centerY + (this.y - canvas.centerY) * this.scale; } // new branch factory function newBranch(parent) { var branch = new Branch(parent, parent.level - 1, hue, parent.p1.x, parent.p1.y); branch.angle = Math.atan2( parent.p1.y - parent.p0.y, parent.p1.x - parent.p0.x ) + (branch.level ? (Math.random() * maxAngle - (maxAngle * 0.5)) : 0 ); branch.vx = Math.cos(branch.angle) * growSpeed; branch.vy = Math.sin(branch.angle) * growSpeed; branch.life = branch.level ? Math.round(Math.random() * branch.level * branchLength) + 1 : 2; return branch; } // animate the tree function tree() { // clear screen ctx.fillStyle = '#000'; ctx.fillRect(0, 0, canvas.width, canvas.height); // pointer trail if (pointer.moveDistance > 10 * resolution) { pointer.moveDistance = 0; // main trunk var branch = new Branch( root, root.level, hue, root.p1.x, root.p1.y ); // add another branch if (Math.random() <= freq) root.b1 = newBranch(root); // new root root = branch; root.p1.x = pointer.x; root.p1.y = pointer.y; } // increment color hue++; // traverse the tree var trunk = root; while (trunk) { trunk.grow(); trunk = trunk.parent; } } // prepare the canvas var canvas = { elem: document.getElementById('canvas'), resize: function() { this.width = this.elem.width = this.elem.offsetWidth * resolution; this.height = this.elem.height = this.elem.offsetHeight * resolution; this.centerX = this.width * 0.5; this.centerY = this.height * 0.5; } } var ctx = canvas.elem.getContext("2d"); window.addEventListener('resize', canvas.resize.bind(canvas), false); canvas.resize(); // pointer events var pointer = { x: 0, y: 0, px: 0, py: 0, moveDistance: 0, move: function(e) { e.preventDefault(); var pointer = e.targetTouches ? e.targetTouches[0] : e; // stop automove if (automove) { automove = false; document.getElementById("clic").innerHTML = ""; } this.x = pointer.clientX * resolution; this.y = pointer.clientY * resolution; this.distance(); // render tree requestAnimationFrame(tree); }, distance: function() { var dx = this.x - this.px; var dy = this.y - this.py; this.moveDistance += Math.sqrt(dx * dx + dy * dy); // speed limit if (!automove && this.moveDistance > 40) { this.x = this.px + dx * 0.1; this.y = this.py + dy * 0.1; } this.px = this.x; this.py = this.y; } } window.addEventListener("mousemove", pointer.move.bind(pointer), false); canvas.elem.addEventListener("touchmove", pointer.move.bind(pointer), false); // auto start ! function auto() { automove && requestAnimationFrame(auto); // lissajou pointer.x = canvas.centerX + canvas.centerX * Math.cos(angleX += 0.02) * 0.20; pointer.y = canvas.centerY + canvas.centerY * Math.sin(angleY += 0.04) * 0.25; pointer.distance(); // create the first branch if (!root) { root = new Branch(false, maxLevels, hue, pointer.x, pointer.y); root.p0 = root.p1; root.p0.project(); } // render tree tree(); }();}(); </script></body></html> |
总结
以上所述是小编给大家介绍的使用css与js生成的唯美炫酷的图形树效果,希望对大家有所帮助,如果大家有任何疑问请给我留言,小编会及时回复大家的。在此也非常感谢大家对脚本之家网站的支持!
相关文章
如何使用CSS的object-position实现图片在img标签中的定位
该文章介绍了CSS中的object-position属性,用于精确控制替换元素在容器内的位置,通过指定水平和垂直方向的偏移量,可以实现精准定位2024-11-08- 文章主要探讨了CSS Grid布局在Internet Explorer(IE)中的不兼容问题,并提供了具体的解决方案和最佳实践,文章首先介绍了CSS Grid布局的基本概念和与传统布局方法的区别,然2024-11-08
 本文介绍了CSS实现圆角渐变边框的方法,首先设置元素边框为1像素宽度,样式为实线,颜色为透明,然后设置元素边框圆角为10像素,再设置背景剪裁区域和背景绘制区域为内边距和边2024-10-29
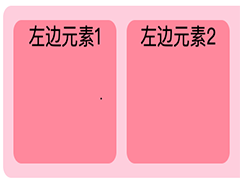 在CSS布局中,实现元素左右排列有多种方式,Flex布局通过设置margin-left:auto或margin-right:auto实现元素靠右或靠左排列,Grid布局利用grid-template-columns和justify-self2024-10-29
- 在CSS中,隐藏滚动条同时保留滚动功能可以通过设置overflow属性和使用特定的CSS伪元素实现,例如,使用::-webkit-scrollbar针对WebKit浏览器,-ms-overflow-style适用于IE和Edg2024-10-29
- 本文详细介绍了CSS中的border属性及其相关特性,包括border-width(宽度)、border-style(样式)和border-color(颜色)等,此外,还讲述了如何独立控制元素的四个边的边框,2024-10-28
- 本文主要介绍了在网页开发中如何实现“回到顶部”的功能,通过HTML和CSS的编写,可以实现一个浮动在页面右下角的小图标,点击后即可回到页面顶部,这种设计可以提高网站的可用2024-10-28
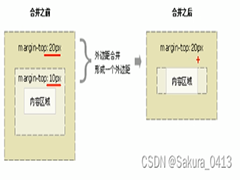 盒子模型是网页布局的基础,包括边框、外边距、内边距和实际内容,通过CSS可以控制盒子之间的距离及其外观,如边框样式、边框颜色等,重要属性包括padding和margin,分别控制内2024-10-18
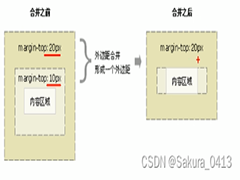 盒子模型是网页布局的基础,包括边框、外边距、内边距和实际内容,通过CSS可以控制盒子之间的距离及其外观,如边框样式、边框颜色等,重要属性包括padding和margin,分别控制内2024-10-18
CSS使用filter和backdrop-filter实现高斯模糊效果(示例代码)
本文详细介绍了CSS3中的两个实现高斯模糊效果的API:filter和backdrop-filter,filter可以直接在图像或背景图上添加多种效果,而backdrop-filter则用于在元素后的区域添加效2024-09-26





最新评论