思科Cisco路由器配置——单臂路由实现VLAN间通信实验详解
发布时间:2020-02-23 14:51:26 作者:Stalk  我要评论
我要评论
这篇文章主要介绍了思科Cisco路由器配置单臂路由实现VLAN间通信实验,总结分析了基于单臂路由实现VLAN间通信的具体步骤、操作命令及相关注意事项,需要的朋友可以参考下
本文实例讲述了思科Cisco单臂路由实现VLAN间通信实验。分享给大家供大家参考,具体如下:
一、实验目的:用路由器使同和不同vlan可以通信
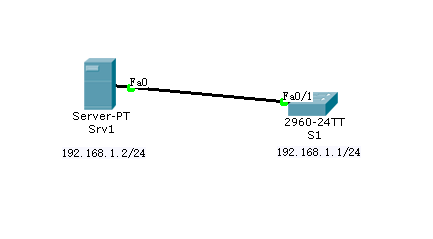
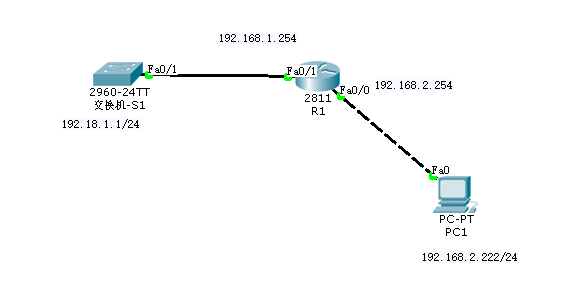
二、拓扑图如下:

三、具体步骤:
(1)R1路由器配置:
Router>en  --进入特权模式
Router#conf t  --进入全局配置模式
Enter configuration commands, one per line. End with CNTL/Z.
Router(config)#hostname R1  --修改路由器名为R1
R1(config)#interface f0/0  --进入端口
R1(config-if)#no shutdown  --开启端口

R1(config-if)#interface f0/0.1  --进入子端口
R1(config-subif)#encapsulation dot1q 10
R1(config-subif)#ip address 192.168.1.254 255.255.255.0  --给子端口设置ip地址
R1(config-subif)#interface f0/0.2  --进入子端口
R1(config-subif)#encapsulation dot1q 20  --封装端口
R1(config-subif)#ip address 192.168.2.254 255.255.255.0  --给子端口设置ip地址
R1(config-subif)#interface f0/0.3  --进入子端口
R1(config-subif)#encapsulation dot1q 30  --封装端口
R1(config-subif)#ip address 192.168.3.254 255.255.255.0  --给子端口设置ip地址
R1(config-subif)#interface f0/0.4  --进入子端口
R1(config-subif)#encapsulation dot1q 40  --封装端口
R1(config-subif)#ip address 192.168.4.254 255.255.255.0  --给子端口设置ip地址
R1(config-subif)#end  --返回特权模式
R1#copy running-config startup-config  --保存配置

[OK]  --保存成功
(2)S1交换机配置
Switch>en  --进入全局配置模式
Switch#conf t  --进入全局配置模式
Enter configuration commands, one per line. End with CNTL/Z.
Switch(config)#hostname S1  --修改交换机名为S1
S1(config)#vtp domain abc  --创建vtp域
Domain name already set to abc.
S1(config)#vtp mode server  设置当前交换机在vtp中为server模式
Device mode already VTP SERVER.
S1(config)#vlan 10  --创建vlan 10
S1(config-vlan)#vlan 20  --创建vlan 20
S1(config-vlan)#vlan 30  --创建vlan 30
S1(config-vlan)#vlan 40  --创建vlan 40
S1(config-vlan)#interface range f0/1-4  --进入f0/1,f0/2,f0/3,f0/4端口
S1(config-if-range)#switchport mode trunk  --设置f0/1-f0/4之间所有端口为trunk模式

S1(config-if-range)#interface range f0/10-11  --进入f0/10和f0/11端口
S1(config-if-range)#switchport mode access  --设置f0/10,f0/11端口为access模式
S1(config-if-range)#switchport access vlan 40  --将f0/10,f0/11端口划入vlan 40
S1(config-if-range)#end  --返回特权模式
S1#copy running-config startup-config  --保存配置

[OK]  --保存成功
(3)S2交换机配置
Switch>en  --进入特权模式
Switch#conf t  --进入全局配置模式
Enter configuration commands, one per line. End with CNTL/Z.
Switch(config)#hostname S2  --修改交换机名为S2
S2(config)#vtp mode client  --设置当前交换机在vtp中为客户模式
Device mode already VTP CLIENT.
S2(config)#interface f0/1  --进入f0/1端口
S2(config-if)#switchport mode access  --设置f0/1端口为access模式
S2(config-if)#switchport access vlan 10  --将f0/1端口划入vlan 10
S2(config-if)#interface f0/2  --进入f0/2端口
S2(config-if)#switchport mode access  --设置f0/2端口为access模式
S2(config-if)#switchport access vlan 20  --将f0/2划入vlan2
S2(config-if)#interface f0/3  --进入f0/3端口
S2(config-if)#switchport mode access  --设置f0/3端口为access模式
S2(config-if)#switchport access vlan 30  --将f0/3端口划入vlan 30
S2(config-if)#interface f0/4  --进入f0/4端口
S2(config-if)#switchport mode trunk  --设置f0/4端口为trunk模式

S2(config-if)#end  --返回特权模式
S2#copy running-config startup-config  --保存配置

[OK]  --保存成功
(4)S3交换机配置
Switch>en  --进入特权模式
Switch#conf t  --进入全局配置模式
Enter configuration commands, one per line. End with CNTL/Z.
Switch(config)#hostname S3  --修改交换机名为S3
S3(config)#vtp mode client  --设置当前交换机在vtp中为客户模式
Device mode already VTP CLIENT.
S3(config)#interface f0/1  --进入f0/1端口
S3(config-if)#switchport mode access  --设置f0/1端口为access模式
S3(config-if)#switchport access vlan 10  --将f0/1端口划入vlan 10
S3(config-if)#interface f0/2  --进入f0/2端口
S3(config-if)#switchport mode access  --设置f0/2端口为access模式
S3(config-if)#switchport access vlan 20  --将f0/2端口划入vlan 20
S3(config-if)#interface f0/3  --进入f0/3端口

S3(config-if)#switchport mode access  --设置f0/3端口为access模式
S3(config-if)#switchport access vlan 30  --将f0/3端口划入vlan 30
S3(config-if)#interface f0/4  --进入f0/4端口
S3(config-if)#switchport mode  trunk  --设置f0/4端口为trunk模式

S3(config-if)#end  --返回特权模式
S3#copy running-config startup-config  --保存配置

[OK]  --保存成功
(5)S4交换机配置
Switch>en  --进入特权模式
Switch#conf t  --进入全局配置模式
Enter configuration commands, one per line. End with CNTL/Z.
Switch(config)#hostname S4  --修改交换机名为S4
S4(config)#vtp mode client  --设置当前交换机在VTP中为客户模式
Device mode already VTP CLIENT.
S4(config)#interface f0/1  --进入f0/1端口
S4(config-if)#switchport mode access  --设置f0/1端口为access模式
S4(config-if)#switchport access vlan 10  --将f0/1划分到vlan 10
S4(config-if)#interface f0/2  --进入f0/2端口
S4(config-if)#switchport mode access  --设置f0/2端口为access模式
S4(config-if)#switchport access vlan 20  --将f0/2划分到vlan  20
S4(config-if)#interface f0/3  --进入f0/3端口
S4(config-if)#switchport mode access  --设置f0/3端口为access模式
S4(config-if)#switchport access vlan 30  --将f0/3划分到vlan 30
S4(config-if)#interface f0/4  --进入f0/4端口
S4(config-if)#switchport mode trunk  --将f0/4端口设置为trunk模式

S4(config-if)#end  --返回特权模式
S4#copy running-config startup-config  --保存配置

[OK]  --保存成功
四、验证不同vlan是否能通讯
(1)PC11与PC22

vlan 10和vlan 20可以通信
(2)PC33与WEB

vlan 30 与vlan 40 可以通信
相关文章

思科Cisco路由器与交换机配置——配置文件和系统映像备份与恢复实验案
这篇文章主要介绍了思科Cisco交换机配置文件和系统映像备份与恢复实验,结合具体案例形式详细分析了思科Cisco交换机备份配置文件和系统映像到TFTP服务器,以及恢复备份的相关2020-02-18
思科Cisco路由器与交换机配置——交换机默认网关实现跨网段telnet案例
这篇文章主要介绍了思科Cisco交换机默认网关实现跨网段telnet,结合具体案例形式分析了思科Cisco交换机跨网段telnet配置的具体实现步骤与相关操作命令,需要的朋友可以参考下2020-02-14CCNA认证考试学习笔记之思科(Cisco)路由器常用命令总结
这篇文章主要介绍了CCNA认证考试学习笔记之思科(Cisco)路由器常用命令,整理总结了CCNA认证考试思科Cisco路由器配置、设置、静态路由、动态路由、访问控制列表等常用命令及2020-02-02- 这篇文章主要介绍了恢复Cisco 思科路由器口令详细介绍的相关资料,需要的朋友可以参考下2016-12-05
- IP欺骗技术就是伪造某台主机的IP 地址的技术。通过IP地址的伪装使得某台主机能够伪装另外的一台主机,而这台主机往往具有某种特权或者被另外的主机所信任,那么怎样利用思2014-09-26
- 这篇文章主要为大家介绍了怎么设置思科路由器IS-IS,很多熟悉思科路由器的朋友都知道sisi,但是对于新手来说,就不知道思科路由器设置IS-IS该怎么处理了,以下是思科路由器2014-09-24
思科Cisco路由器access-list访问控制列表命令详解
CISCO路由器中的access-list(访问列表)最基本的有两种,分别是标准访问列表和扩展访问列表,二者的区别主要是前者是基于目标地址的数据包过滤,而后者是基于目标地址、源2013-01-25- 路由器已经是一个网必不可少的设备之一,在运行的过程中出现故障是在所难免的,所有的故障总的来说分为硬件故障和软件故障,本篇以思科路由器为大家介绍如果路由器出现硬件2012-10-08

最新思科路由器交换机模拟软件 Cisco packet tracer v5.3 中文汉化正式
这是Cisco 思科公司发布的一个辅助学习工具Packet Tracer,为学习CCNA课程的网络初学者去设计、配置、排除网络故障提供了网络模拟环境2012-05-30- 本文主要介绍了思科路由器的基本的配置,不需要太复杂。2012-05-11


最新评论