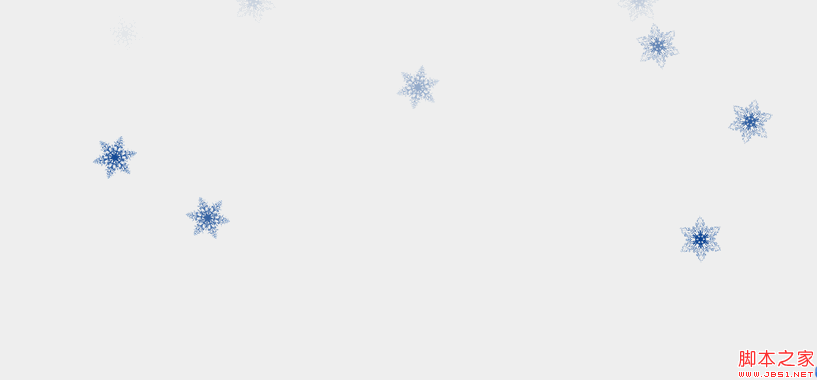
CSS3中利用animation属性创建雪花飘落特效
发布时间:2014-05-14 10:55:36 作者:佚名  我要评论
我要评论
在CSS3中我们可以使用animation属性来创建复杂的动画效果,本文就要借助它实现雪花飘落特效,功能代码如下,希望对大家学习css3有所帮助
先介绍一下CSS3中的animation的特性吧。
在CSS3中我们可以使用animation属性来创建复杂的动画效果,包括移动,旋转,缩放,倾斜(后几个请参考css3中的transform,scale等属性)等。而这一切,只需要我们创建关键帧(@keyframes),然后将自己想要实现的动作添加进去就可以实现。
比如:
@keyframes bgchange{
from {background:red;}
to {background:yellow}
}
div:hover{
animation:bgchange 5s;
}
当鼠标悬停在<div>时,该<div>的背景颜色会在五秒之内从红色变为黄色。
注意:使用animation和@keyframes时不同浏览器需要加上不同的前缀名!
下面代码实现雪花飘落功能:
<!DOCTYPE HTML>
<html>
<head>
<meta charset="UTF-8" />
<title>snowing snow</title>
<style>
body{
background: #eee;
}
@keyframes mysnow{
0%{
bottom:100%;
opacity:0;
}
50%{
opacity:1;
transform: rotate(1080deg);
}
100%{
transform: rotate(0deg);
opacity: 0;
bottom:0;
}
}
@-webkit-keyframes mysnow{
0%{
bottom:100%;
opacity:0;
}
50%{
opacity:1;
-webkit-transform: rotate(1080deg);
}
100%{
-webkit-transform: rotate(0deg);
opacity: 0;
bottom:0;
}
}
@-moz-keyframes mysnow{
0%{
bottom:100%;
opacity:0;
}
50%{
opacity:1;
-moz-transform: rotate(1080deg);
}
100%{
-moz-transform: rotate(0deg);
opacity: 0;
bottom:0;
}
}
@-ms-keyframes mysnow{
0%{
bottom:100%;
opacity:0;
}
50%{
opacity:1;
-ms-transform: rotate(1080deg);
}
100%{
-ms-transform: rotate(0deg);
opacity: 0;
bottom:0;
}
}
@-o-keyframes mysnow{
0%{
bottom:100%;
opacity:0;
}
50%{
opacity:1;
-o-transform: rotate(1080deg);
}
100%{
-o-transform: rotate(0deg);
opacity: 0;
bottom:0;
}
}
.roll{
position:absolute;
opacity:0;
animation: mysnow 5s ;
-webkit-animation: mysnow 5s ;
-moz-animation: mysnow 5s ;
-ms-animation: mysnow 5s ;
-o-animation: mysnow 5s ;
height:80px;
}
.div{
position:fixed;
}
</style>
</head>
<body>
<div id="snowzone" >
</div>
</body>
<script>
(function(){
function snow(left,height,src){
var div = document.createElement("div");
var img = document.createElement("img");
div.appendChild(img);
img.className = "roll";
img.src = src;
div.style.left=left+"px";
div.style.height=height+"px";
div.className="div";
document.getElementById("snowzone").appendChild(div);
setTimeout(function(){
document.getElementById("snowzone").removeChild(div);
// console.log(window.innerHeight);
},5000);
}
setInterval(function(){
var left = Math.random()*window.innerWidth;
var height = Math.random()*window.innerHeight;
var src = "s"+Math.floor(Math.random()*2+1)+".png";//两张图片分别为"s1.png"、"s2.png"
snow(left,height,src);
},500);
})();
</script>
</html>
两张雪花图片:

最终效果:

在CSS3中我们可以使用animation属性来创建复杂的动画效果,包括移动,旋转,缩放,倾斜(后几个请参考css3中的transform,scale等属性)等。而这一切,只需要我们创建关键帧(@keyframes),然后将自己想要实现的动作添加进去就可以实现。
比如:
复制代码
代码如下:@keyframes bgchange{
from {background:red;}
to {background:yellow}
}
div:hover{
animation:bgchange 5s;
}
当鼠标悬停在<div>时,该<div>的背景颜色会在五秒之内从红色变为黄色。
注意:使用animation和@keyframes时不同浏览器需要加上不同的前缀名!
下面代码实现雪花飘落功能:
复制代码
代码如下:<!DOCTYPE HTML>
<html>
<head>
<meta charset="UTF-8" />
<title>snowing snow</title>
<style>
body{
background: #eee;
}
@keyframes mysnow{
0%{
bottom:100%;
opacity:0;
}
50%{
opacity:1;
transform: rotate(1080deg);
}
100%{
transform: rotate(0deg);
opacity: 0;
bottom:0;
}
}
@-webkit-keyframes mysnow{
0%{
bottom:100%;
opacity:0;
}
50%{
opacity:1;
-webkit-transform: rotate(1080deg);
}
100%{
-webkit-transform: rotate(0deg);
opacity: 0;
bottom:0;
}
}
@-moz-keyframes mysnow{
0%{
bottom:100%;
opacity:0;
}
50%{
opacity:1;
-moz-transform: rotate(1080deg);
}
100%{
-moz-transform: rotate(0deg);
opacity: 0;
bottom:0;
}
}
@-ms-keyframes mysnow{
0%{
bottom:100%;
opacity:0;
}
50%{
opacity:1;
-ms-transform: rotate(1080deg);
}
100%{
-ms-transform: rotate(0deg);
opacity: 0;
bottom:0;
}
}
@-o-keyframes mysnow{
0%{
bottom:100%;
opacity:0;
}
50%{
opacity:1;
-o-transform: rotate(1080deg);
}
100%{
-o-transform: rotate(0deg);
opacity: 0;
bottom:0;
}
}
.roll{
position:absolute;
opacity:0;
animation: mysnow 5s ;
-webkit-animation: mysnow 5s ;
-moz-animation: mysnow 5s ;
-ms-animation: mysnow 5s ;
-o-animation: mysnow 5s ;
height:80px;
}
.div{
position:fixed;
}
</style>
</head>
<body>
<div id="snowzone" >
</div>
</body>
<script>
(function(){
function snow(left,height,src){
var div = document.createElement("div");
var img = document.createElement("img");
div.appendChild(img);
img.className = "roll";
img.src = src;
div.style.left=left+"px";
div.style.height=height+"px";
div.className="div";
document.getElementById("snowzone").appendChild(div);
setTimeout(function(){
document.getElementById("snowzone").removeChild(div);
// console.log(window.innerHeight);
},5000);
}
setInterval(function(){
var left = Math.random()*window.innerWidth;
var height = Math.random()*window.innerHeight;
var src = "s"+Math.floor(Math.random()*2+1)+".png";//两张图片分别为"s1.png"、"s2.png"
snow(left,height,src);
},500);
})();
</script>
</html>
两张雪花图片:

最终效果:

相关文章
 这篇文章主要介绍了css3的动画特效之动画序列(animation) 的相关资料,小编觉得挺不错的,现在分享给大家,也给大家做个参考。一起跟随小编过来看看吧2017-12-22
CSS3与动画有关的属性transition、animation、transform对比(史上最全
这篇文章主要介绍了CSS3与动画有关的属性transition、animation、transform对比,通过浏览器兼容性,用法和对比更深刻的展示了彼此之间的异同,具体操作步骤大家可查看下文2017-08-18- 这篇文章主要为大家详细介绍了CSS3 animation实现简易幻灯片轮播特效,具有一定的参考价值,感兴趣的小伙伴们可以参考一下2016-09-27
CSS3中动画属性transform、transition和animation属性的区别
最近在项目中用到了CSS3中的动画属性。无奈对于css3几个新加的属性不太熟悉,常常容易搞混。所以从网站研究了点资料,总结一下,方便有需要的朋友们可以参考学习。2016-09-25- 这篇文章主要为大家详细介绍了CSS3中Animation动画属性用法,教大家如何使用animation动画,感兴趣的小伙伴们可以参考一下2016-07-04
- 这篇文章主要介绍了CSS3 animation实现逐帧动画效果,具有一定的参考价值,感兴趣的小伙伴们可以参考一下2016-06-02
CSS3中的Transition过度与Animation动画属性使用要点
这篇文章主要介绍了CSS3中的Transition过度与Animation动画属性使用要点Transition和Animation能被用来制作基本的页面图片动态效果,当然进一步的控制还是需要JavaScript的2016-05-20- 这篇文章主要介绍了利用css3-animation实现逐帧动画效果的相关资料,感兴趣的小伙伴们可以参考一下2016-03-10
- 这篇文章主要介绍了CSS3中Animation属性的使用详解,是CSS3入门学习中的基础知识,需要的朋友可以参考下2015-08-06
CSS3的transition和animation的用法实例介绍
transition用于设定一个元素的两个状态,不同的状态可以用伪类,下面与大家分享下CSS3的transition和animation的用法,需要的朋友可以参考下2014-08-20


最新评论