CSS3关于z-index不生效问题的解决
发布时间:2020-02-19 16:31:31 作者:QinXiao.Shou  我要评论
我要评论
这篇文章主要介绍了CSS3关于z-index不生效问题的解决,文中通过示例代码介绍的非常详细,对大家的学习或者工作具有一定的参考学习价值,需要的朋友们下面随着小编来一起学习学习吧
GPT4.0+Midjourney绘画+国内大模型 会员永久免费使用!
【 如果你想靠AI翻身,你先需要一个靠谱的工具! 】
最近写CSS3和js结合,遇到了很多次z-index不生效的情况:
1.在用z-index的时候,该元素没有定位(static定位除外)
2.在有定位的情况下,该元素的z-index没有生效,是因为该元素的子元素后来居上,盖住了该元素,解决方式:将盖住该元素的子元素的z-index设置为负数
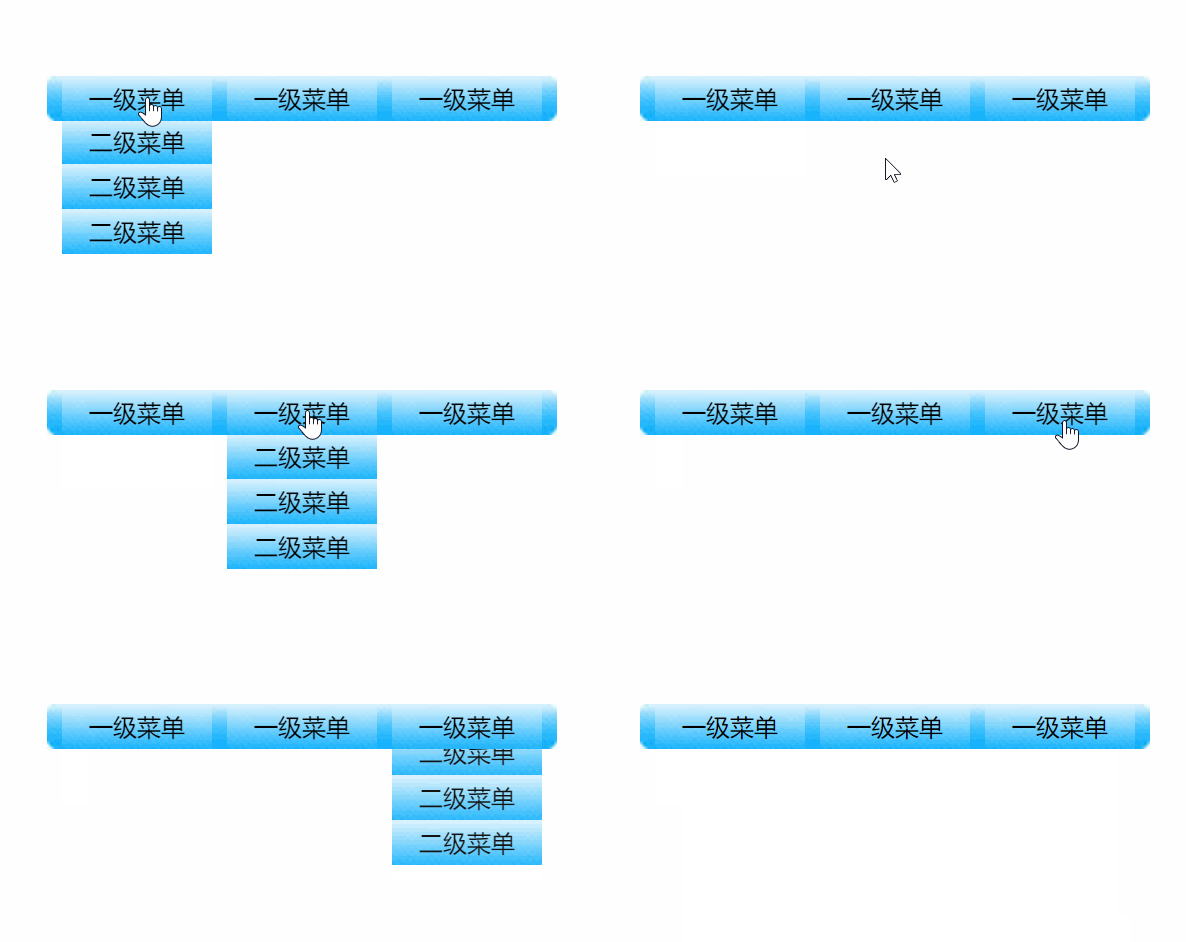
下拉框例子:
1.盖住的时候:

2.将下拉框的z-index设置为负数

代码:
1 2 3 4 5 6 7 8 9 10 11 12 13 14 15 16 17 18 19 20 21 22 23 24 25 26 27 28 29 30 31 32 33 34 35 36 37 38 39 40 41 42 43 44 45 46 47 48 49 50 51 52 53 54 55 56 57 58 59 60 61 62 63 64 65 66 67 68 69 70 71 72 73 74 75 76 77 78 79 80 81 82 83 84 85 86 87 88 89 90 91 92 93 94 95 96 97 98 99 100 101 102 103 104 105 106 107 108 109 110 111 112 113 114 115 116 117 118 119 120 121 122 123 124 125 126 127 | <!DOCTYPE HTML PUBLIC "-//W3C//DTD HTML 4.01 Transitional//EN" "http://www.w3.org/TR/html4/loose.dtd"><html><head><meta http-equiv="Content-Type" content="text/html; charset=utf-8"><title>无标题文档</title><style type="text/css">* { padding: 0; margin: 0; list-style: none;}.all { width: 330px; height: 120px; overflow: hidden; background: url(img/bg.jpg) no-repeat; margin: 100px auto; line-height: 30px; text-align: center; padding-left: 10px; margin-bottom: 0;}.all ul { position: relative; height: 30px; width: 100%;}.all ul li { width: 100px; height: 30px; background: url(img/libg.jpg); float: left; margin-right: 10px; position: relative; cursor: pointer;}.all ul ul { position: absolute; left: 0; top:-90px; /*display: none; 是一瞬间的事*/ transition: all 1s; opacity: 0; /*后来的盒子会盖住前面的盒子,就算前面的盒子z-index再大也会被盖住, 不过可以设置后来的盒子的z-index为负数就行了*/ z-index:-1;}.all ul .lvTow { top:-90px; opacity: 0;}.all ul .show{ top:30px; opacity: 1;}</style></head><body><div class="all" id="list"> <ul> <li>一级菜单 <ul > <li>二级菜单</li> <li>二级菜单</li> <li>二级菜单</li> </ul> </li> <li>一级菜单 <ul > <li>二级菜单</li> <li>二级菜单</li> <li>二级菜单</li> </ul> </li> <li>一级菜单 <ul > <li>二级菜单</li> <li>二级菜单</li> <li>二级菜单</li> </ul> </li> </ul></div></body></html><script> // 获取对象 遍历对象操作 显示模块 隐藏模块 function List(id) { // 获取对象 this.id = document.getElementById(id); // 取 id 值 this.lis = this.id.children[0].children; // 获取一级菜单所有的li } // init 初始化 List.prototype.init = function() { // 遍历所有的li 显示和隐藏 var that = this; for(var i=0;i<this.lis.length;i++) { this.lis[i].index = i; this.lis[i].onmouseover = function() { that.show(this.children[0]); // 显示出来 } this.lis[i].onmouseout = function() { that.hide(this.children[0]); // 隐藏起来 } } } // 显示模块 List.prototype.show = function(obj) {// obj.style.display = "block"; obj.className = "show"; } // 隐藏模块 List.prototype.hide = function(obj) {// obj.style.display = "none"; obj.className = "lvTow"; } var list = new List("list"); // 实例化了一个对象 叫 list list.init();</script> |
以上就是本文的全部内容,希望对大家的学习有所帮助,也希望大家多多支持脚本之家。
相关文章
css之Display、Visibility、Opacity、rgba和z-index: -1的区别
这篇文章主要介绍了css之Display、Visibility 和 Opacity 的区别,方便我们后期根据需要选择,需要的朋友可以参考下2020-11-07 这篇文章主要介绍了解决CSS中子元素z-index与父元素兄弟节点的层级问题,本文通过实例代码给大家介绍的非常详细,对大家的学习或工作具有一定的参考借鉴价值,需要的朋友可2020-06-17
 这篇文章主要介绍了css 层叠与z-index的示例代码,文中通过示例代码介绍的非常详细,对大家的学习或者工作具有一定的参考学习价值,需要的朋友们下面随着小编来一起学习学2020-03-23
- 这篇文章主要介绍了z-index为负值的元素无法点击到的解决方法,需要的朋友可以参考下2016-10-27
- 这篇文章主要介绍CSS z-index 层级关系优先级的概念,讲解的比较详细,需要的朋友可以参考下。2016-06-06
- 这篇文章主要介绍了css z-index层重叠顺序使用介绍,需要的朋友可以参考下2014-11-04

css中z-index: 0和z-index: auto的区别
本文主要介绍了css中z-index: 0和z-index: auto的区别,文中通过示例代码介绍的非常详细,具有一定的参考价值,感兴趣的小伙伴们可以参考一下2021-08-11


最新评论